In this tutorial I'm going to show you how to create a Trix Editor Component in Laravel Livewire.
Trix Editor is an amazing rich text editor for adding beautifully formatted text to your application. Livewire is an amazing framework that makes building responsive applications fun!
Combining these two technologies, we can create a magical user experience ✨, and we can easily create a component that we can re-use in any of our TallStack applications.
Ok, let's begin.
🆕 Create a new Laravel application
I like to start most of my tutorials off at the very beginning, this way we can walk through the whole process together. With that said, let's create a new Laravel application, using the Laravel installer command:
laravel new trix
This will create a new folder inside of the current location with a new Laravel application installed. Now, I'm using Laravel Valet, so after running this command, I can now visit trix.test inside my browser to view my new Laravel application.

Great! Now, that we have our application created we need to install Laravel livewire in our application.
📦 Install Laravel Livewire
Installing Livewire is very simple, we can run the following command to install Livewire via composer:
composer require livewire/livewire
After that we are going to open up our resources/views/welcome.blade.php and inside this file we are going to replace the contents with the following:
<!DOCTYPE html>
<html lang="{{ str_replace('_', '-', app()->getLocale()) }}">
    <head>
        <meta charset="utf-8">
        <meta name="viewport" content="width=device-width, initial-scale=1">

        <title>Trix Editor Component</title>
        <link rel="stylesheet" href="https://cdnjs.cloudflare.com/ajax/libs/tailwindcss/2.2.7/tailwind.min.css" />
        @livewireStyles

    </head>
    <body>
        <h1>Let's do this!</h1>

        @livewireScripts
    </body>
</html>
What we have done is included a TailwindCSS CDN link and the Laravel livewire styles @livewireStyles and scripts @livewireScripts to our page.
Livewire is now installed and we can move on to the next step of creating a new component for our Trix Editor.
🧩 Creating our Component
Now we can create our Livewire component with the following command:
php artisan make:livewire trix
After running that command two new files will be created. Our Component Controller at app/Http/Livewire/Trix.php, and our Component View at resources/views/livewire/trix.blade.php.
Inside of our resources/views/livewire/trix.blade.php is where we are going to add our Trix editor. Let's do that in the next step.
✍️ Including the Trix Editor
The simplest way to include the Trix files will be to use the CDN links. Depending on your use-case you may want to switch those out with the actual distribution links, but the CDN's will work for this use-case.
Inside of our resources/view/livewire/trix.blade.php file we are going to add the following contents:
<div>
    <link rel="stylesheet" href="https://cdnjs.cloudflare.com/ajax/libs/trix/1.3.1/trix.min.css" />

    <trix-editor></trix-editor>

    <script src="https://cdnjs.cloudflare.com/ajax/libs/trix/1.3.1/trix.min.js"></script>
</div>
Next, we can add our Livewire component to our resources/views/welcome.blade.php body contents:
<body>
    <h1>Let's do this!</h1>

    @livewire('trix')

    @livewireScripts
</body>
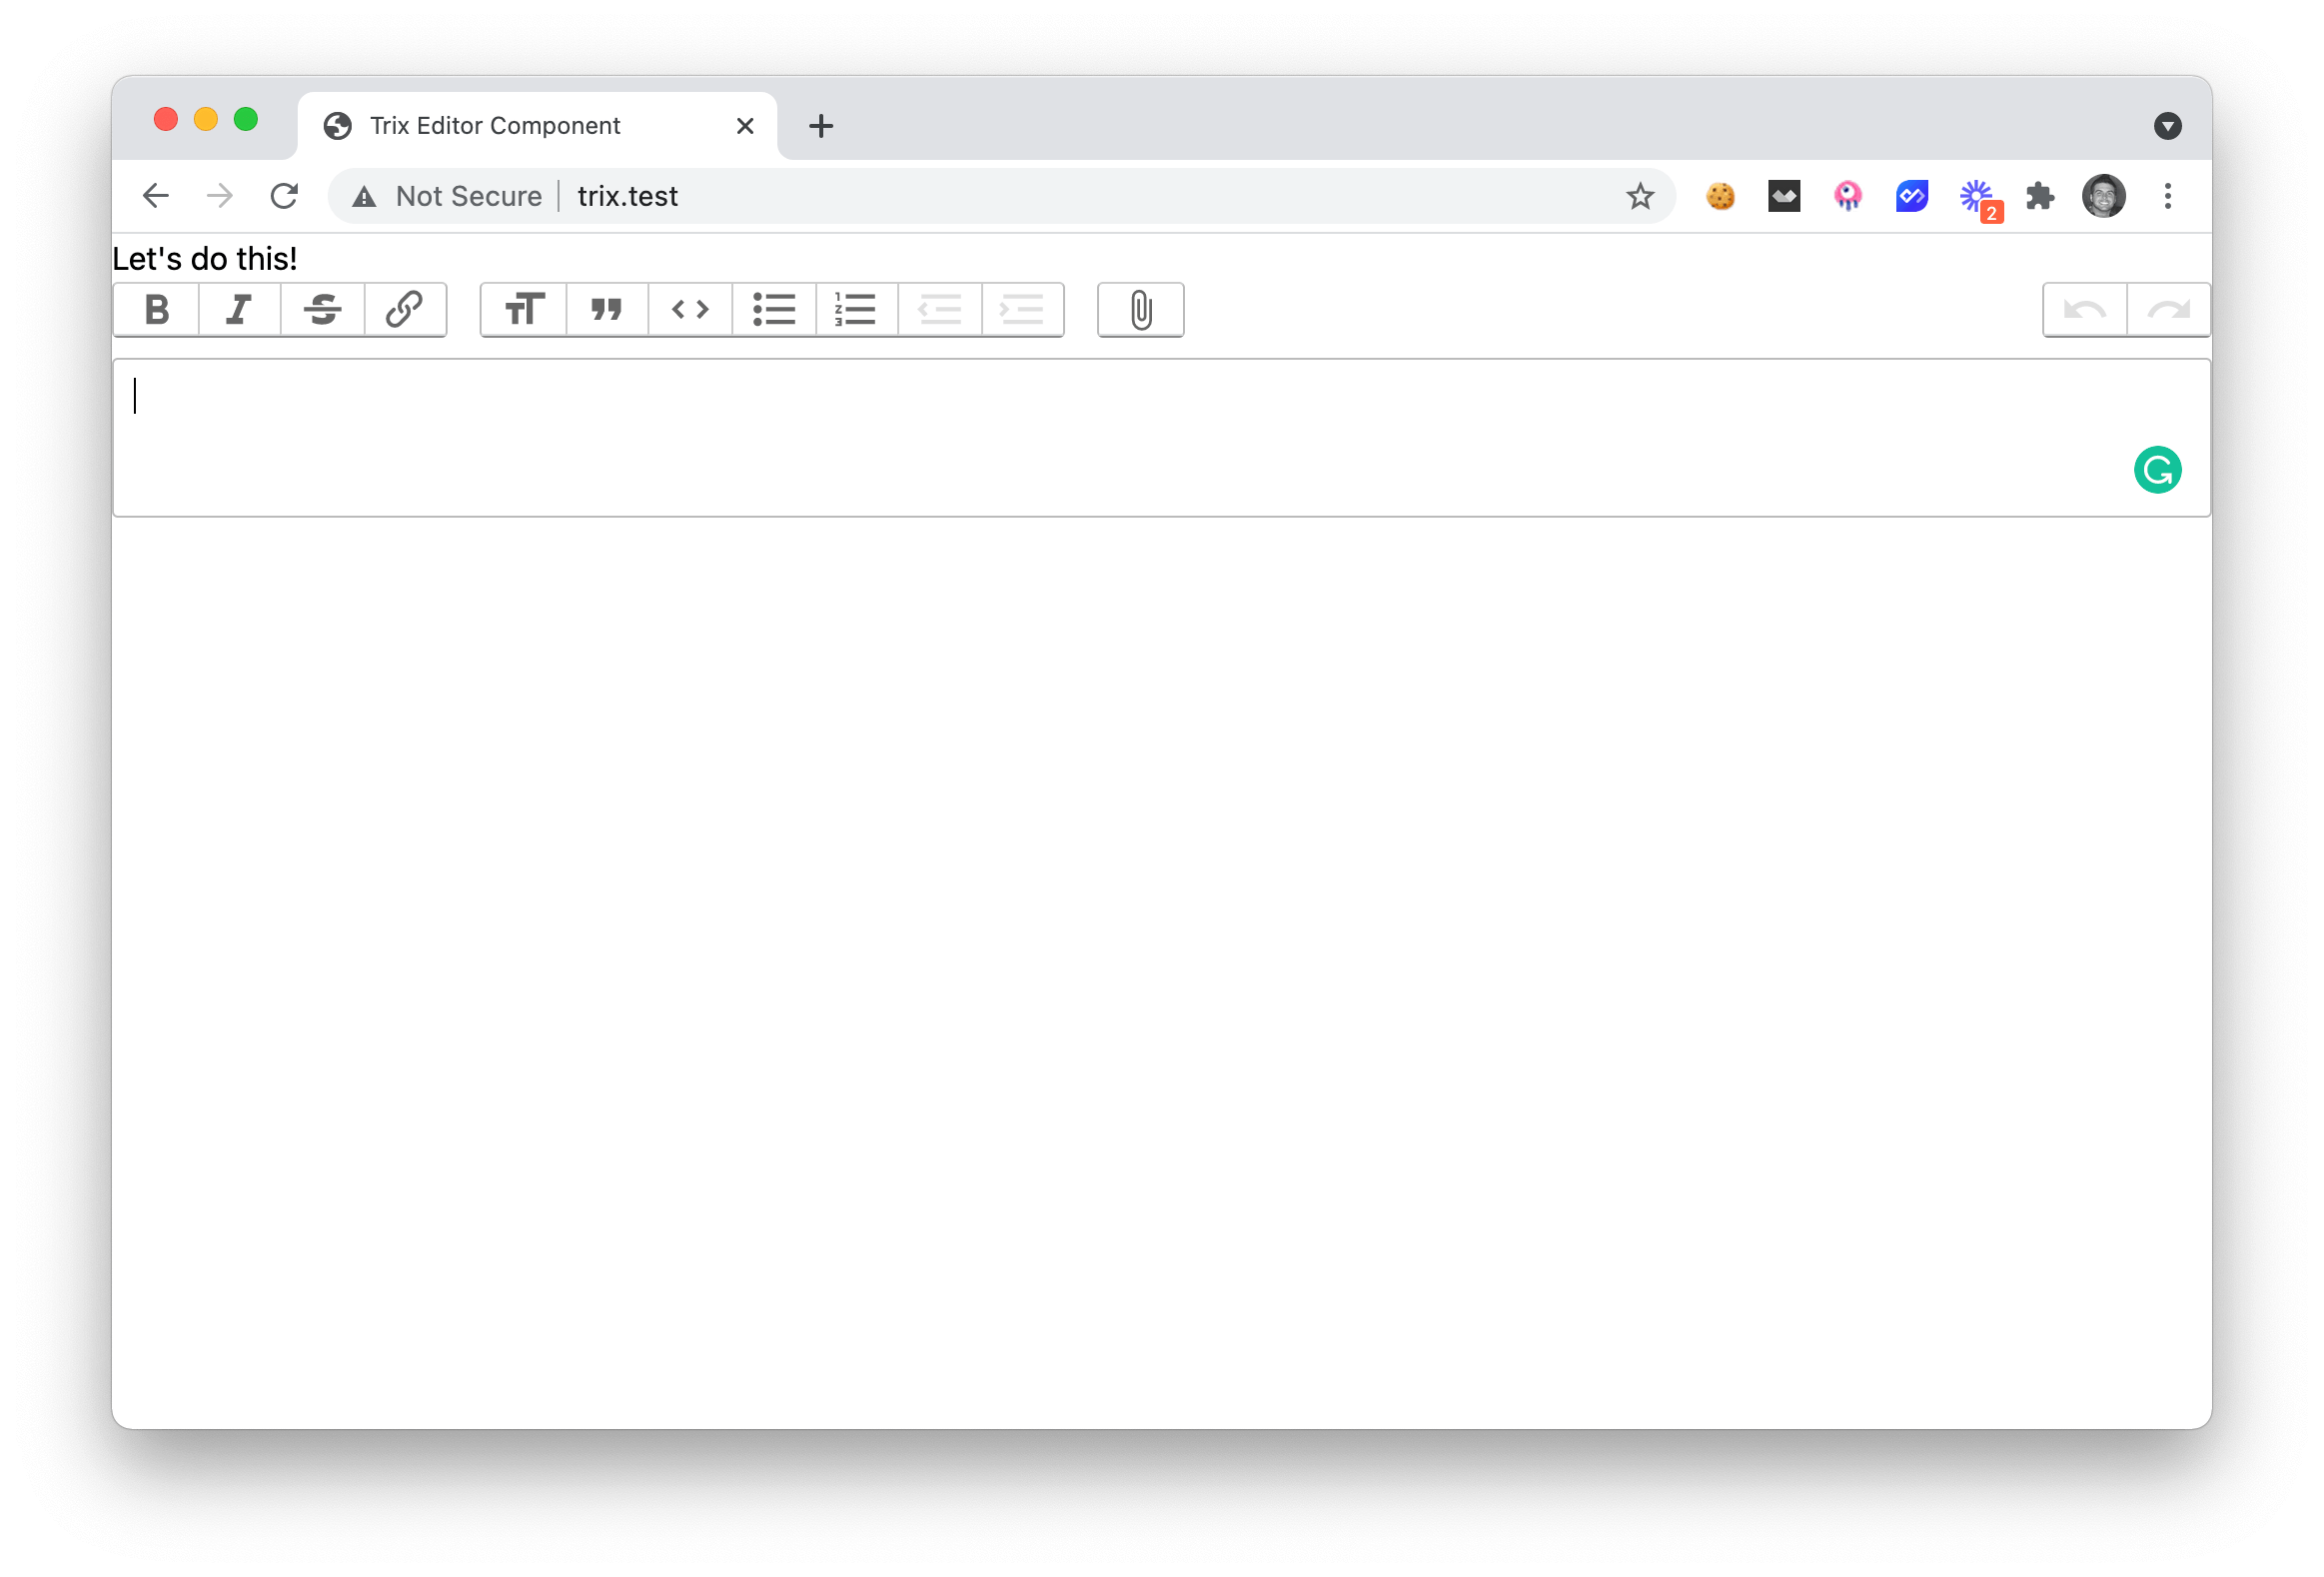
And, if we view our page, we'll see that we now have a Trix Editor on the page 🙌.
Now, we may need to do some style changes and we need to add some functionality to allow the trix editor values to be sent to the Livewire Controller.
➕ Populating the Editor with a Value
The first thing we'll want to do is to populate our Trix editor with a value. This may be the case if you are editing a comment or an article that already has content inside of the trix editor.
Inside our Livewire Controller located at app\Http\Livewire\Trix.php, we'll want to start off by adding the following code:
<?php

namespace App\Http\Livewire;

use Livewire\Component;

class Trix extends Component
{

    public $value;
    public $trixId;

    public function mount($value = ''){
        $this->value = $value;
        $this->trixId = 'trix-' . uniqid();
    }

    public function render()
    {
        return view('livewire.trix');
    }
}
Above you can see that we are setting a $value inside the mount() method. This means we can pass a optional value to our component like so:
@livewire('trix', ['value' => 'Awesome <strong>Sauce</strong>'])
In order to populate our value inside of the Trix editor, the documentation says that we need to add a hidden input, which references an id in the editor, like so:
<form …>
  <input id="x" value="Editor content goes here" type="hidden" name="content">
  <trix-editor input="x"></trix-editor>
</form>
This means that we will need to add. the following code to our Component View resources/views/livewire/trix.blade.php:
<div>
    <link rel="stylesheet" href="https://cdnjs.cloudflare.com/ajax/libs/trix/1.3.1/trix.min.css" />

    <input id="{{ $trixId }}" type="hidden" name="content" value="{{ $value }}">
    <trix-editor input="{{ $trixId }}"></trix-editor>

    <script src="https://cdnjs.cloudflare.com/ajax/libs/trix/1.3.1/trix.min.js"></script>
</div>
As you'll note above, we have created a generic $trixId, this is in case we want to have multiple trix editors on the same page 😉.
💾 Saving the Value
Now, one of the better ways to save data that's being added to the editor is to submit an Ajax post to the server when the editor has been blured.
We can easily do that by adding the following functionality to our Component View:
<script>
    var trixEditor = document.getElementById("{{ $trixId }}")

    addEventListener("trix-blur", function(event) {
        @this.set('value', trixEditor.getAttribute('value'))
    })
</script>
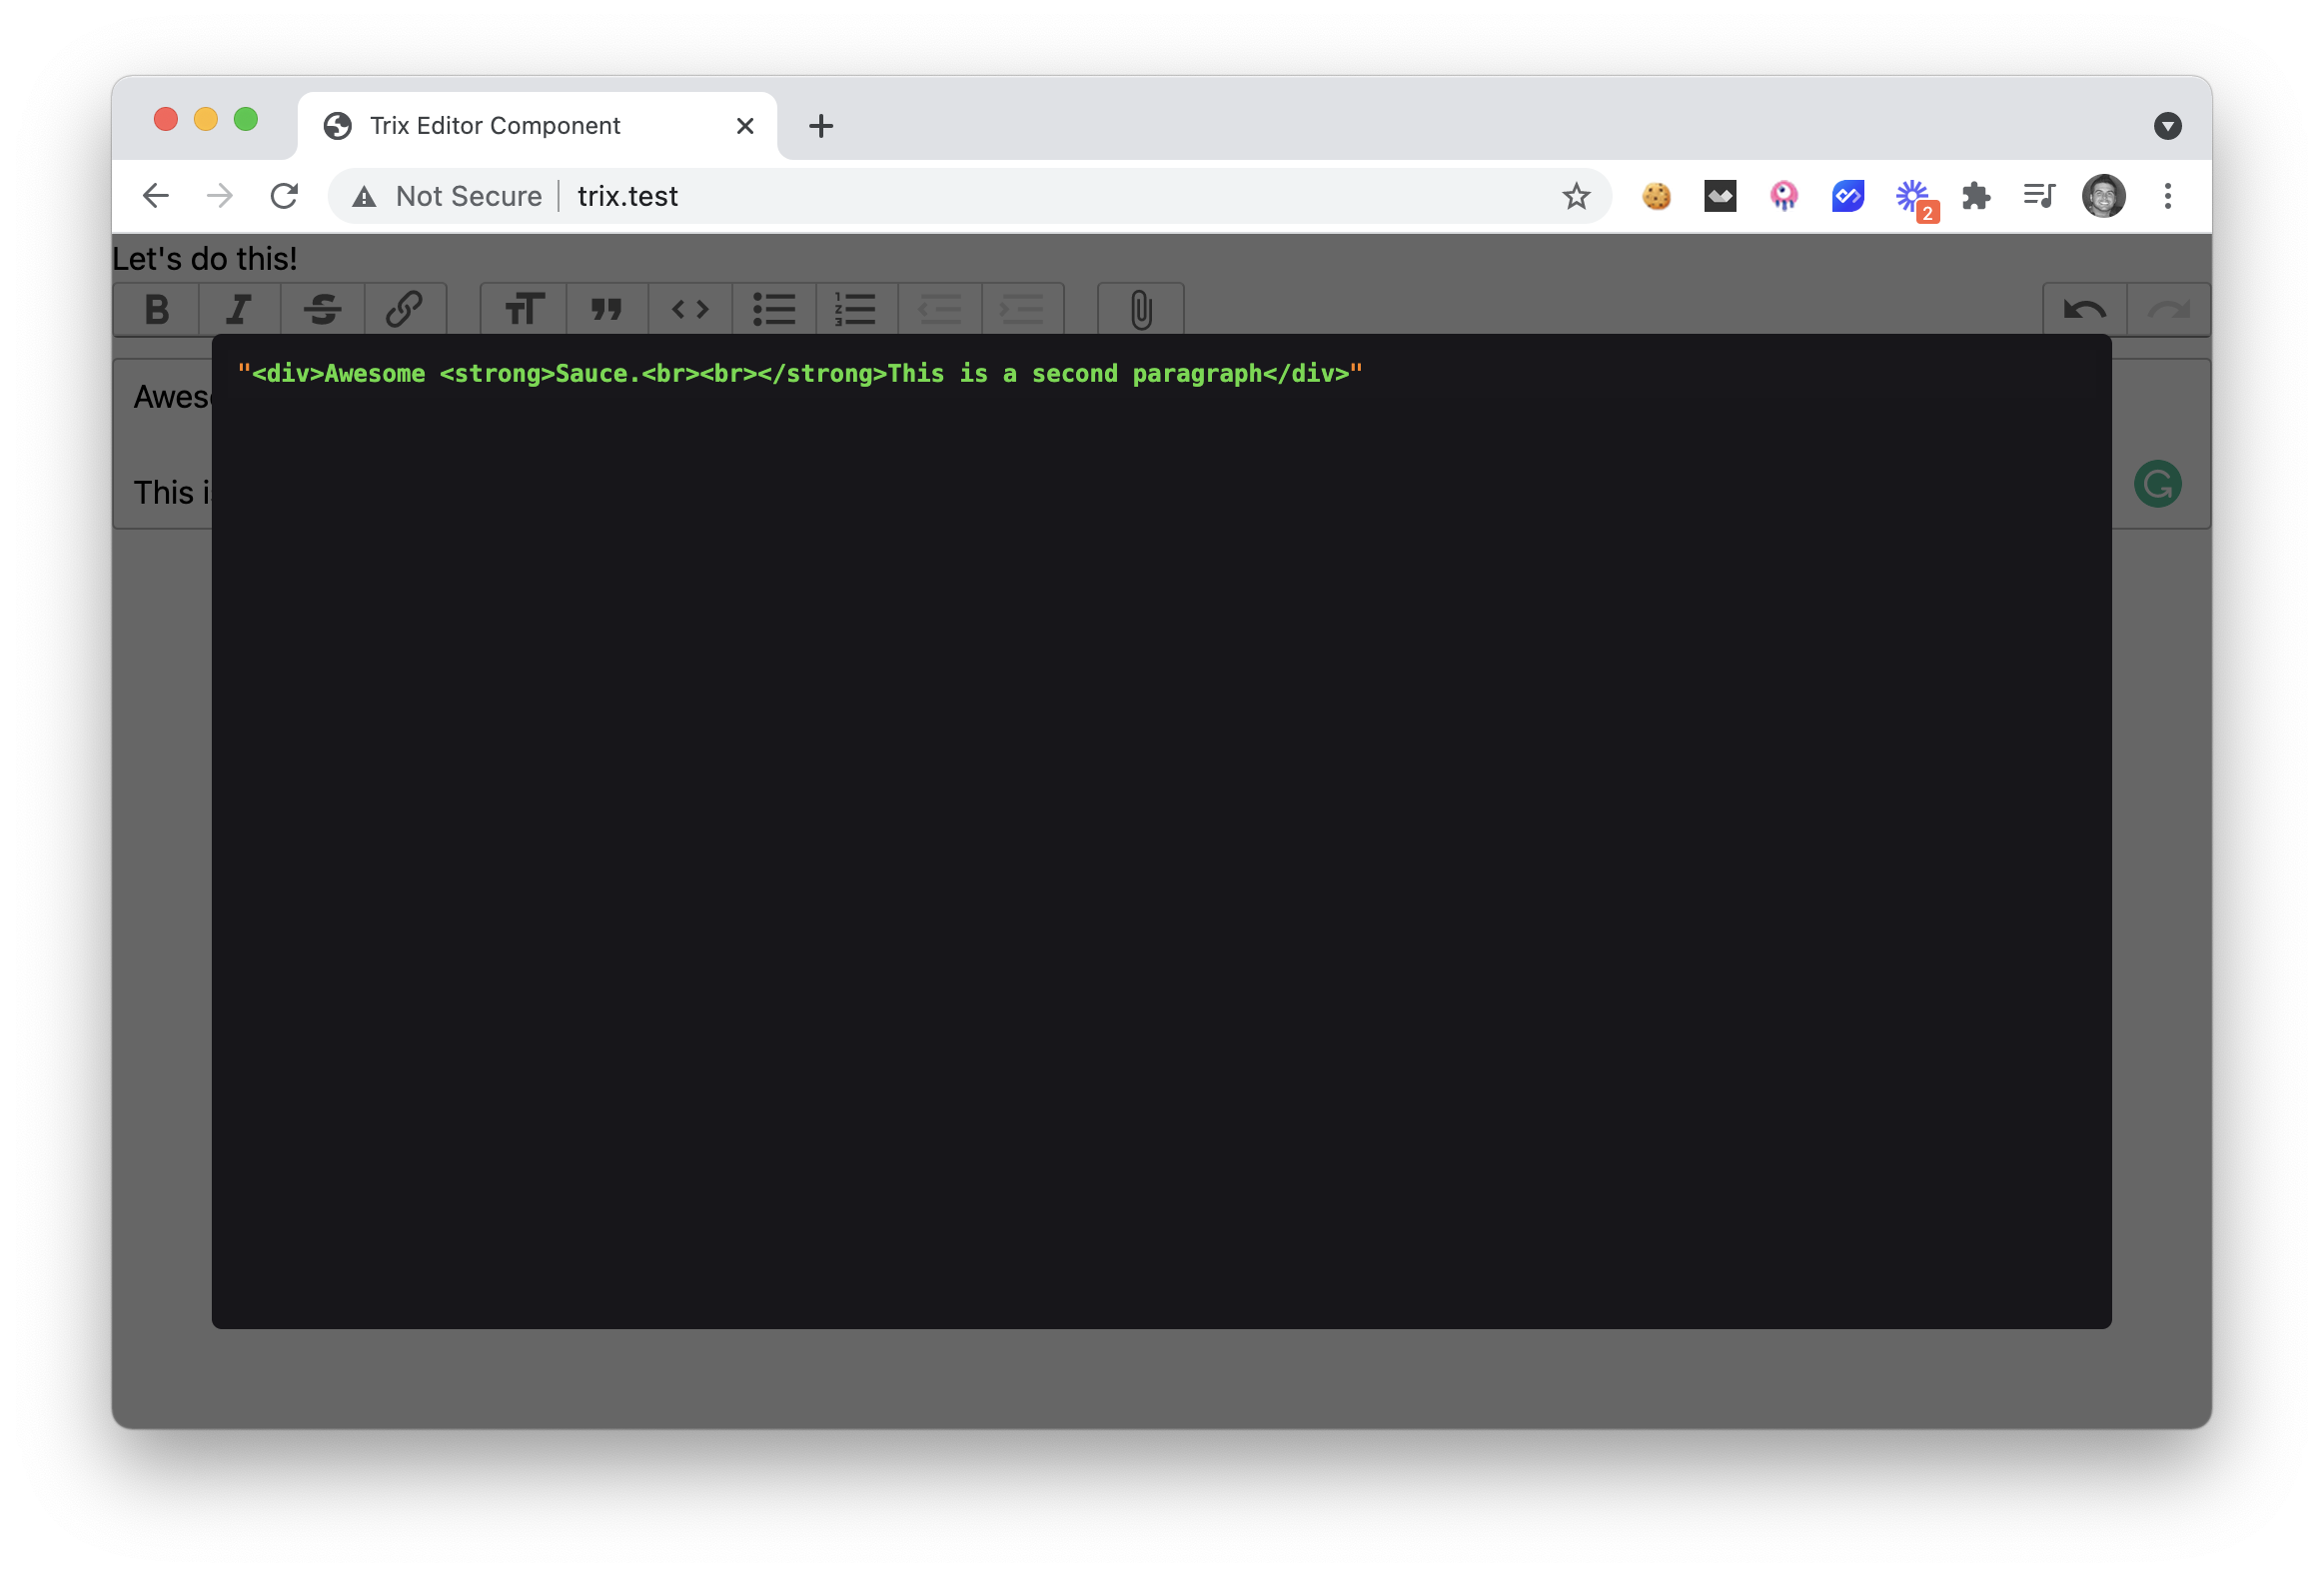
This code is going to save to the $value, inside our Component Controller when the editor is blurred. We can verify this functionality by adding a lifecycle hook to our Component Controller.
public function updatedValue($value){
    dd($value);
}
This will get fired whenever we blur the focus from our editor and we will see the contents of $value displayed on the screen.
This is great! We are now saving the value everytime the editor is blurred.
Before we wrap up this tutorial, there are a few things that you will need to be aware of. The trix-editor will need to have a wire:ignore attribute; otherwise the value will be restored to the original value passed to the component.
Let me make this a bit more clear by creating a new Post Component and adding our Trix Component to that new component.
🛠 Using the Trix Component
The easiest way to show you how to use this new Trix component is to give you an example of using it in the real world. The best way to do this is to create a new Post component. Let's create that component now:
php artisan make:livewire post
We'll now have another two files that were created in our project. Our post Component Controller app/Http/Livewire/Post.php and our post Component View resources/views/livewire/post.blade.php.
Go ahead and add the following code to your post Component:
<?php
namespace App\Http\Livewire;
use Livewire\Component;
use App\Http\Livewire\Trix;
class Post extends Component
{
public $title;
public $body;
public $listeners = [
Trix::EVENT_VALUE_UPDATED // trix_value_updated()
];
public function trix_value_updated($value){
$this->body = $value;
}
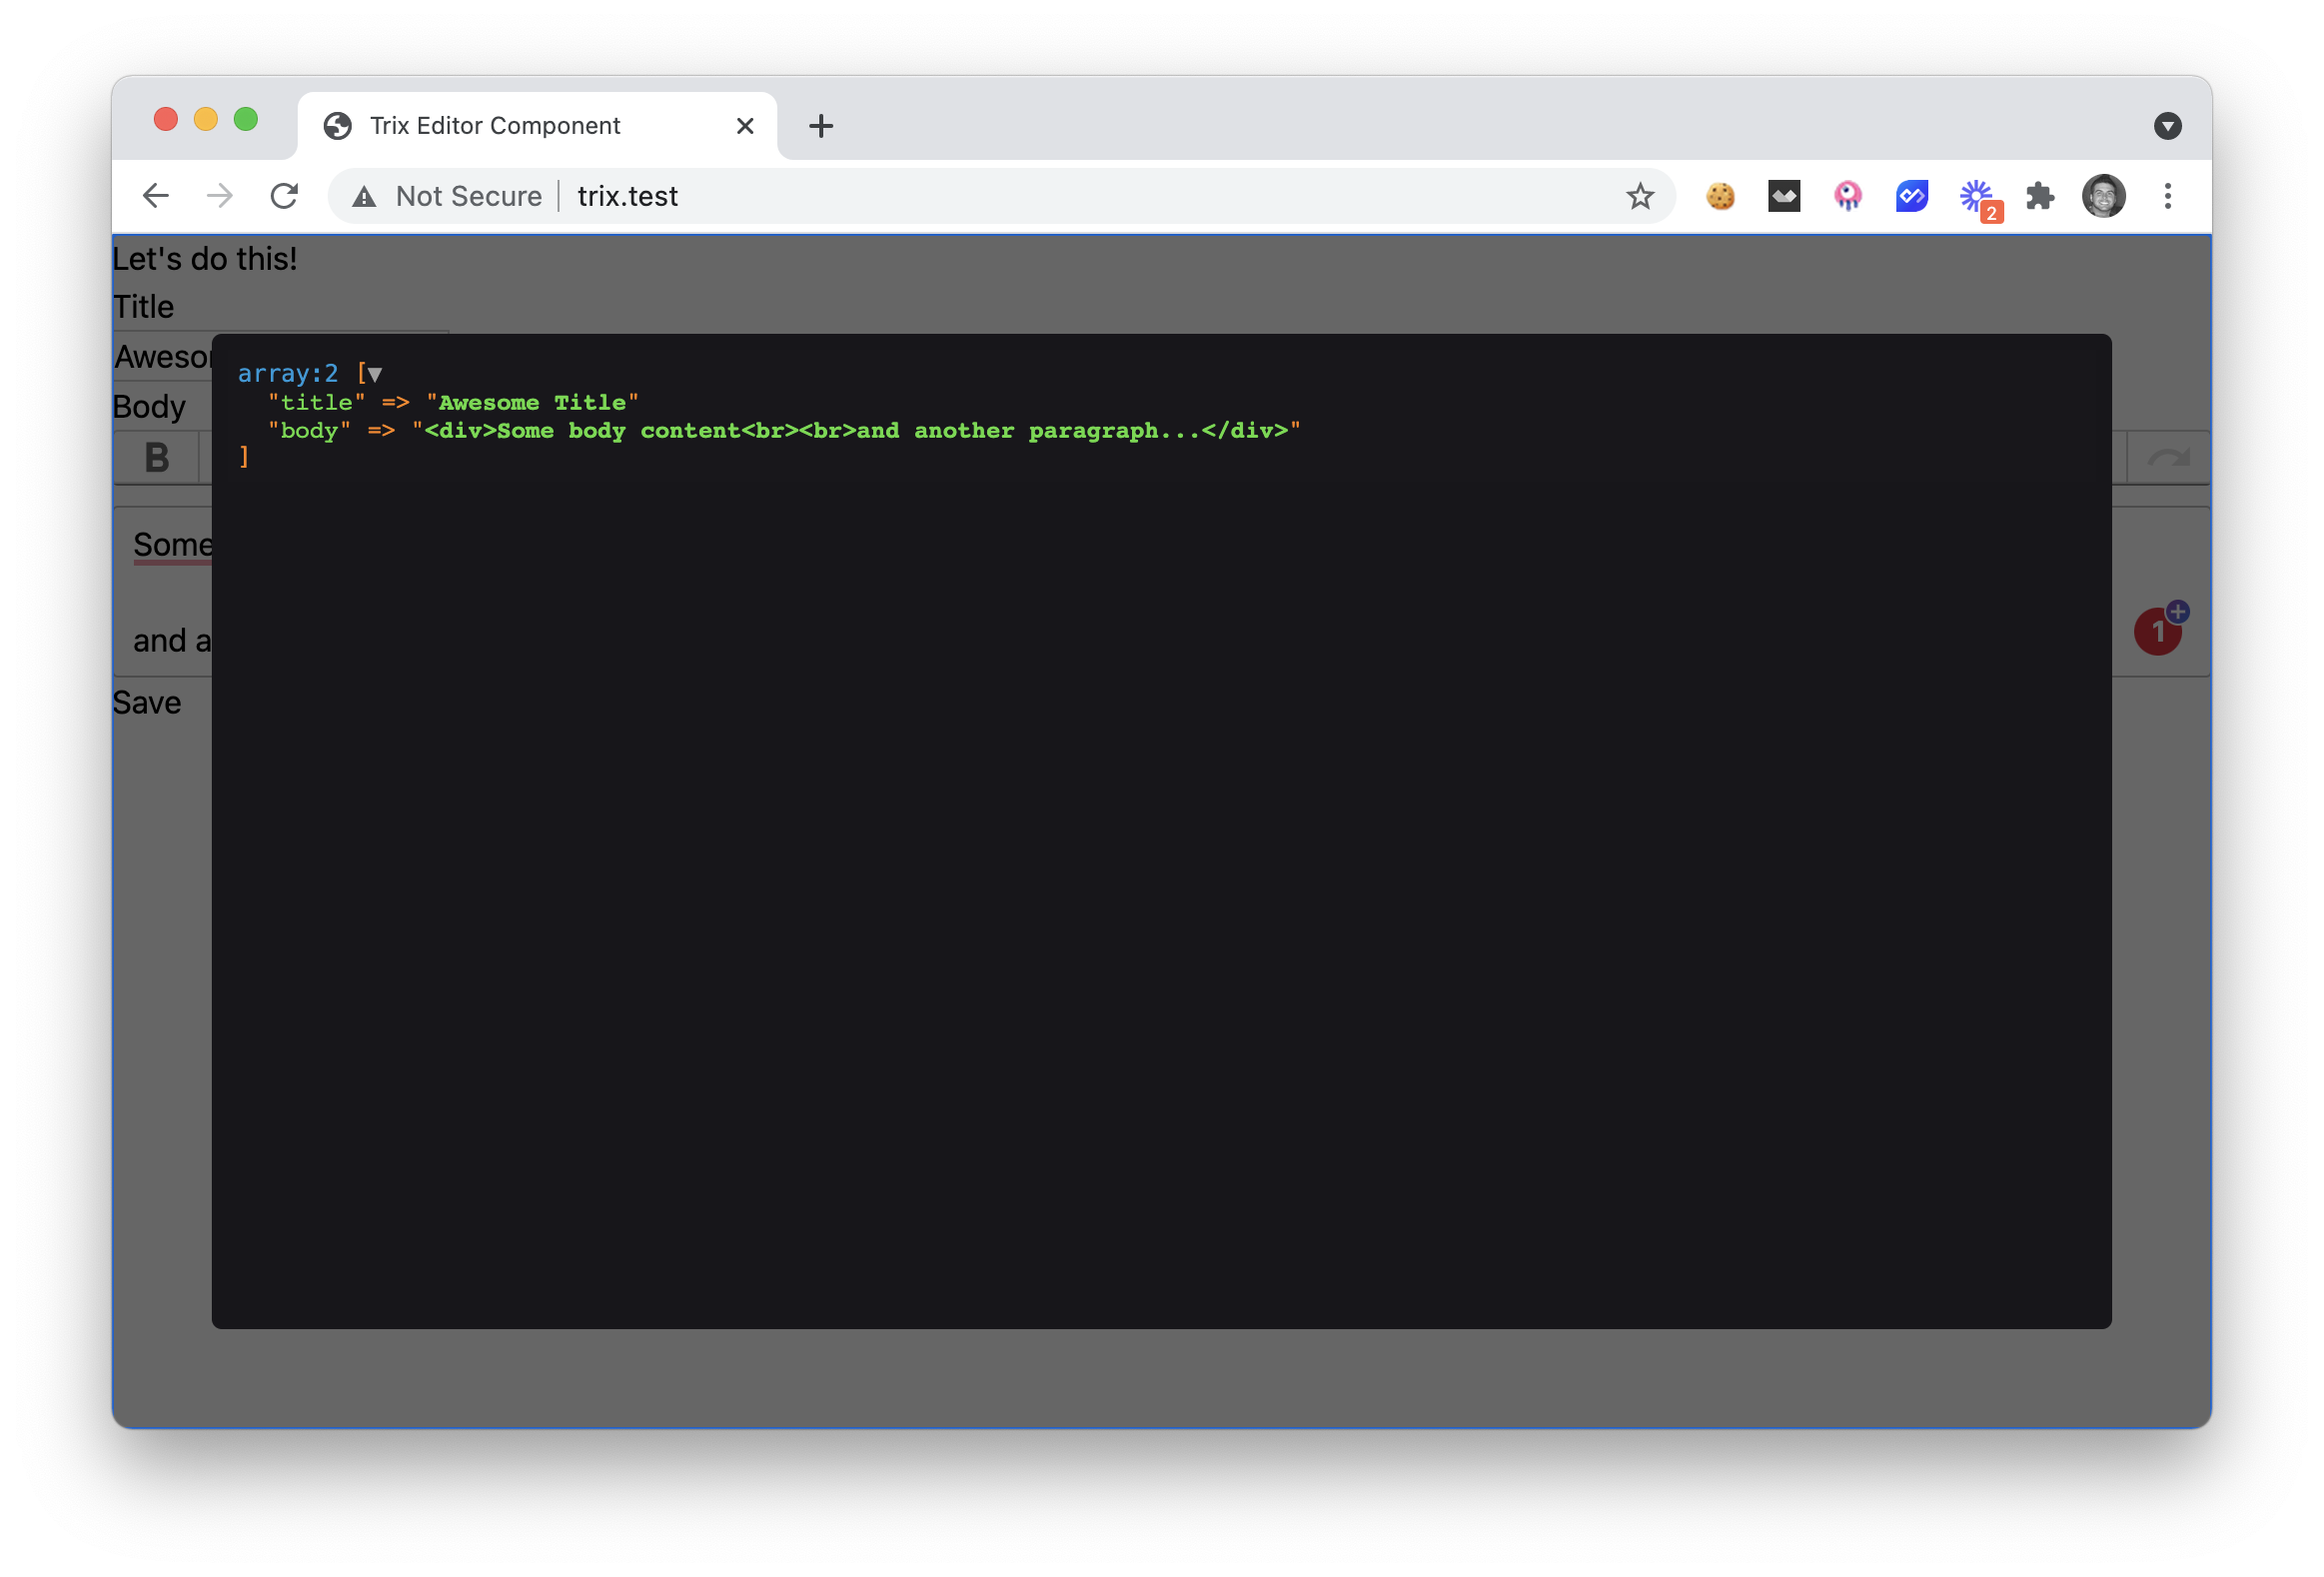
public function save(){
dd([
'title' => $this->title,
'body' => $this->body
]);
}
public function render()
{
return view('livewire.post');
}
}
And add the following to your post view:
<div>
    <div>
        <label for="title" style="display:block">Title</label>
        <input type="text" style="border:1px solid #ccc" name="title" wire:model.lazy="title">
    </div>

    <div>
        <label for="body">Body</label>
        <livewire:trix :value="$body">
    </div>

    <div>
        <button wire:click="save">Save</button>
    </div>
</div>
Now, we also added an event so that way our Trix component can emit to our Post component whenever the $value has changed. Here is the code for the Trix Component Controller:
<?php

namespace App\Http\Livewire;

use Livewire\Component;

class Trix extends Component
{
    const EVENT_VALUE_UPDATED = 'trix_value_updated';

    public $value;
    public $trixId;

    public function mount($value = ''){
        $this->value = $value;
        $this->trixId = 'trix-' . uniqid();
    }

    public function updatedValue($value){
        $this->emit(self::EVENT_VALUE_UPDATED, $this->value);
    }

    public function render()
    {
        return view('livewire.trix');
    }
}
We can now add the following component to our welcome.blade.php file:
<body>
    <h1>Let's do this!</h1>

    @livewire('post')

    @livewireScripts
</body>
If you visit the page and you try to add some content and click on the Save button, you'll notice that the editor toolbar gets removed.
This can easily be resolved if we add the wire:ignore to our Trix editor component. Inside the Component View for your Trix component it should look like the following:
<div wire:ignore>
    <link rel="stylesheet" href="https://cdnjs.cloudflare.com/ajax/libs/trix/1.3.1/trix.min.css" />

    <input id="{{ $trixId }}" type="hidden" name="content" value="{{ $value }}">
    <trix-editor wire:ignore input="{{ $trixId }}"></trix-editor>

    <script src="https://cdnjs.cloudflare.com/ajax/libs/trix/1.3.1/trix.min.js"></script>
    <script>
        var trixEditor = document.getElementById("{{ $trixId }}")

        addEventListener("trix-blur", function(event) {
            @this.set('value', trixEditor.getAttribute('value'))
        })
    </script>
</div>
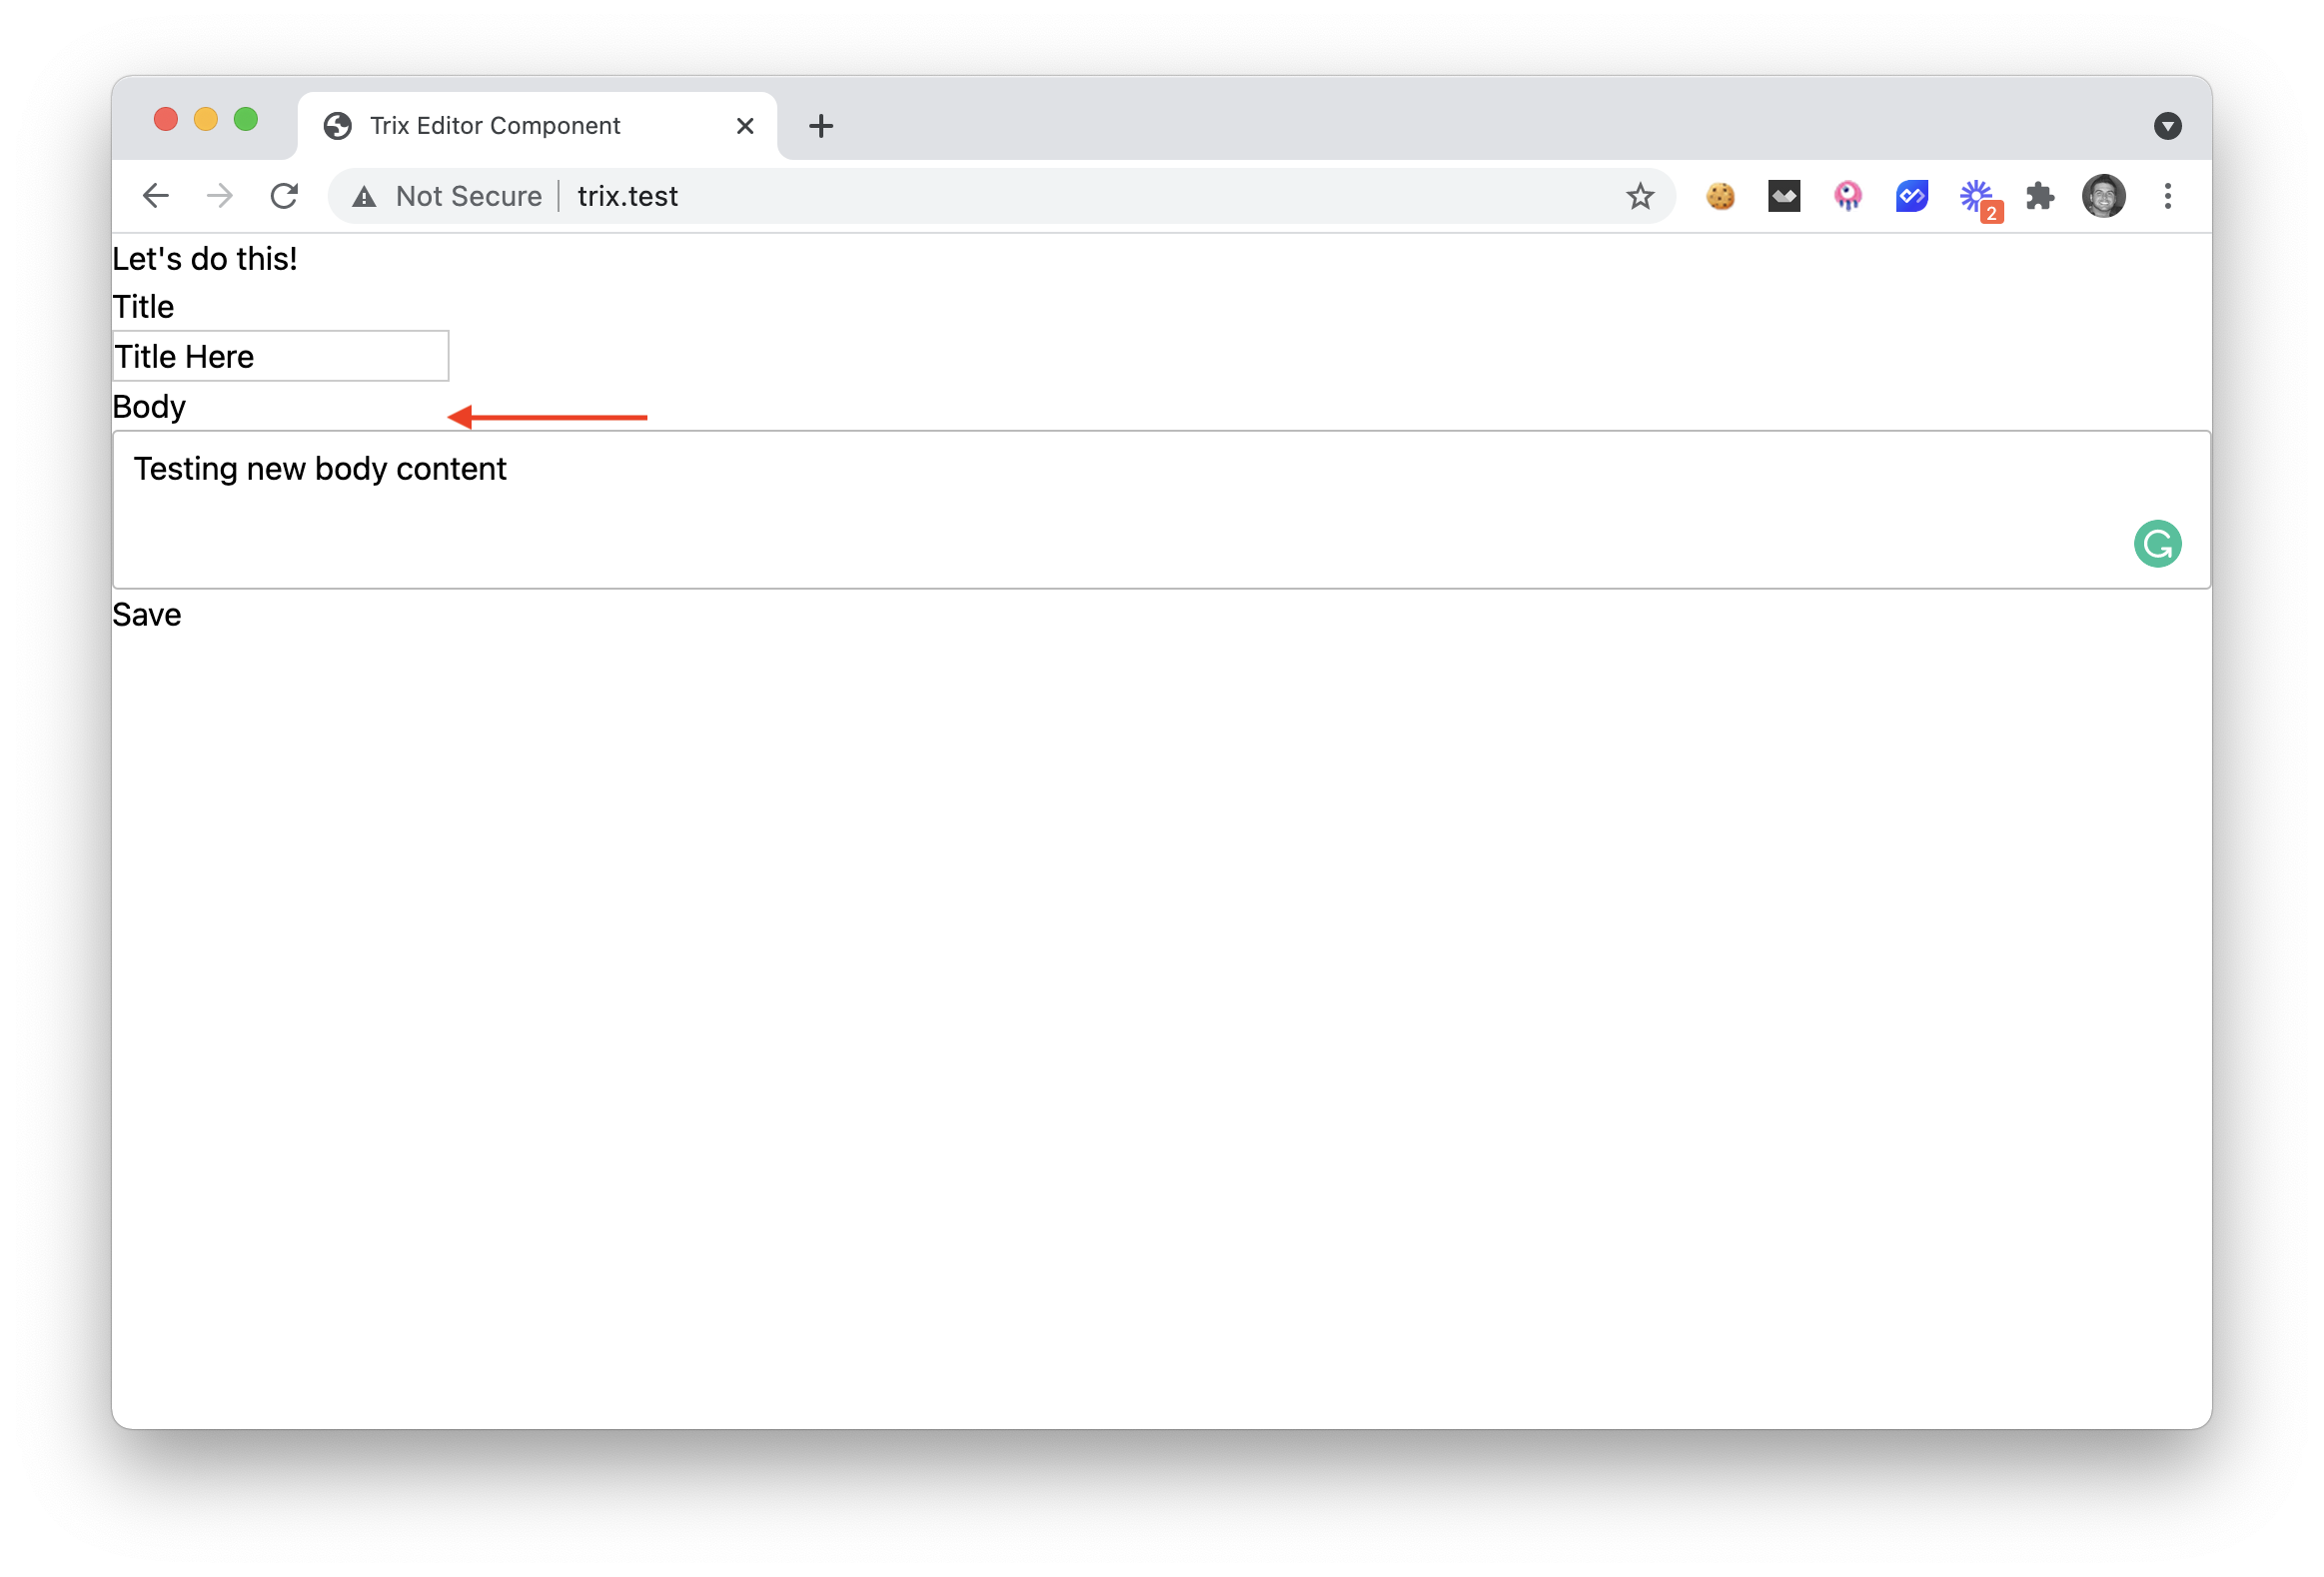
Now, if we were to visit our homepage we can enter content inside our title and inside our Trix Editor and when we click save, we'll see the data displayed from the post component.
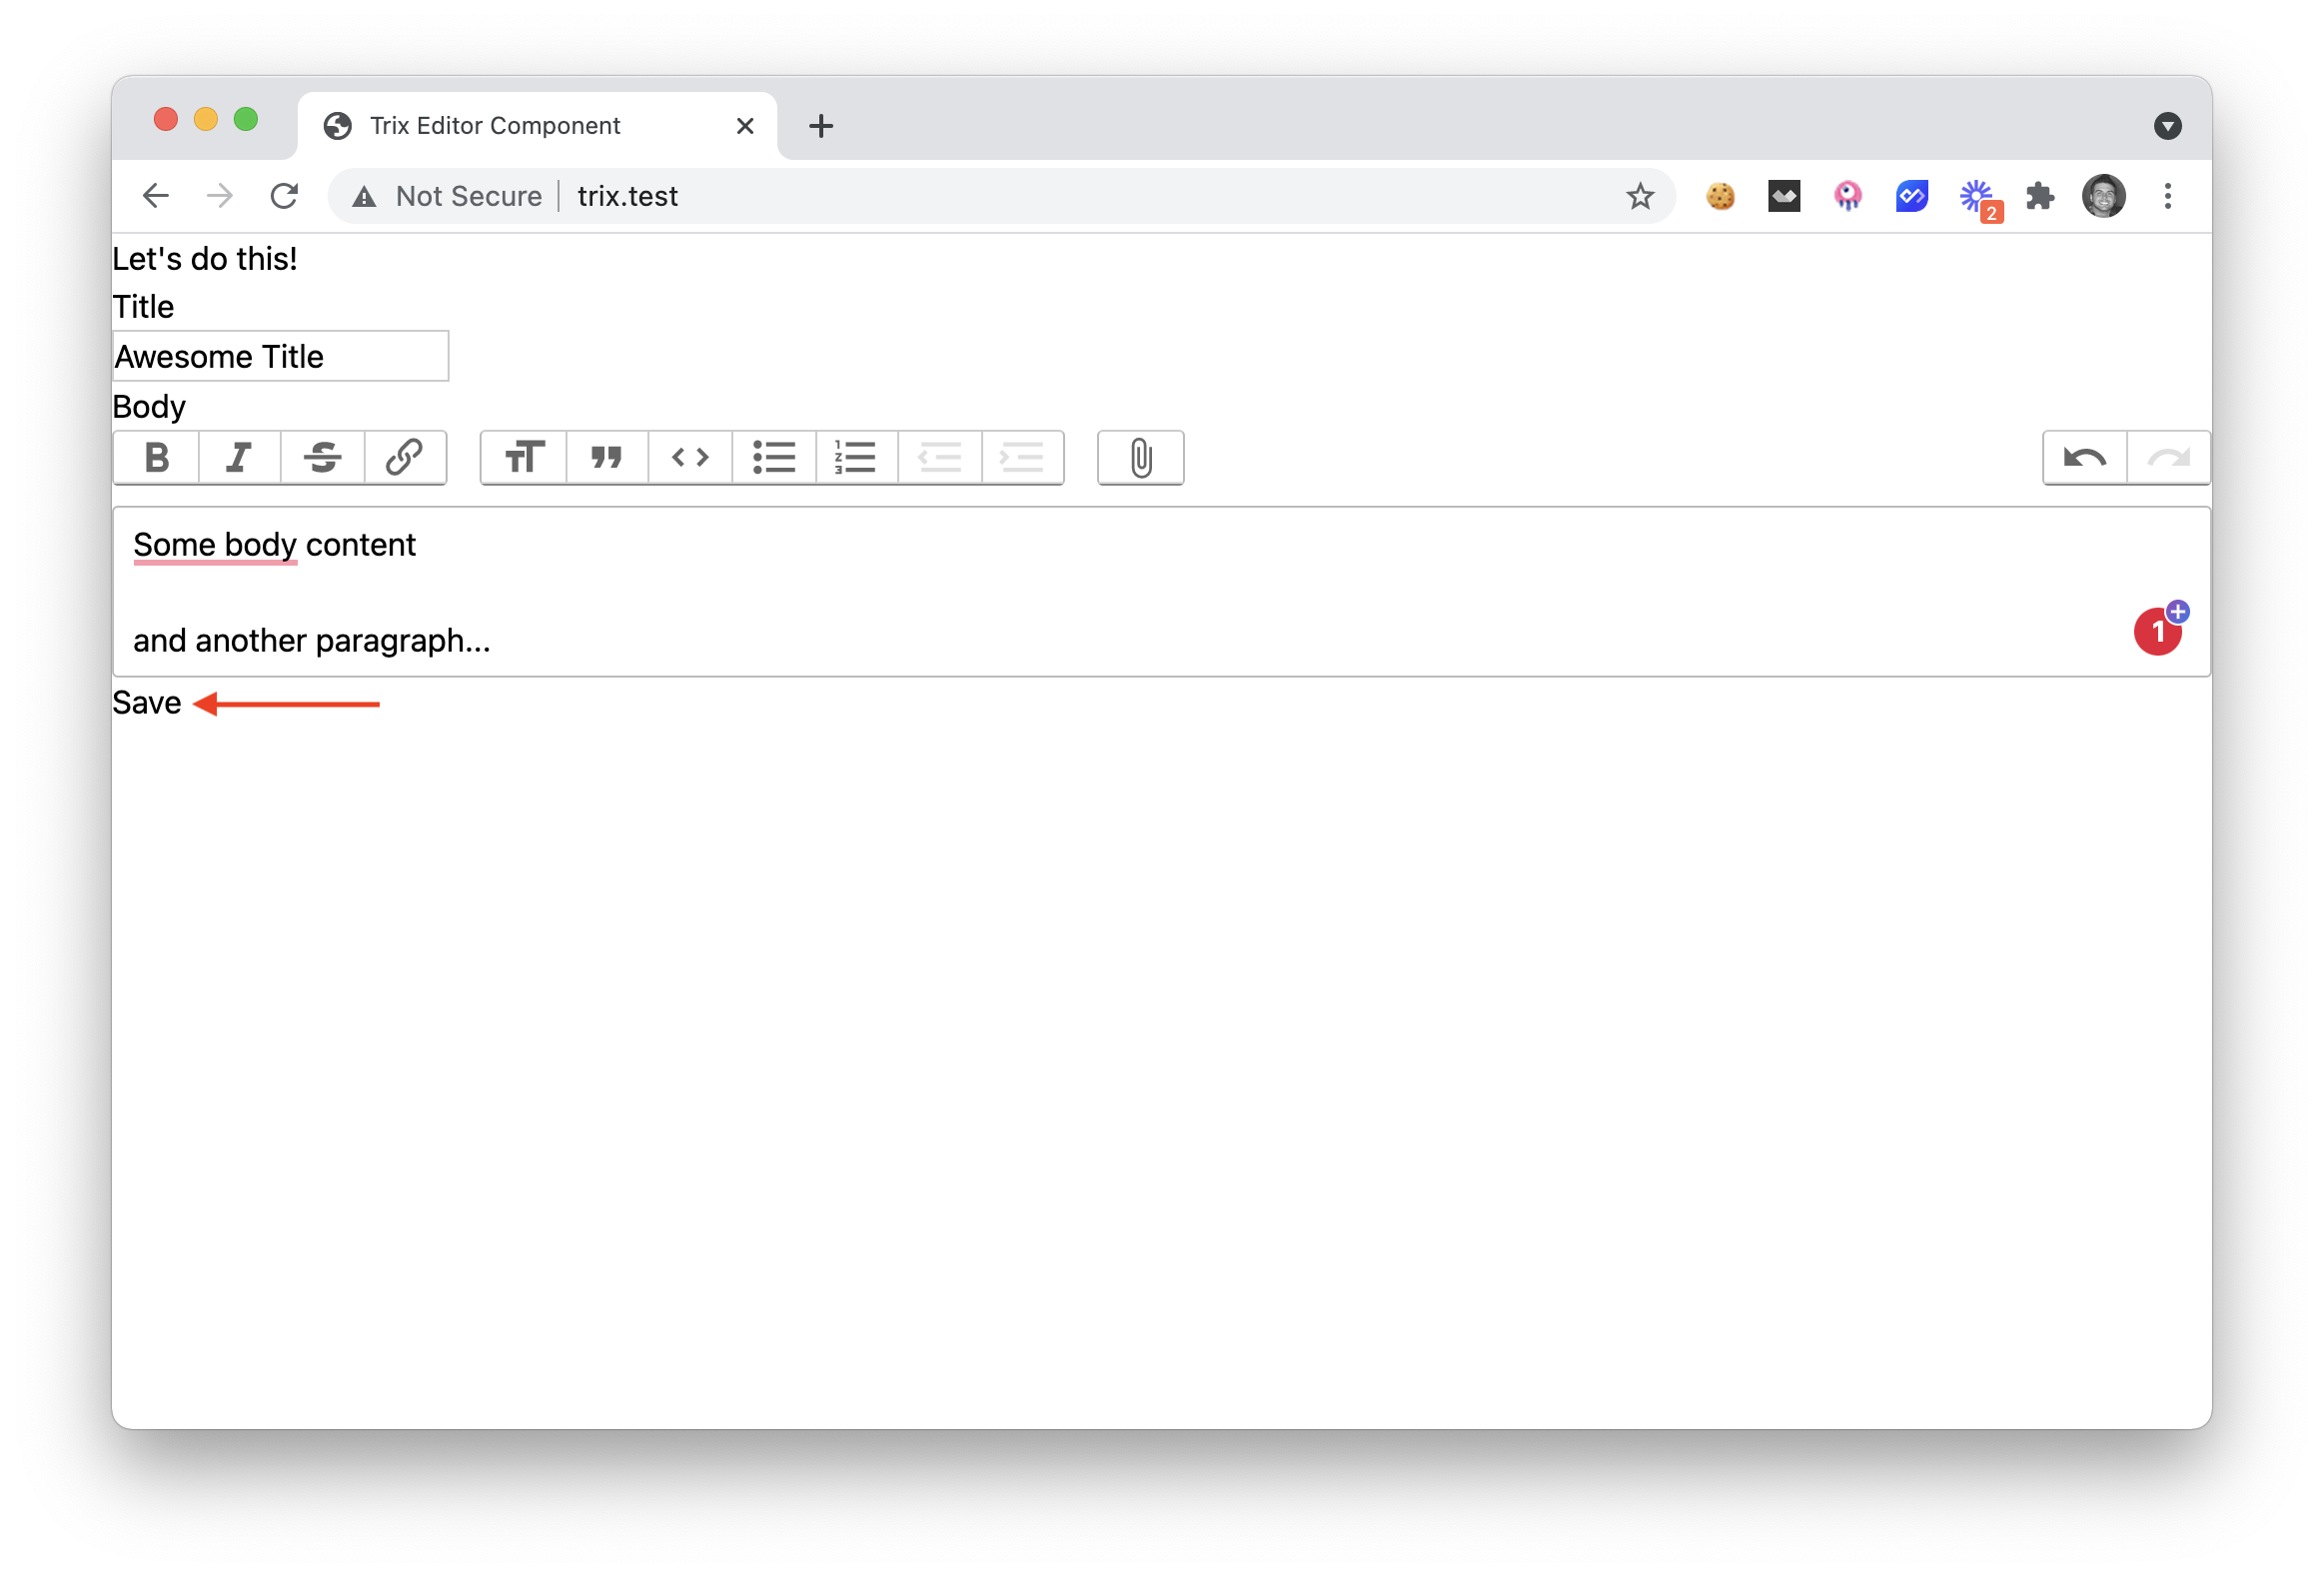
Sweet Success 🎉, you can now see that we are able to drop-in our Trix component and use it anywhere in our app.
🎁 Bonus
If you want to add image uploading to your Trix editor you can easily do so. I'm not going to walk-through every line of code, but you can essentially copy and paste the Trix Controller and View into your project:
Trix Component Controller
<?php

namespace App\Http\Livewire;

use Livewire\Component;
use Livewire\WithFileUploads;
use Illuminate\Support\Facades\Storage;

class Trix extends Component
{
    use WithFileUploads;

    const EVENT_VALUE_UPDATED = 'trix_value_updated';

    public $value;
    public $trixId;
    public $photos = [];

    public function mount($value = ''){
        $this->value = $value;
        $this->trixId = 'trix-' . uniqid();
    }

    public function updatedValue($value){
        $this->emit(self::EVENT_VALUE_UPDATED, $this->value);
    }

    public function completeUpload(string $uploadedUrl, string $trixUploadCompletedEvent){

        foreach($this->photos as $photo){
            if($photo->getFilename() == $uploadedUrl) {
                // store in the public/photos location
                $newFilename = $photo->store('public/photos');

                // get the public URL of the newly uploaded file
                $url = Storage::url($newFilename);

                $this->dispatchBrowserEvent($trixUploadCompletedEvent, [
                    'url' => $url,
                    'href' => $url,
                ]);
            }
        }
    }

    public function render()
    {
        return view('livewire.trix');
    }
}
Trix Component View
<div wire:ignore>
    <link rel="stylesheet" href="https://cdnjs.cloudflare.com/ajax/libs/trix/1.3.1/trix.min.css" />

    <input id="{{ $trixId }}" type="hidden" name="content" value="{{ $value }}">
    <trix-editor wire:ignore input="{{ $trixId }}"></trix-editor>

    <script src="https://cdnjs.cloudflare.com/ajax/libs/trix/1.3.1/trix.min.js"></script>
    <script>
        var trixEditor = document.getElementById("{{ $trixId }}")
        var mimeTypes = ["image/png", "image/jpeg", "image/jpg"];

        addEventListener("trix-blur", function(event) {
            @this.set('value', trixEditor.getAttribute('value'))
        });

        addEventListener("trix-file-accept", function(event) {
            if (! mimeTypes.includes(event.file.type) ) {
                // file type not allowed, prevent default upload
                return event.preventDefault();
            }
        });

        addEventListener("trix-attachment-add", function(event){
            uploadTrixImage(event.attachment);
        });

        function uploadTrixImage(attachment){
            // upload with livewire
            @this.upload(
                'photos',
                attachment.file,
                function (uploadedURL) {

                    // We need to create a custom event.
                    // This event will create a pause in thread execution until we get the Response URL from the Trix Component @completeUpload
                    const trixUploadCompletedEvent = `trix-upload-completed:${btoa(uploadedURL)}`;
                    const trixUploadCompletedListener = function(event) {
                        attachment.setAttributes(event.detail);
                        window.removeEventListener(trixUploadCompletedEvent, trixUploadCompletedListener);
                    }

                    window.addEventListener(trixUploadCompletedEvent, trixUploadCompletedListener);

                    // call the Trix Component @completeUpload below
                    @this.call('completeUpload', uploadedURL, trixUploadCompletedEvent);
                },
                function() {},
                function(event){
                    attachment.setUploadProgress(event.detail.progress);
                },
            )
            // complete the upload and get the actual file URL
        }
    </script>
</div>
You can also find the final source code on Github here 😉.
✔ Conclusion
I hope this helps you when you need to integrate a Rich Text editor in your Laravel Livewire apps.
Be sure to learn more about the Trix Editor here. And learn more about Livewire here.
Happy coding ✌️