
Deploying your application is a super important part of growing your application. If it is easy to deploy, you will most likely push code more often and get things done quicker. So, in this tutorial, I'm going to show you how you can deploy your Laravel app on Cloudways using Deployer.
Deployer is an amazing deployment tool for PHP to deploy changes of our application to a Cloudways Server. Let's jump into it.
👨💻 Creating a New Server
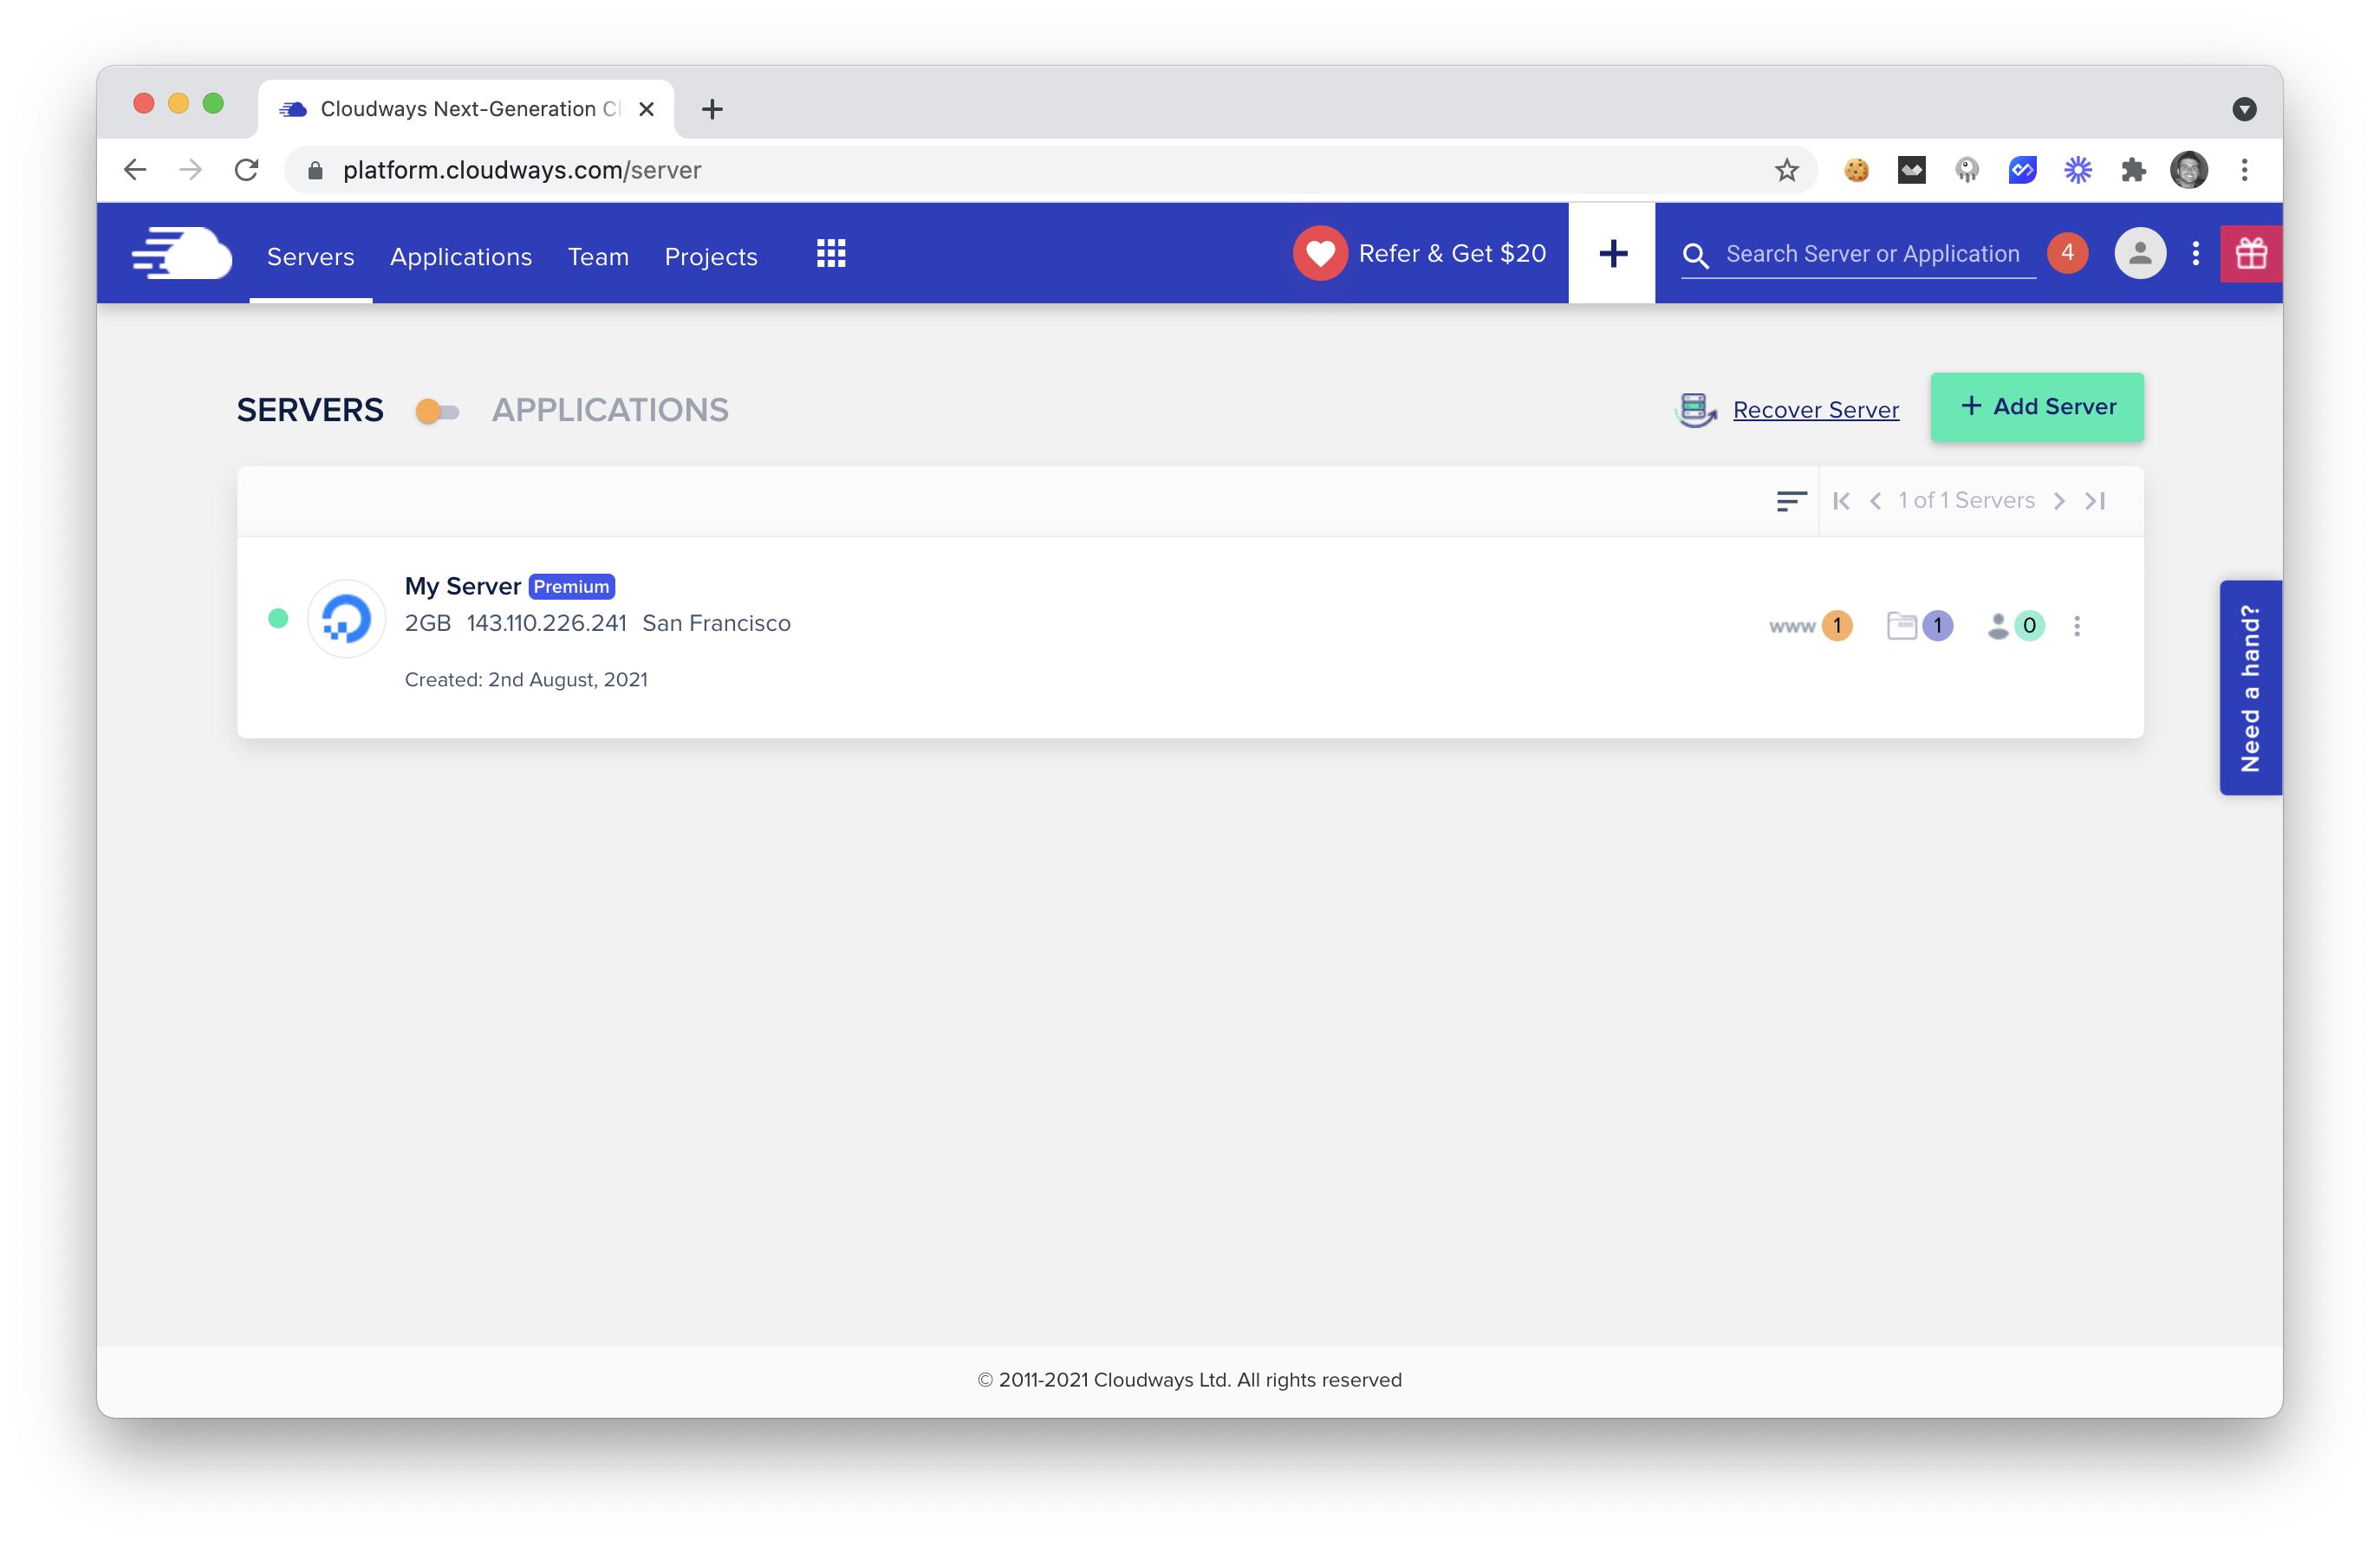
I like to start things off at the very beginning. The first step that you will need to do is boot up a standard Laravel server in Cloudways.
If you're not familiar with how to do that, you can check out this article on Creating a Laravel Server on Cloudways. After you have your new server created in your Cloudways Dashboard, you'll see a server listed on your server page:
And you will also see your new Laravel application listed on your applications page.
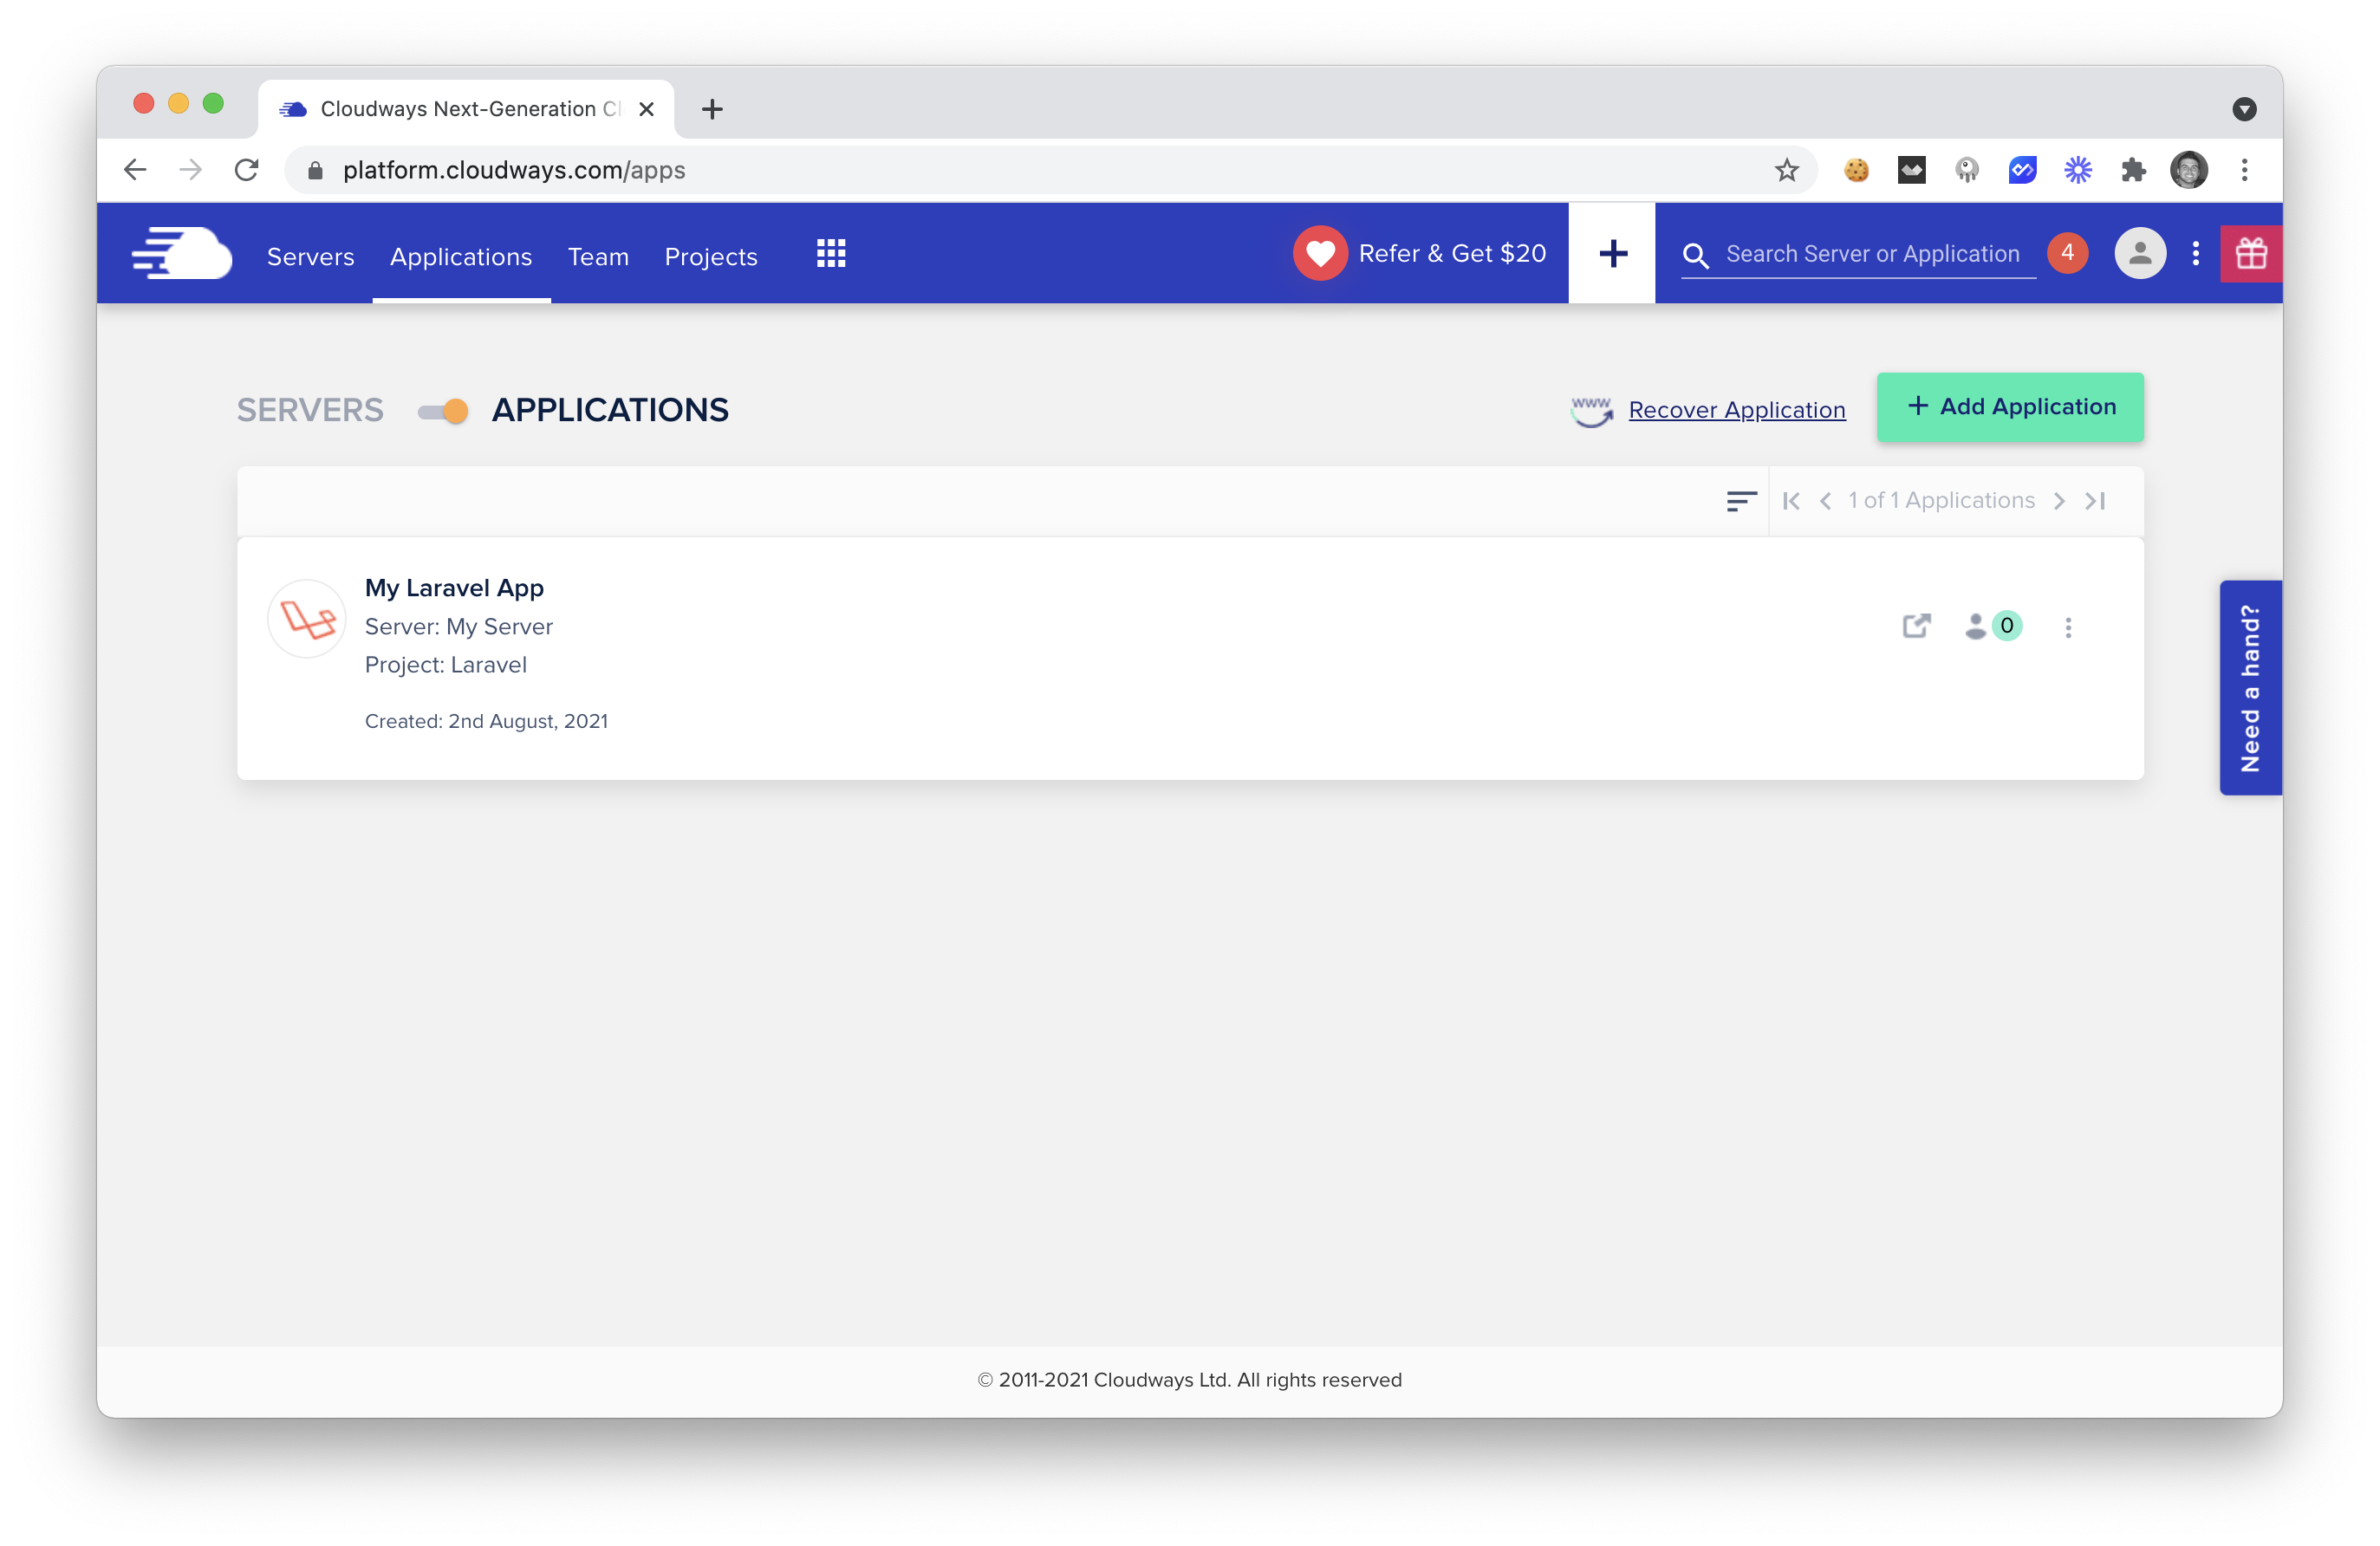
Now that we have our new Laravel server, we'll also need to create a new Laravel application and submit it to a Github repo.
🆕 New Laravel App
Ok, now we are going to create a new Laravel application called laravel-cloudways-deployer.
laravel new laravel-cloudways-deployer
After we have our new app created, we'll want to create a new Github repo.
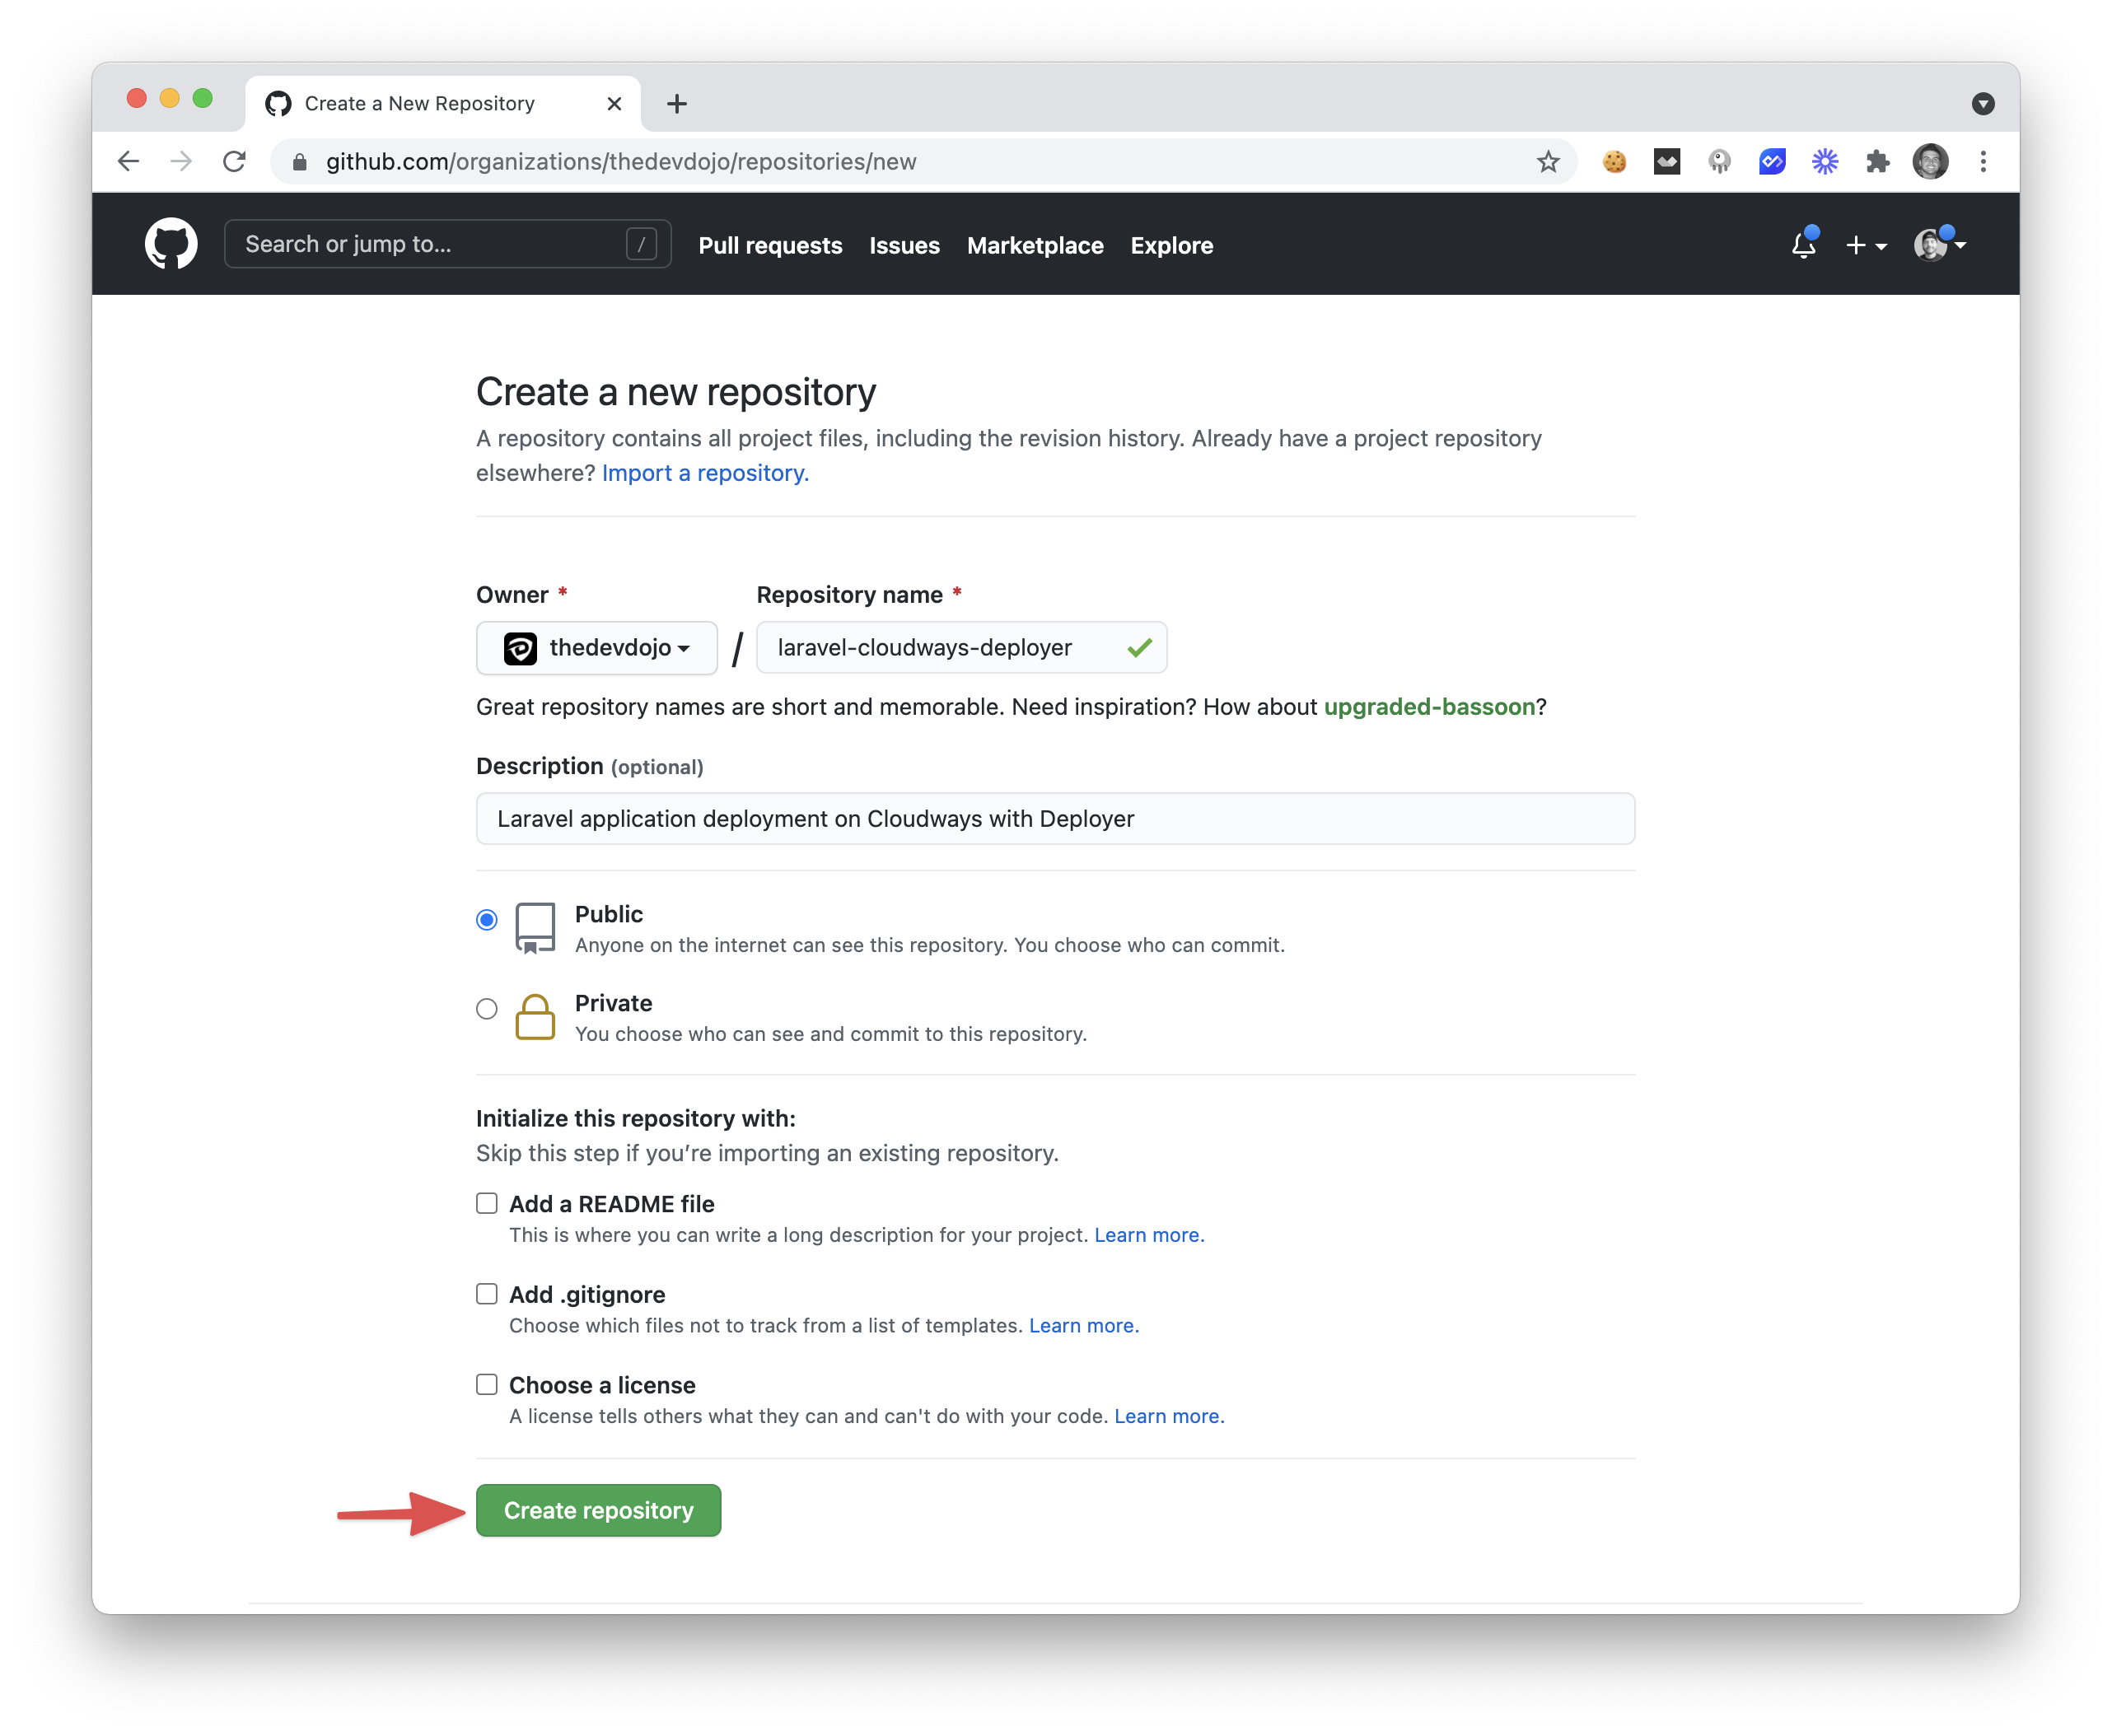
After creating that repo, we can then submit our new laravel application to that repo. Make sure to navigate to the root of your application cd ~/Sites/laravel-cloudways-deployer, and commit all your files:
git init
git add --all
git commit -m "first commit"
git branch -M main
git remote add origin [email protected]:thedevdojo/laravel-cloudways-deployer.git
git push -u origin main
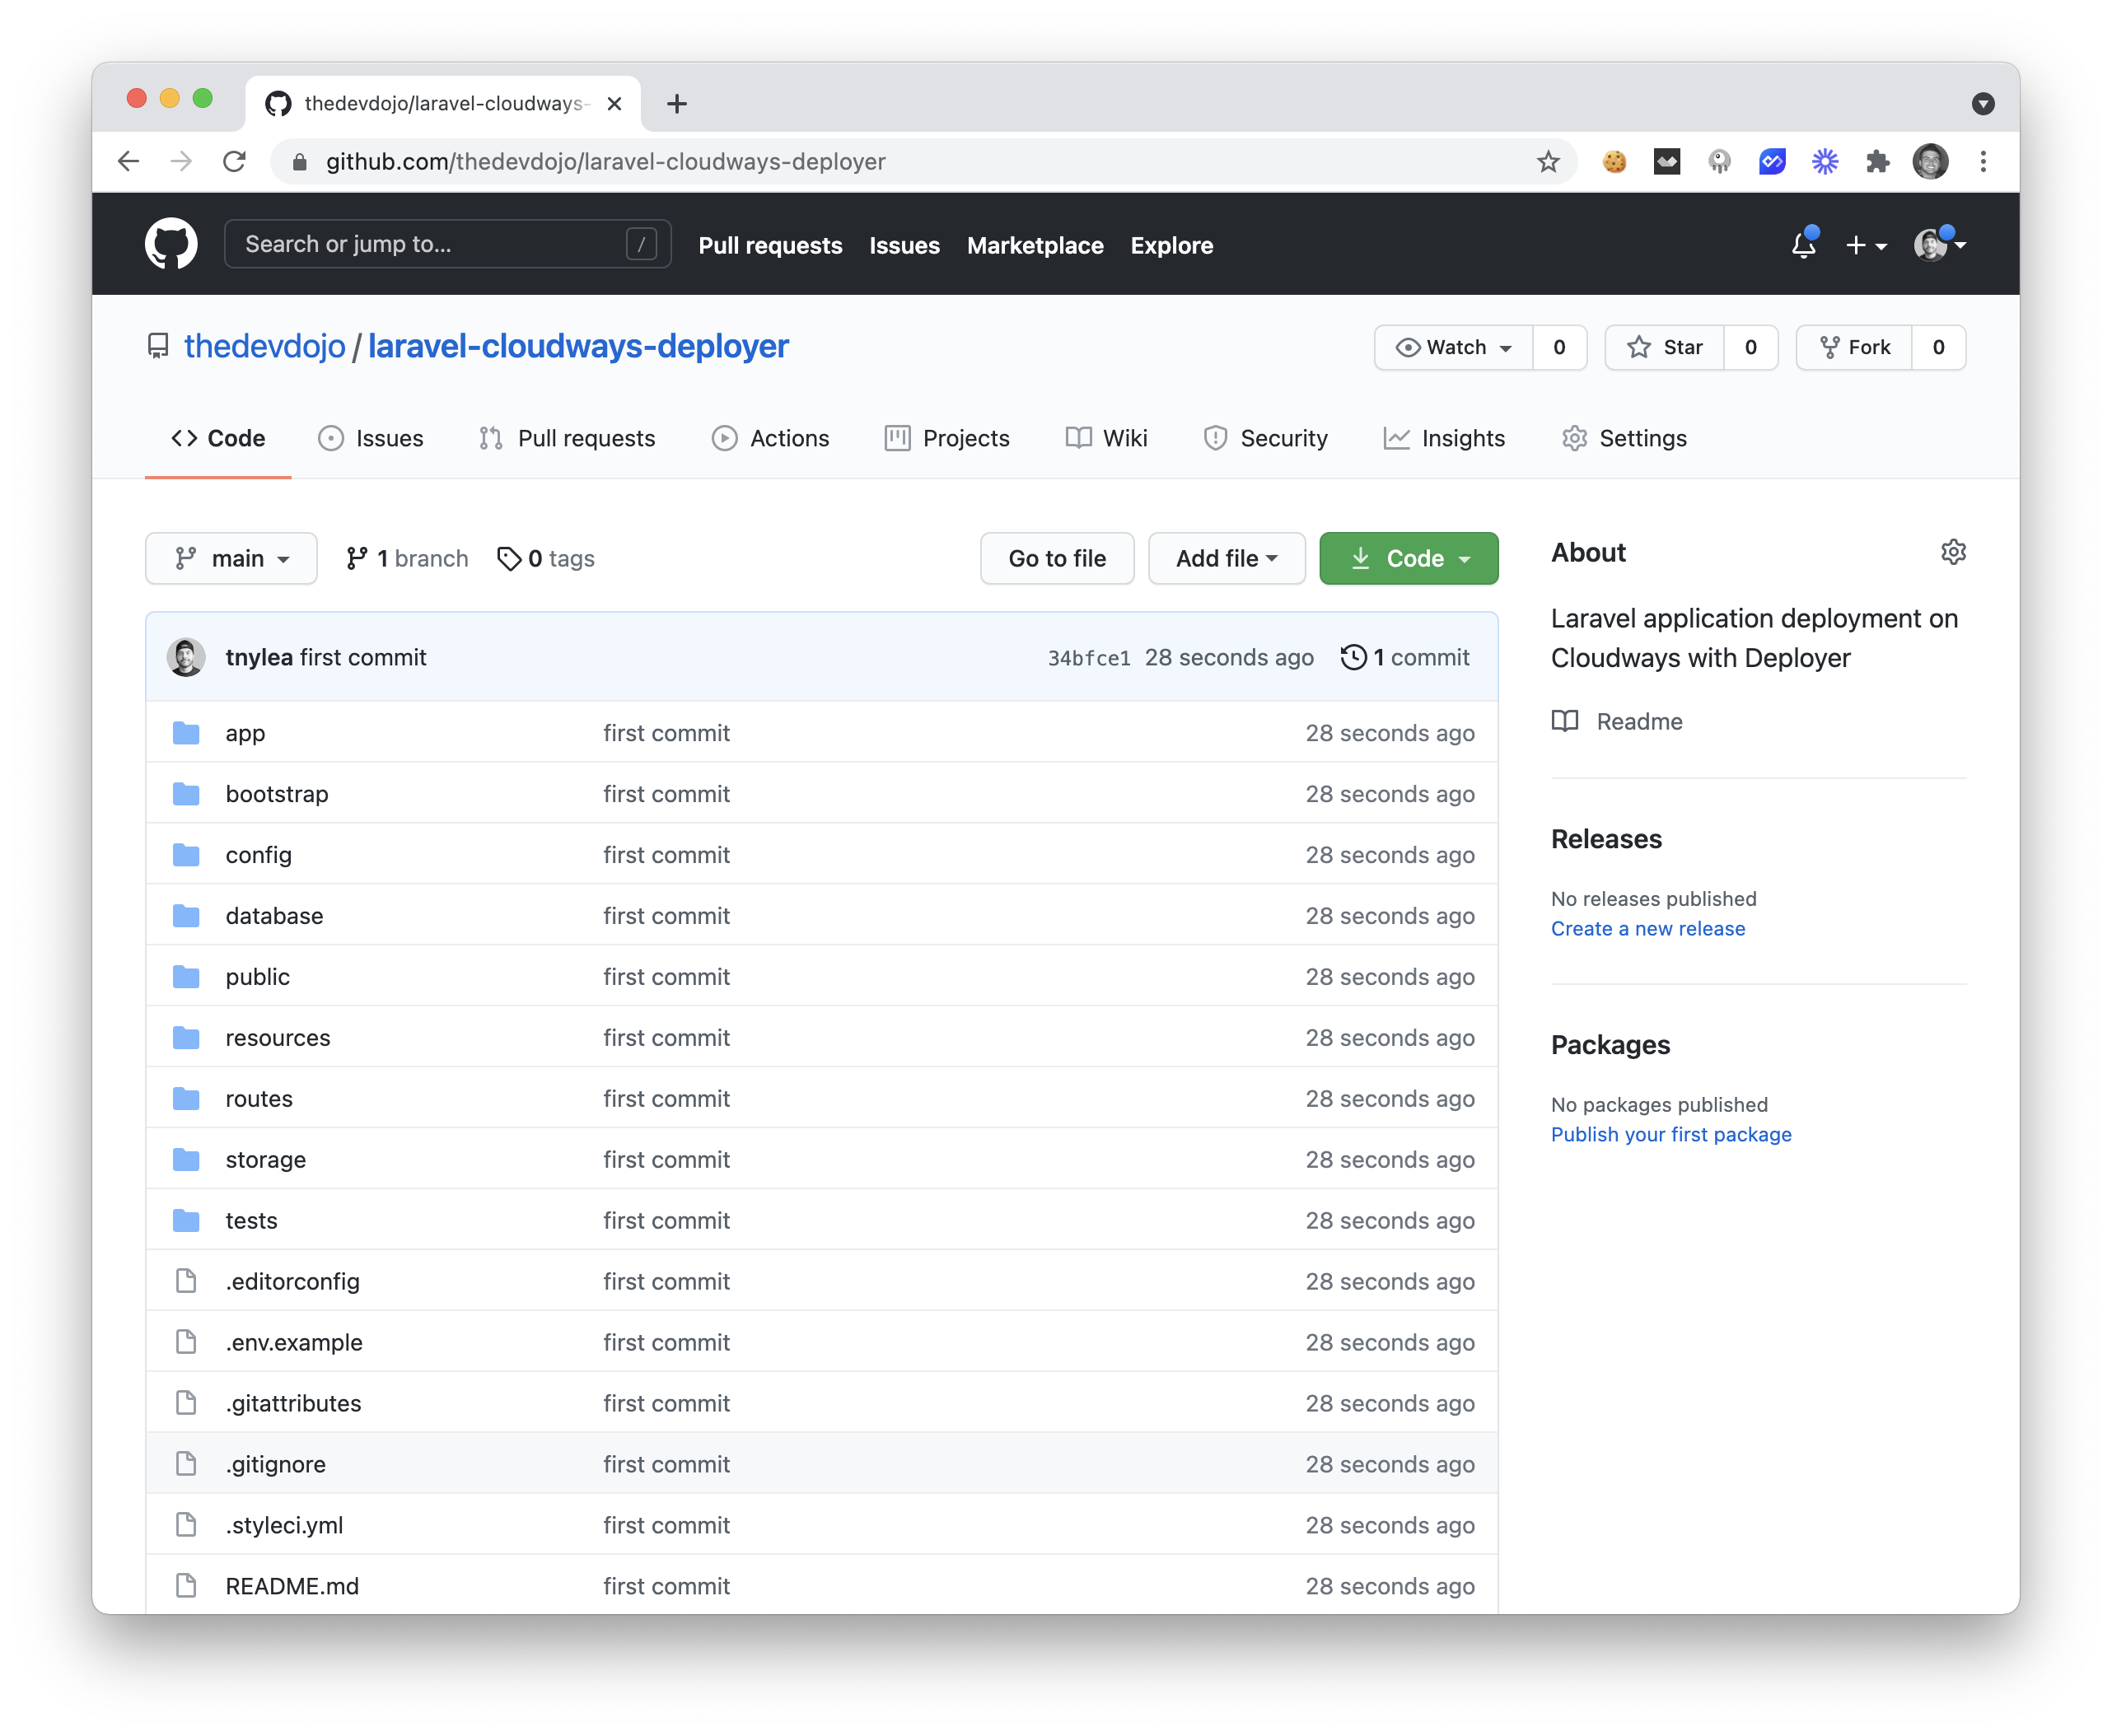
If everything looks good, we will see our Laravel application inside of our Github Repo.
💿 Installing Deployer
Now that we have our new Laravel application, we are now going to install the Deployer package on our local machine. We can easily do that with the following commands:
curl -LO https://deployer.org/deployer.phar
mv deployer.phar /usr/local/bin/dep
chmod +x /usr/local/bin/dep
After adding this to our machine, we'll now be able to run the dep command, and you'll see a bunch of new commands that you have available at your disposal.
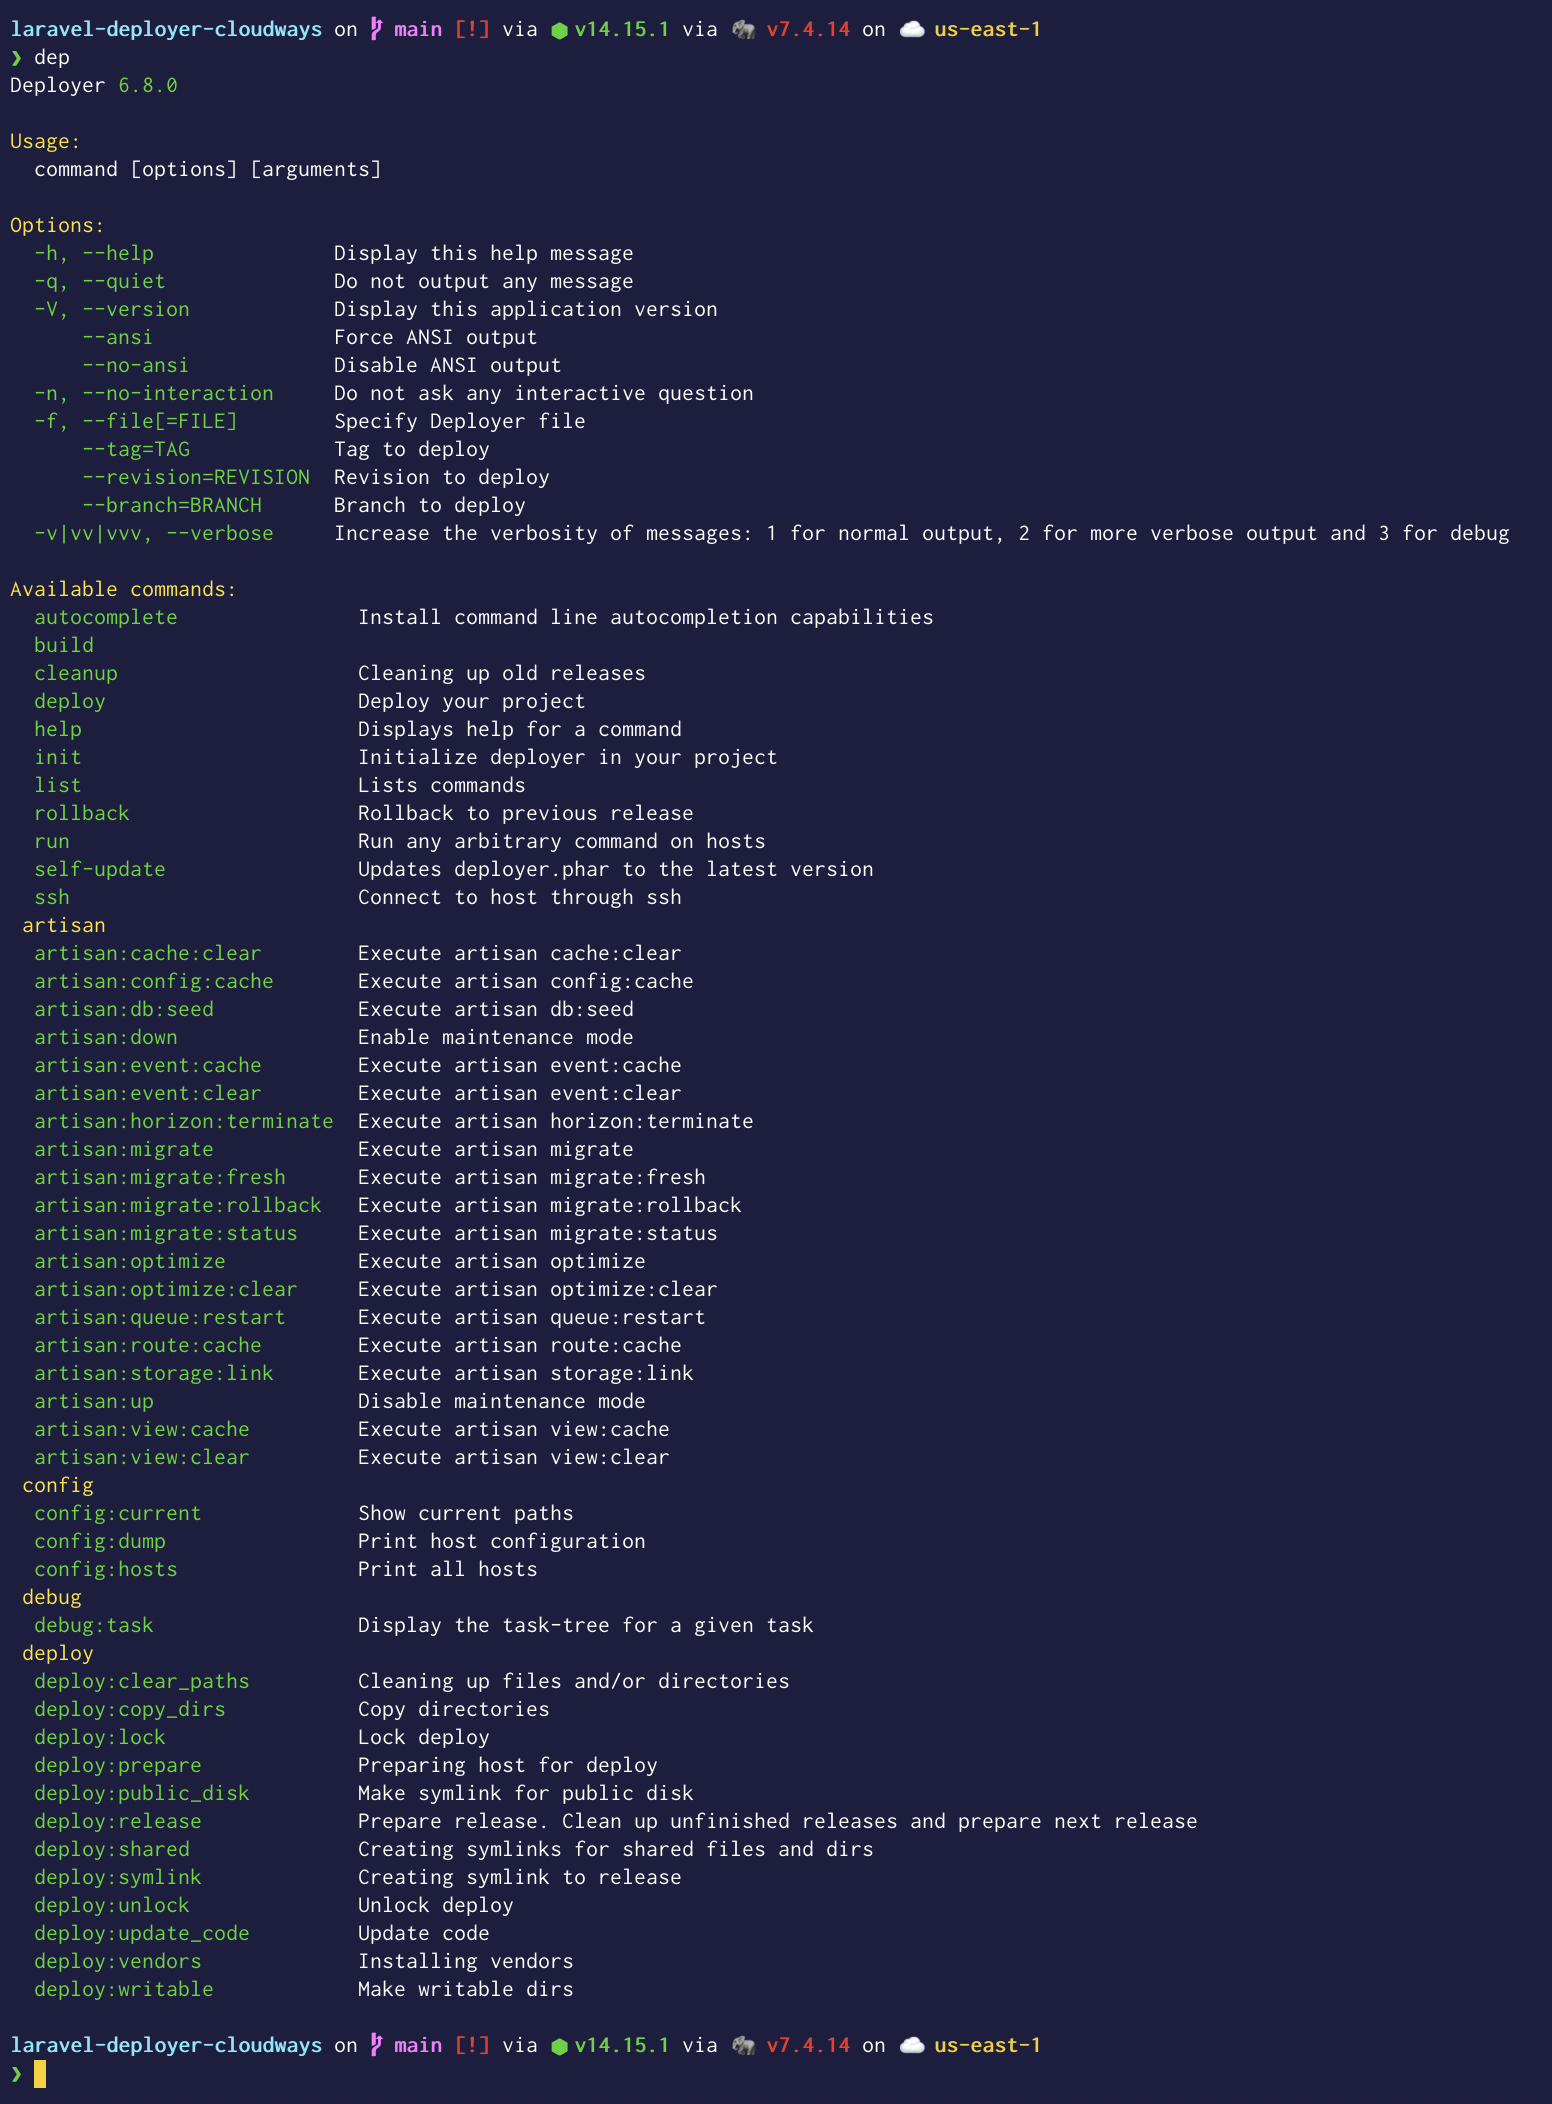
After installing deployer, there is one command that we can use to create a new deploy file for a laravel application described here. The command is the following:
dep init -t Laravel
This command will create a new file at the root of our Laravel application called deploy.php; this is the file where we will add our server credentials and information to tell the deployer how to deploy our application.
🔑 Adding our SSH Key to Cloudways
Before we can deploy our application using Deployer, it would be best if your local machine could talk to your server without the need for a password, and that's when we want to add our Local SSH key to our Cloudways server.
Visit the Master Credentials tab of your Server Details page, and you'll see a button called SSH Public Keys

If we click on this button, we'll be presented with a popup asking us for the label and SSH key.
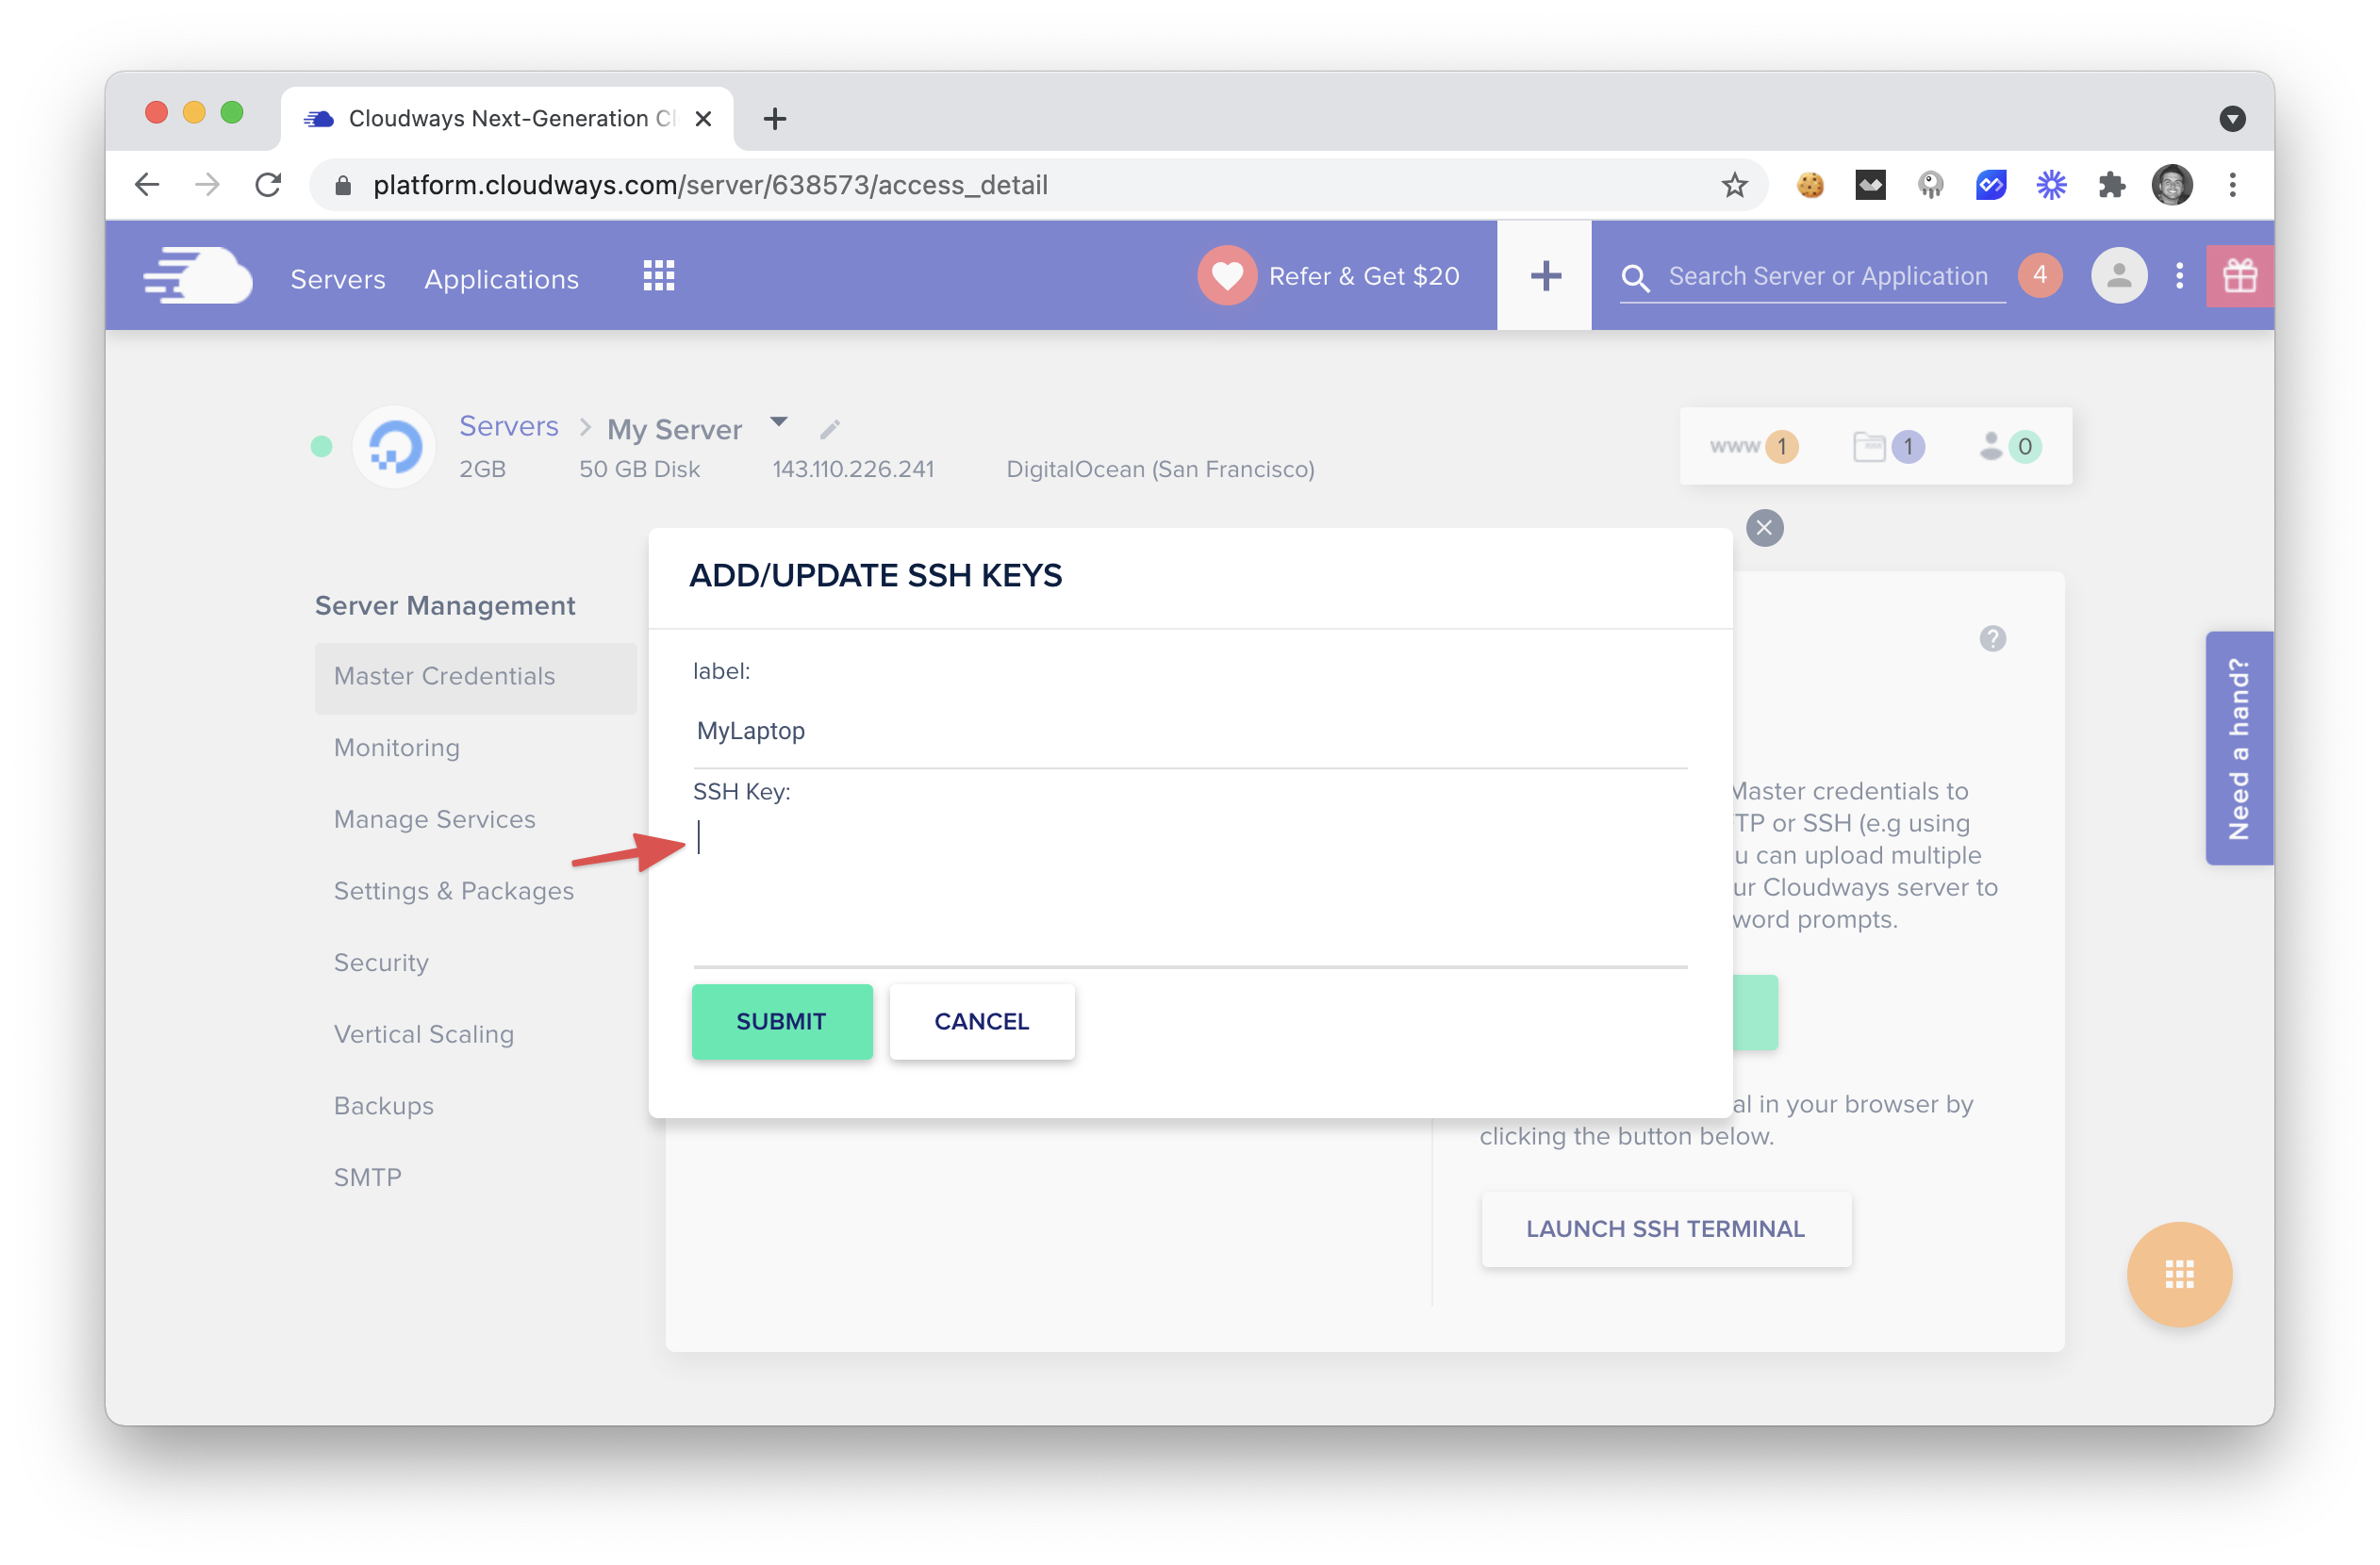
You can enter anything in the Label field, and then you'll need to get your local SSH Key and paste it into the text area.
In most cases, you can copy your SSH key to your clipboard with the following terminal command:
pbcopy < ~/.ssh/id_rsa.pub
If you do not have an SSH key generated for your local machine, you can perform a simple Google search on how to generate an SSH key for your operating system.
You can try to SSH into your machine to test this, and you won't be asked for a password. Instead, you will be immediately logged in 🔓.
Now that our local machine and our server can talk to each other, we can move on to configuring our Deployer file and then test out a quick deployment 🚀.
🛠 Configuring deploy.php
If you open up the deploy.php file that we created a few steps ago, there are a few lines we need to modify. Try to locate the following lines:
// Project repository
set('repository', '[email protected]:username/repository.git');

...

// Hosts
host('project.com')
    ->set('deploy_path', '~/{{application}}');
The first line we will need to change is our Project Repository. Make sure to update your Github URL on this line:
set('repository', 'https://github.com/thedevdojo/laravel-cloudways-deployer.git');
Next, you will need to update the Hosts line with the information about your server.
host('143.110.226.241')
    ->user('master_xuysnxxcuh')
    ->forwardAgent()
    ->set('deploy_path', '/home/master/applications/yjtccvqskp/public_html');
On this line, you will need to enter the public IP of your server, the username, and the deploy path.
If you are not sure about the application folder path, you can visit the Application Settings tab in your Application dashboard, and you'll see the folder name. Your deploy_path should be /home/master/applications/FOLDER_NAME/public_html.
Before we test out a deployment, we will need to update our Cloudways Server and Database to the latest version.
💾 Updating PHP and Database on Server
To deploy our Laravel application to our server, we'll also need to update PHP and MariaDB to the latest version. Visit your application's Settings & Packages tab and change the PHP version and MariaDB to the latest version.
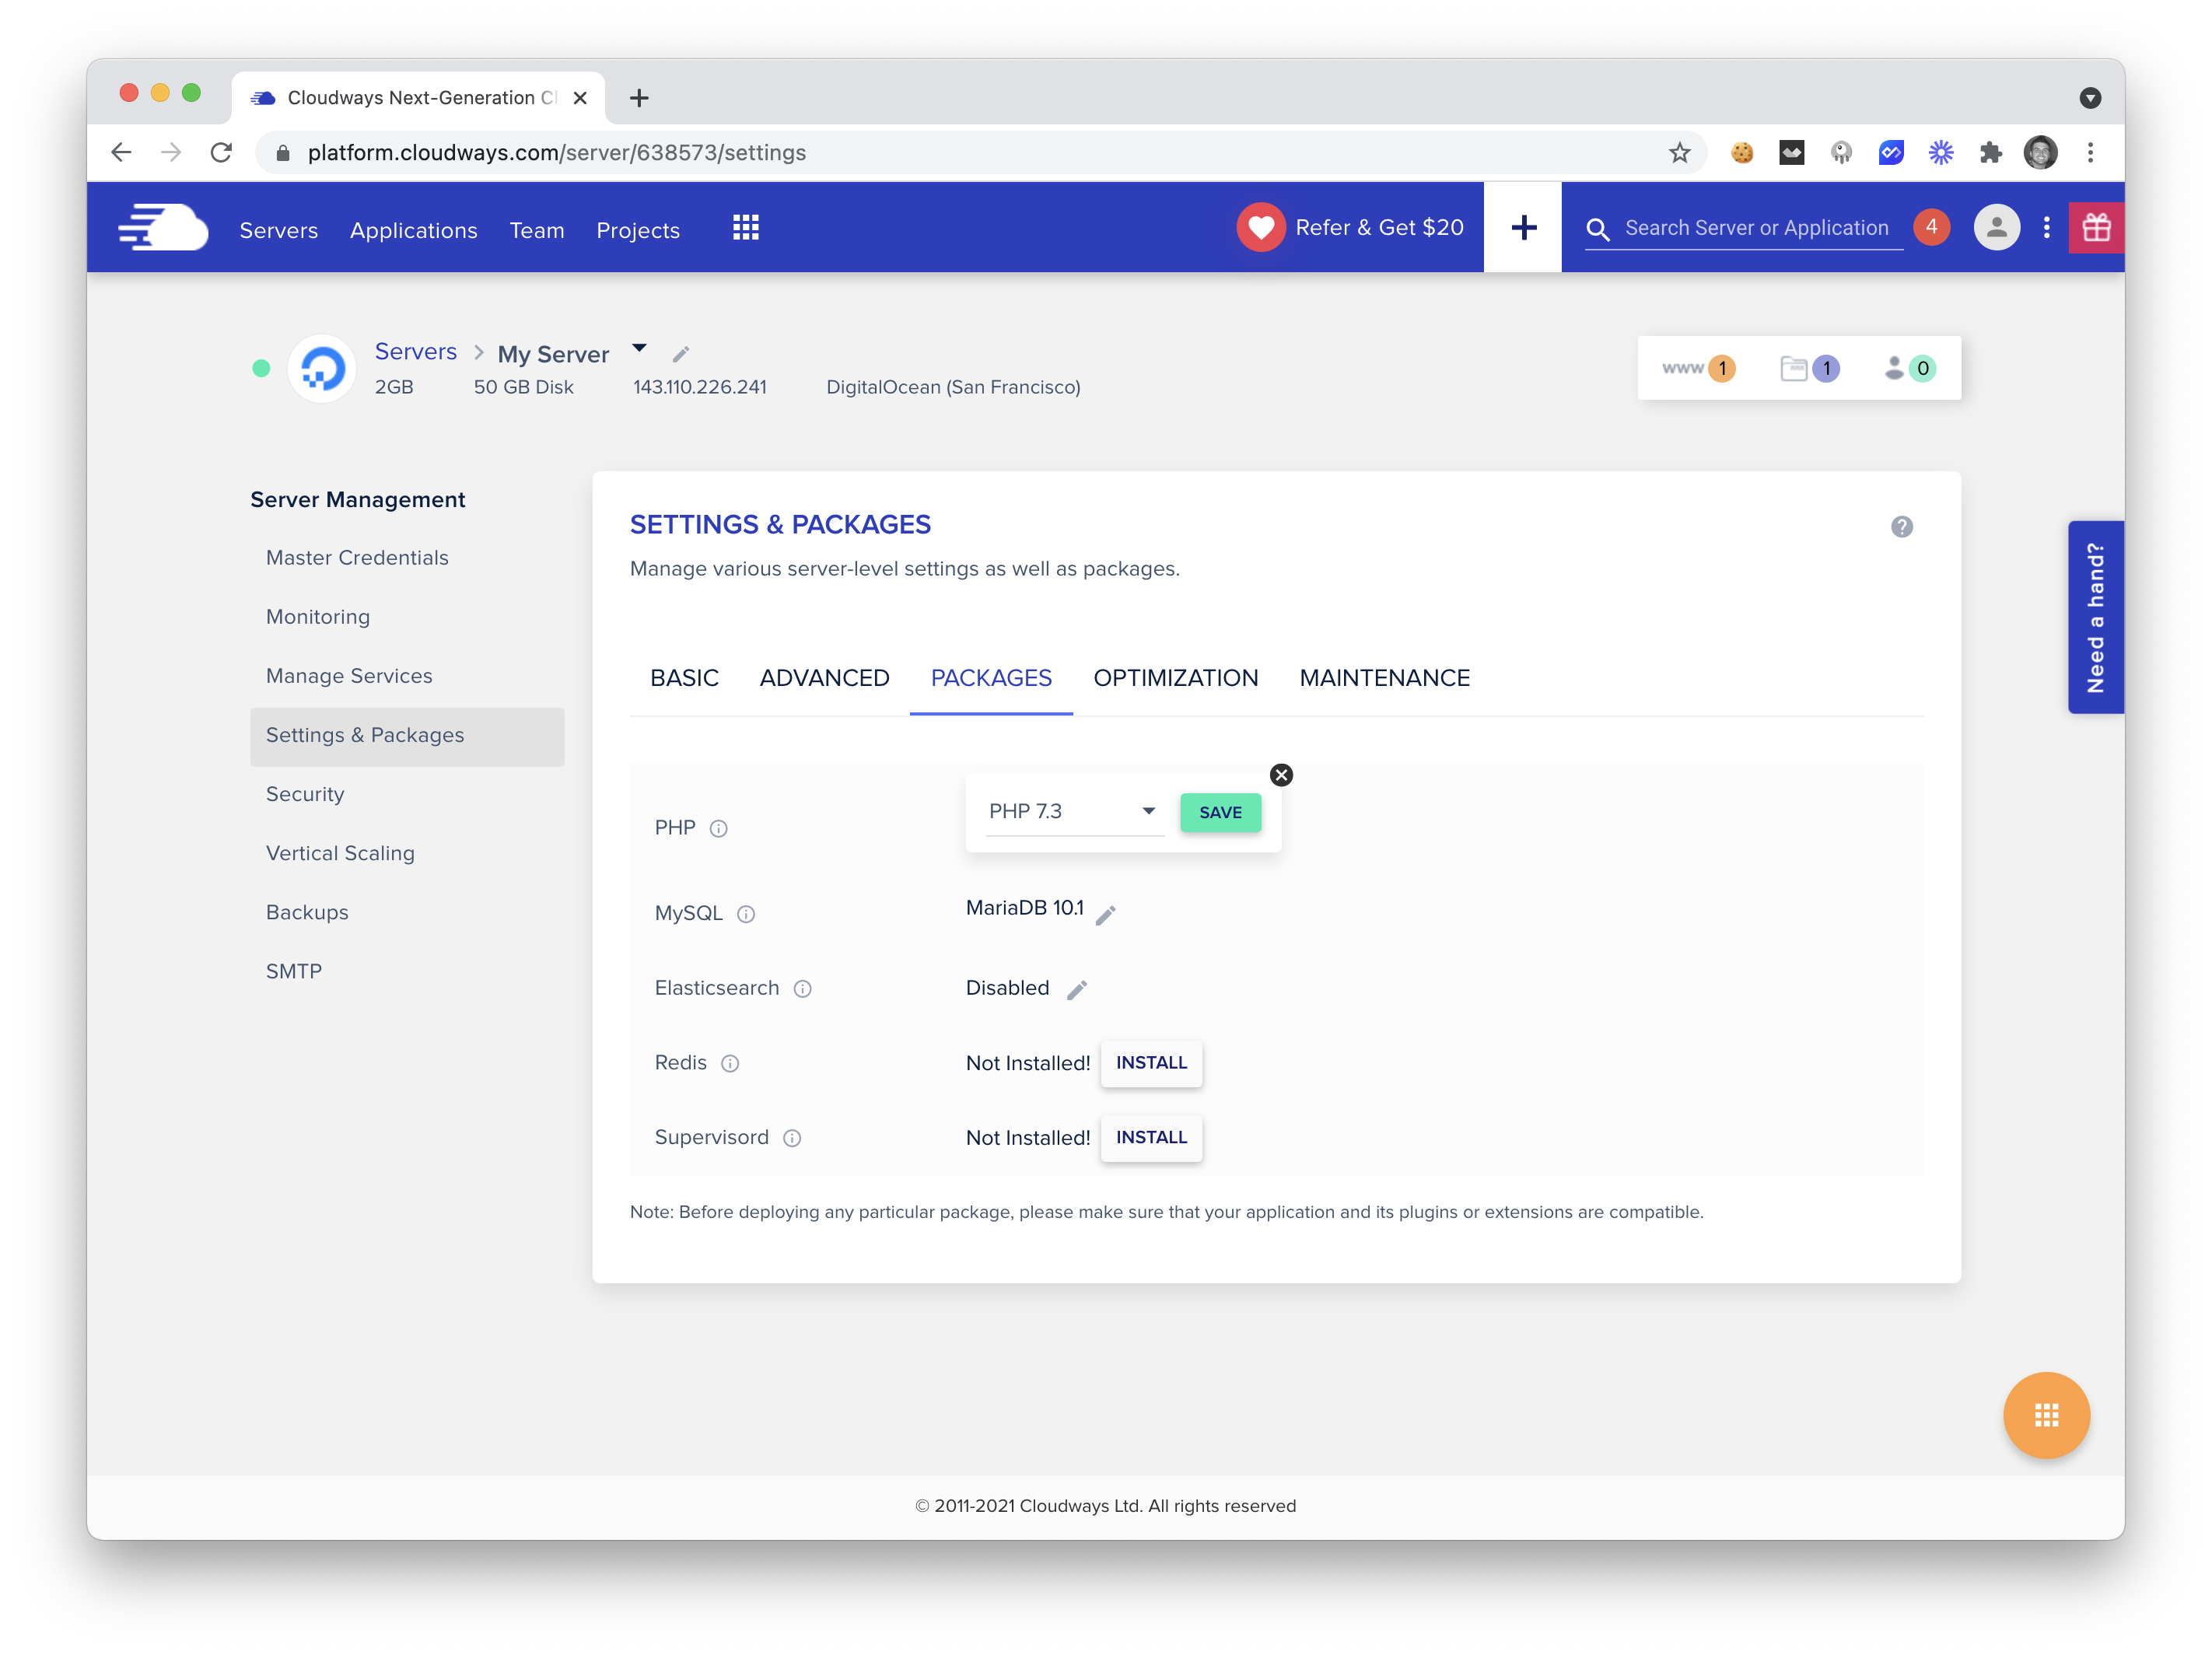
After those two packages have been updated, we can move on to the next step.
🧪 Testing a Deployment
From the command line of your local project, run the following command:
dep deploy
After running your deployment, you'll probably see an error like the following.
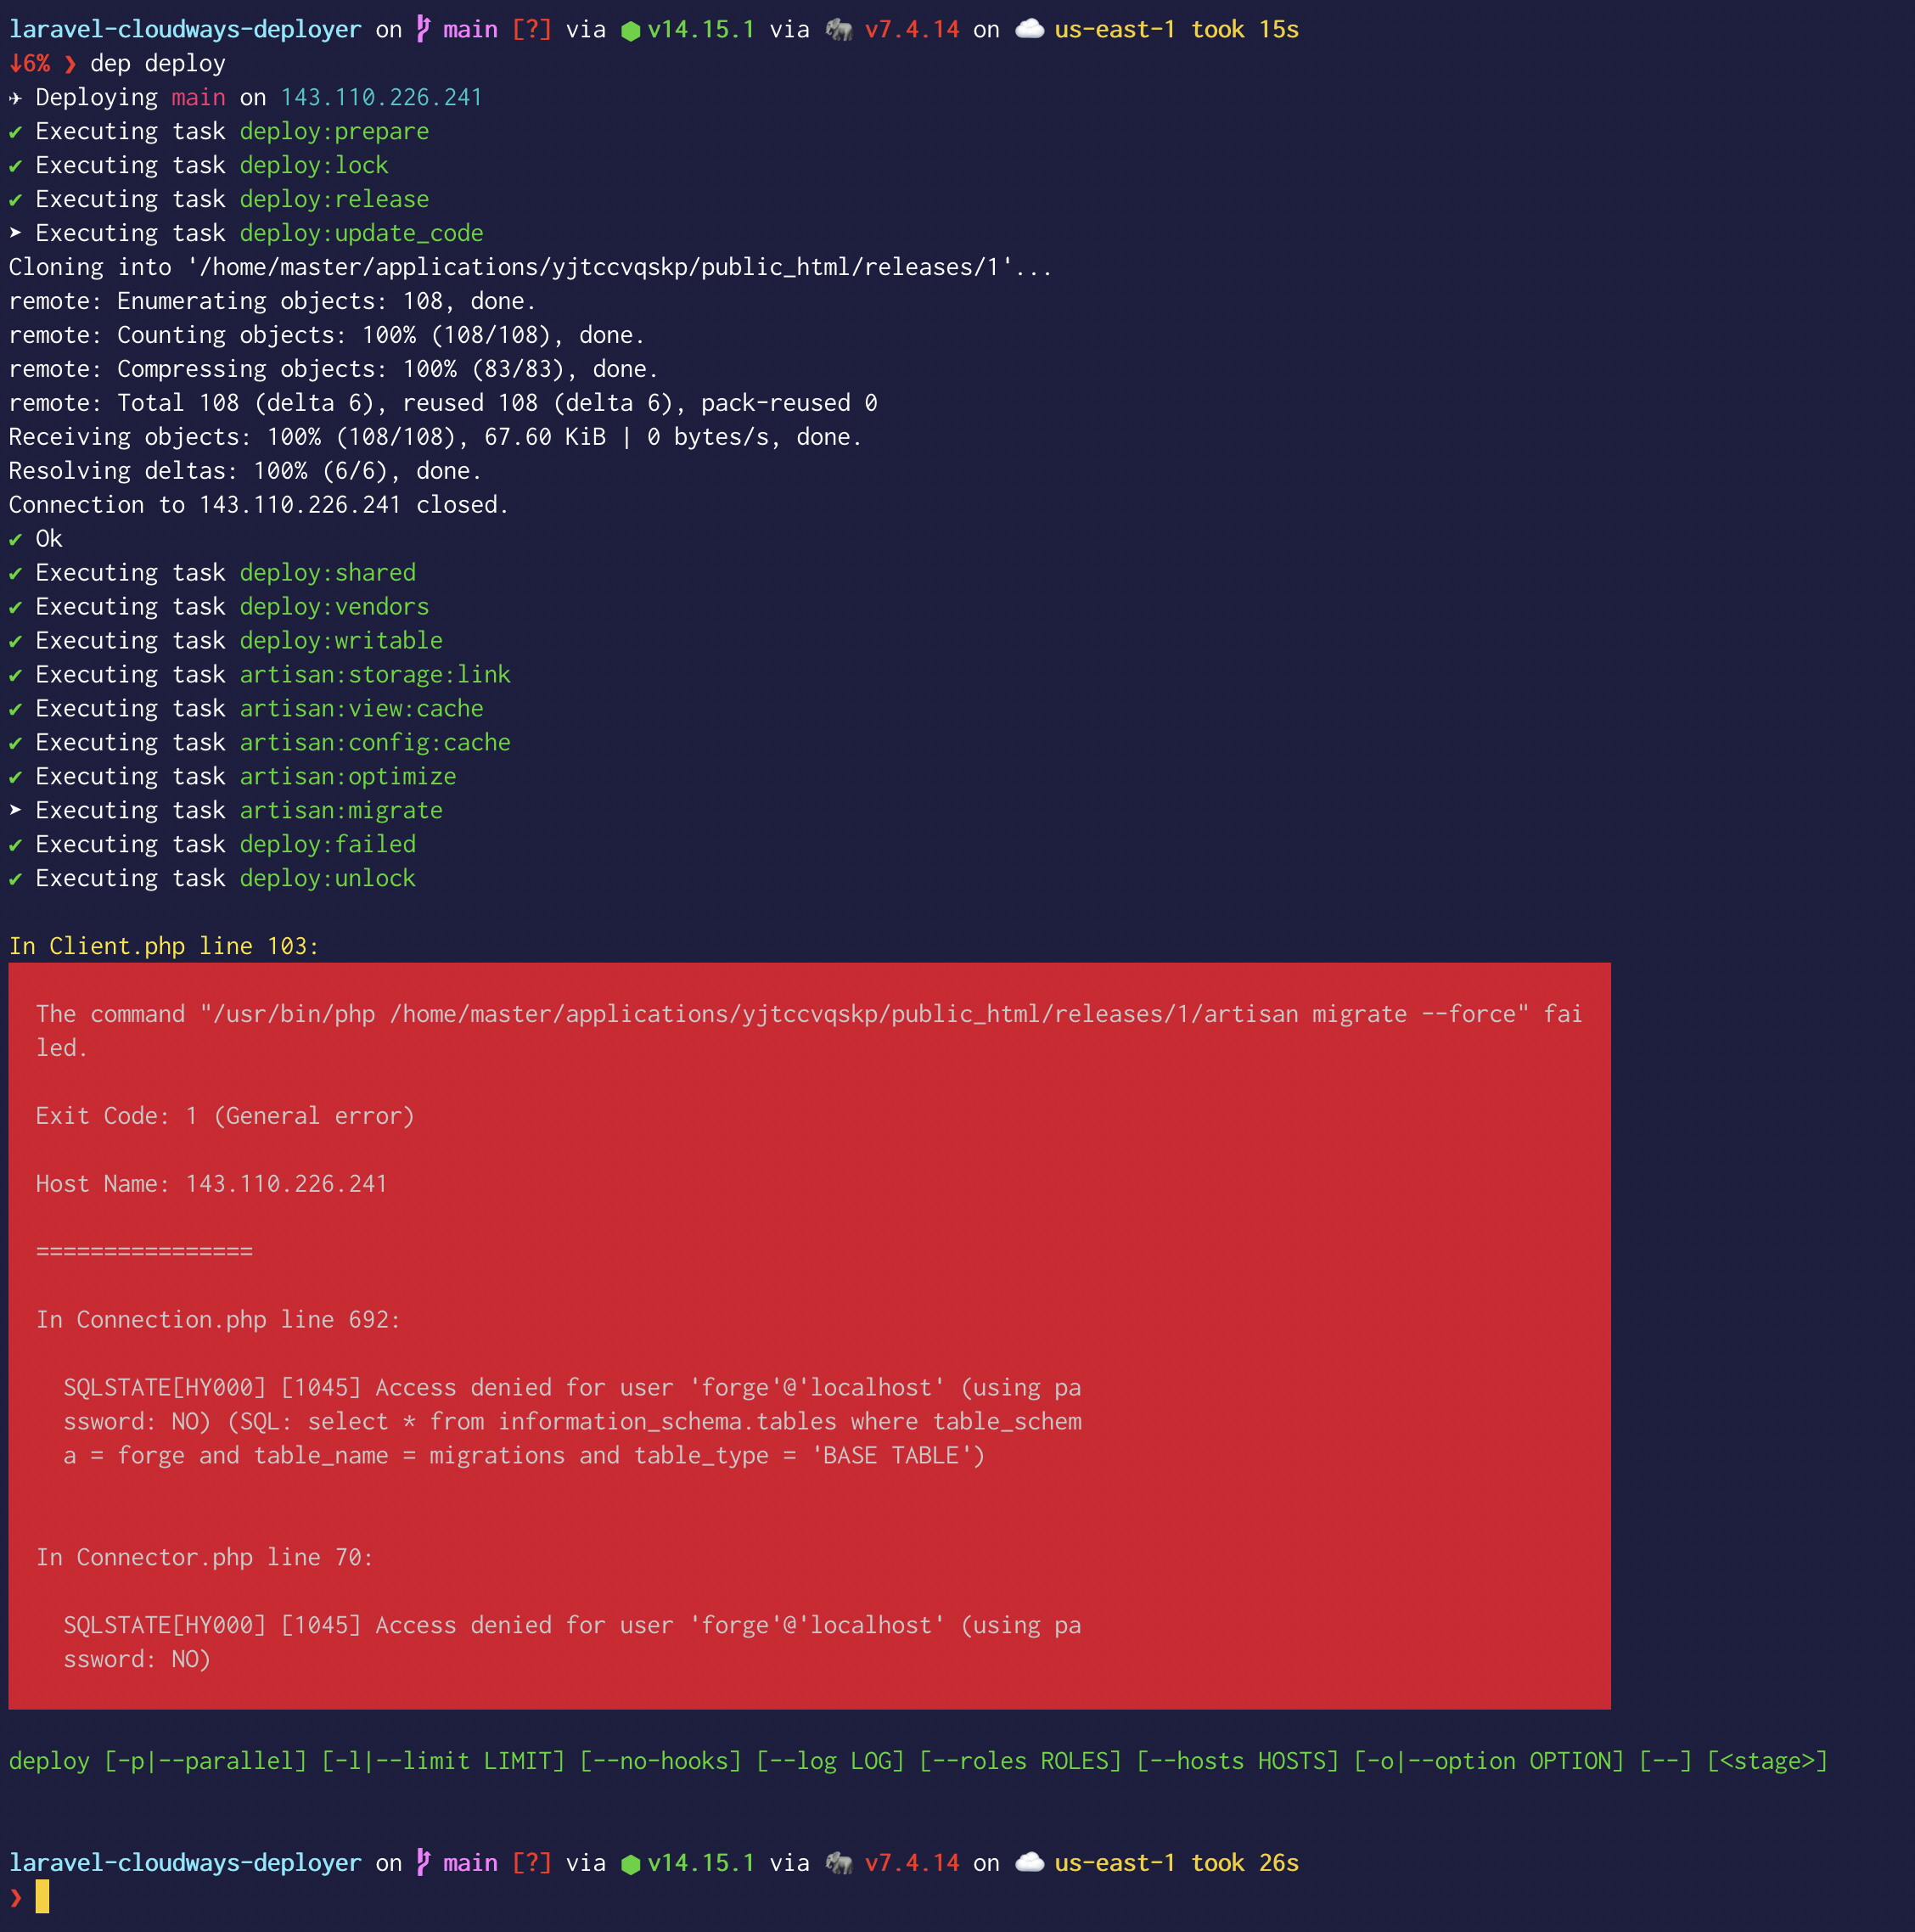
This error means that we do not have our correct shared folders set up just yet.
If you take a look at the documentation, they show you some of the new files that get set up during your first deployment:
├── .dep
├── current -> releases/1
├── releases
│   └── 1
└── shared
    ├── .env
    └── storage
As you can see, we have a new file containing our shared assets, including our .env and our storage directory. We need to move our default Laravel app .env and storage folders over to our shared folder.
📁 Setting up the Shared Folder
For our deployments to succeed, we need to set up our shared folder correctly.
We can do that by SSH'ing into our server and then running the following commands:
cd applications/yjtccvqskp/public_html
rm shared/.env && rm -rf shared/storage
mv .env shared/.env && mv storage shared/storage
Make sure to change the name of your FOLDER in place of yjtccvqskp above.
There are just a few more server configs that we need to make in our Cloudways Dashboard. Let's cover those next.
⚙️ Final Server Configurations
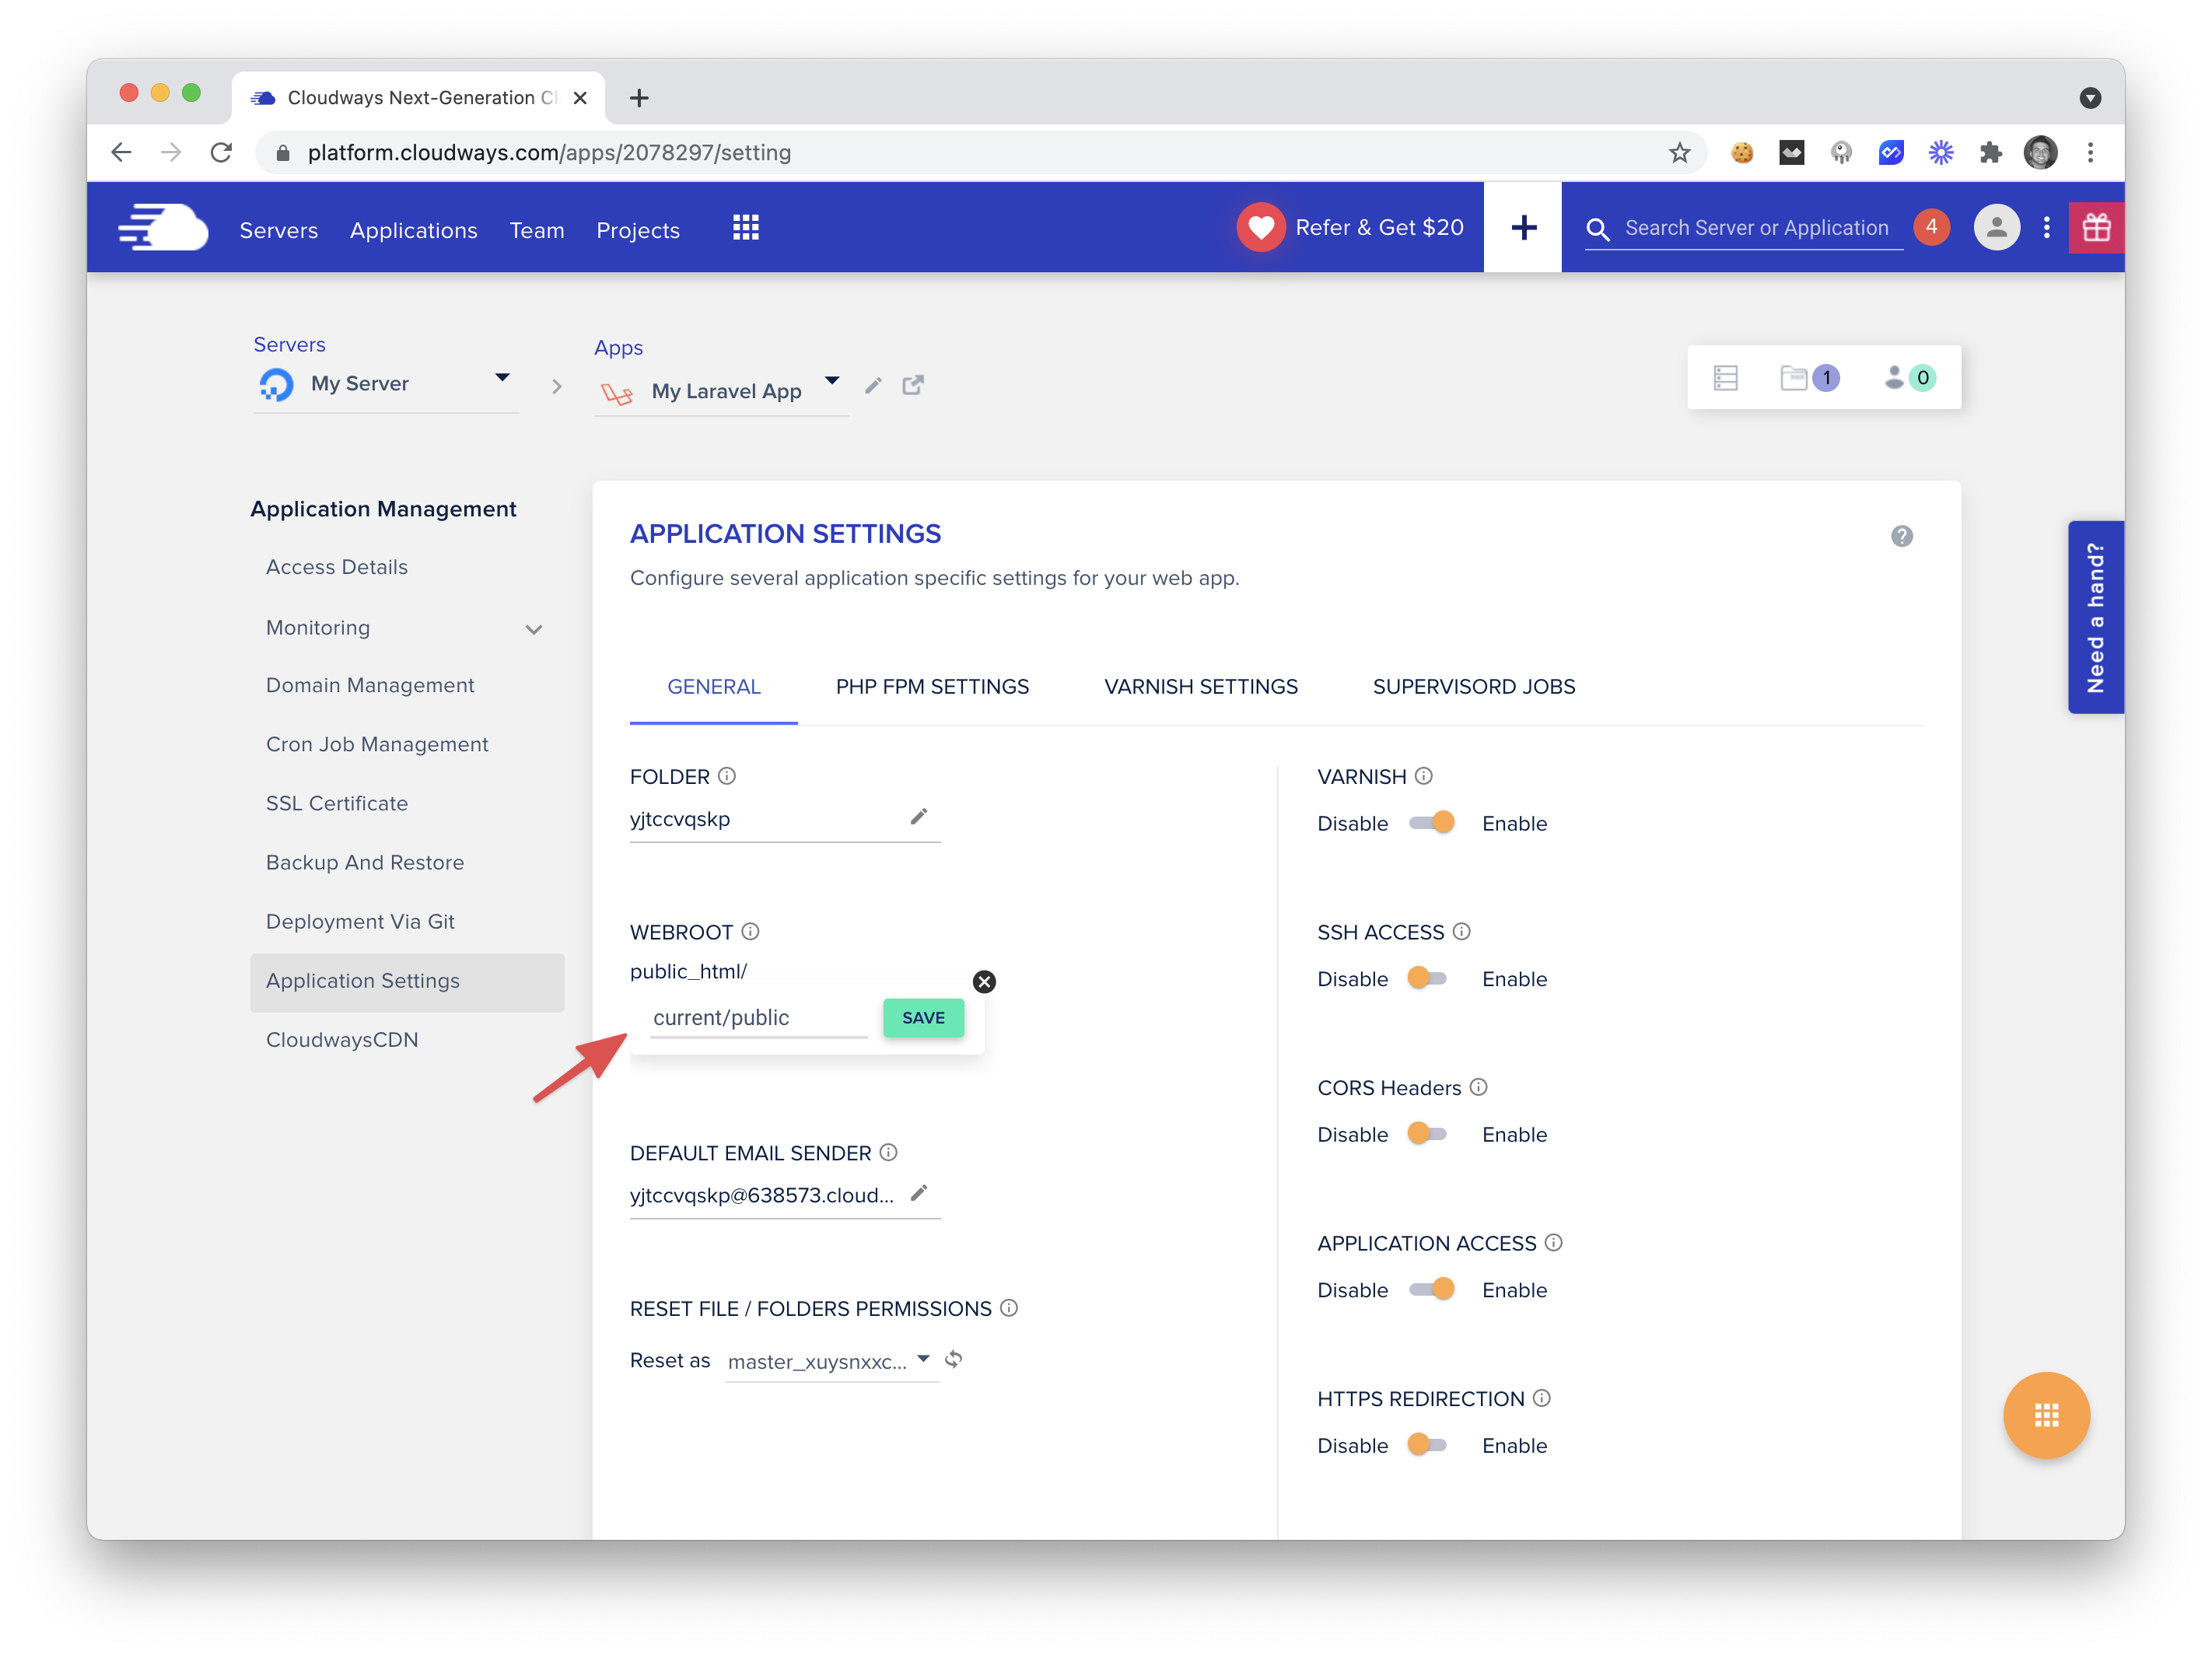
Our application is no longer going to live inside of our public_html/public folder. Instead, it will live inside of pulic_html/current/public (current is a symlink to our latest deployment release). Since we want to change that location, we need to tell our server to point to this folder. Inside of the Application Settings tab of your application details, you can easily change this location:
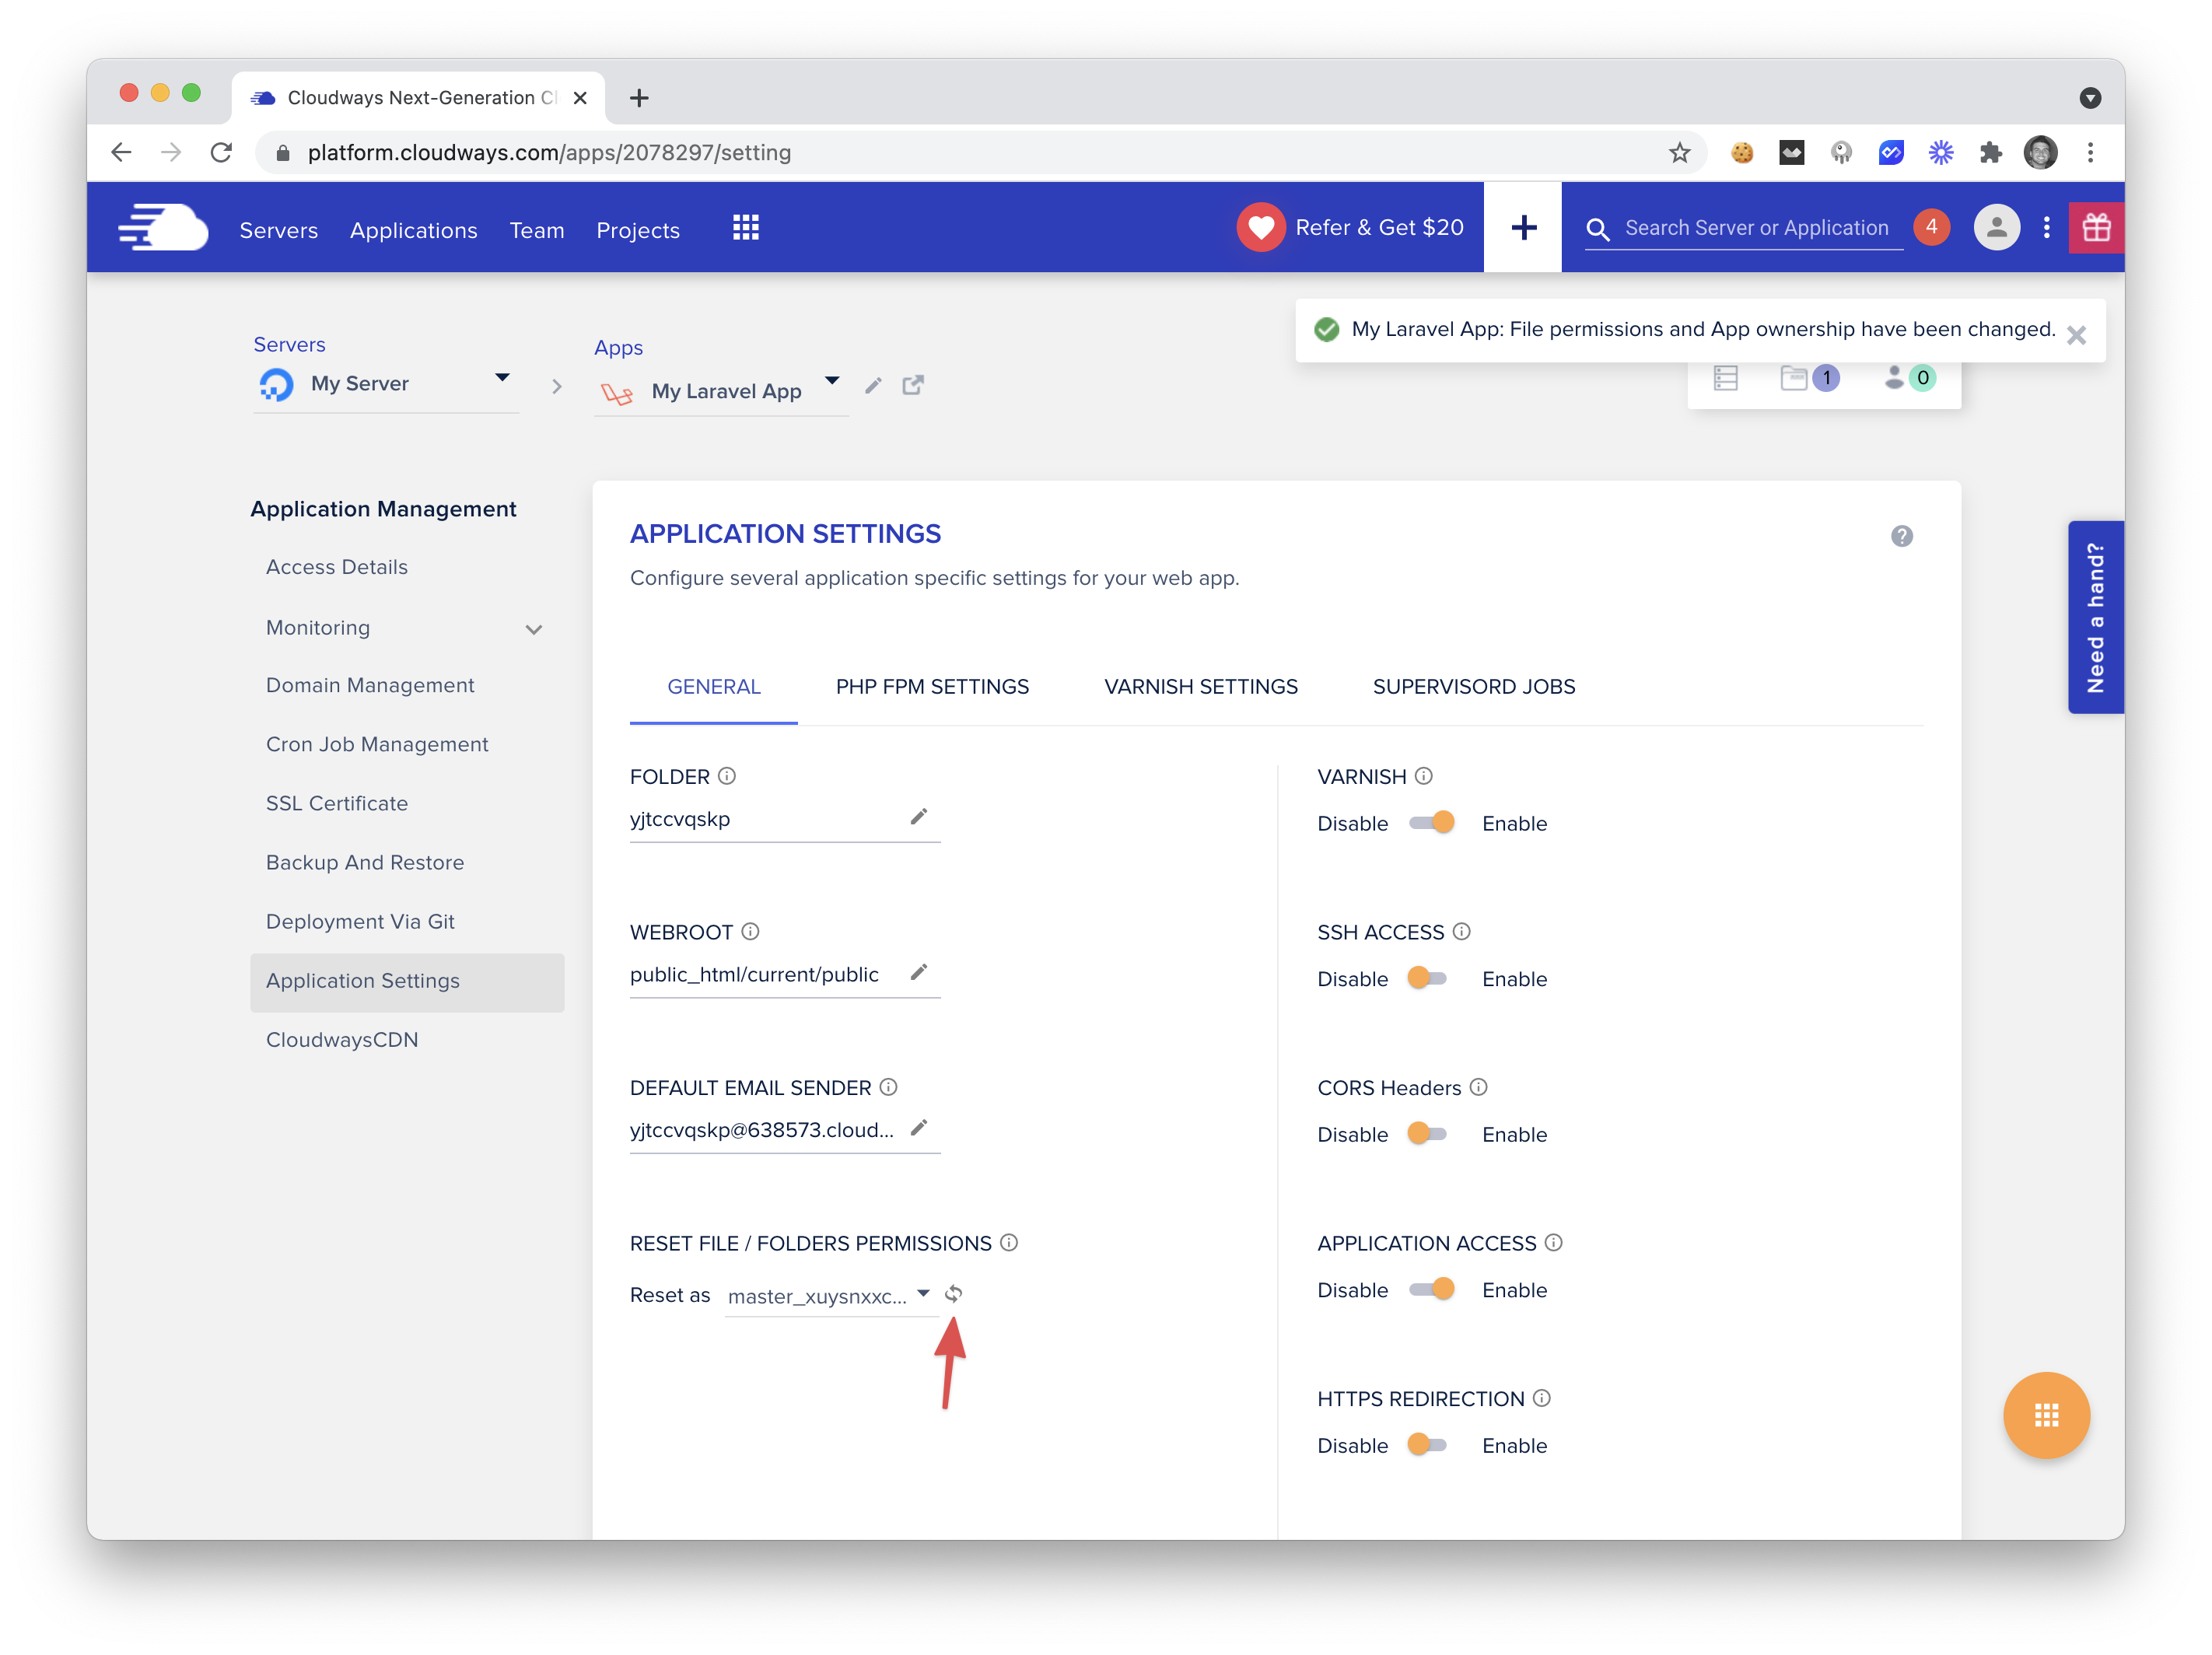
We also need to change the permissions of all the files/folders in our web root to be the same user that we use to SSH into the server. We can do that on the same page. Make sure that the user has the master_ prefix and click the refresh button.
🚀 Deploying Your App
Now, we can run the following command:
dep deploy
And if everything went well, we should see the following output.

That's it. Now, when we want to deploy a change from our master branch, we can run dep deploy 🚀.
🖥 Testing it Out
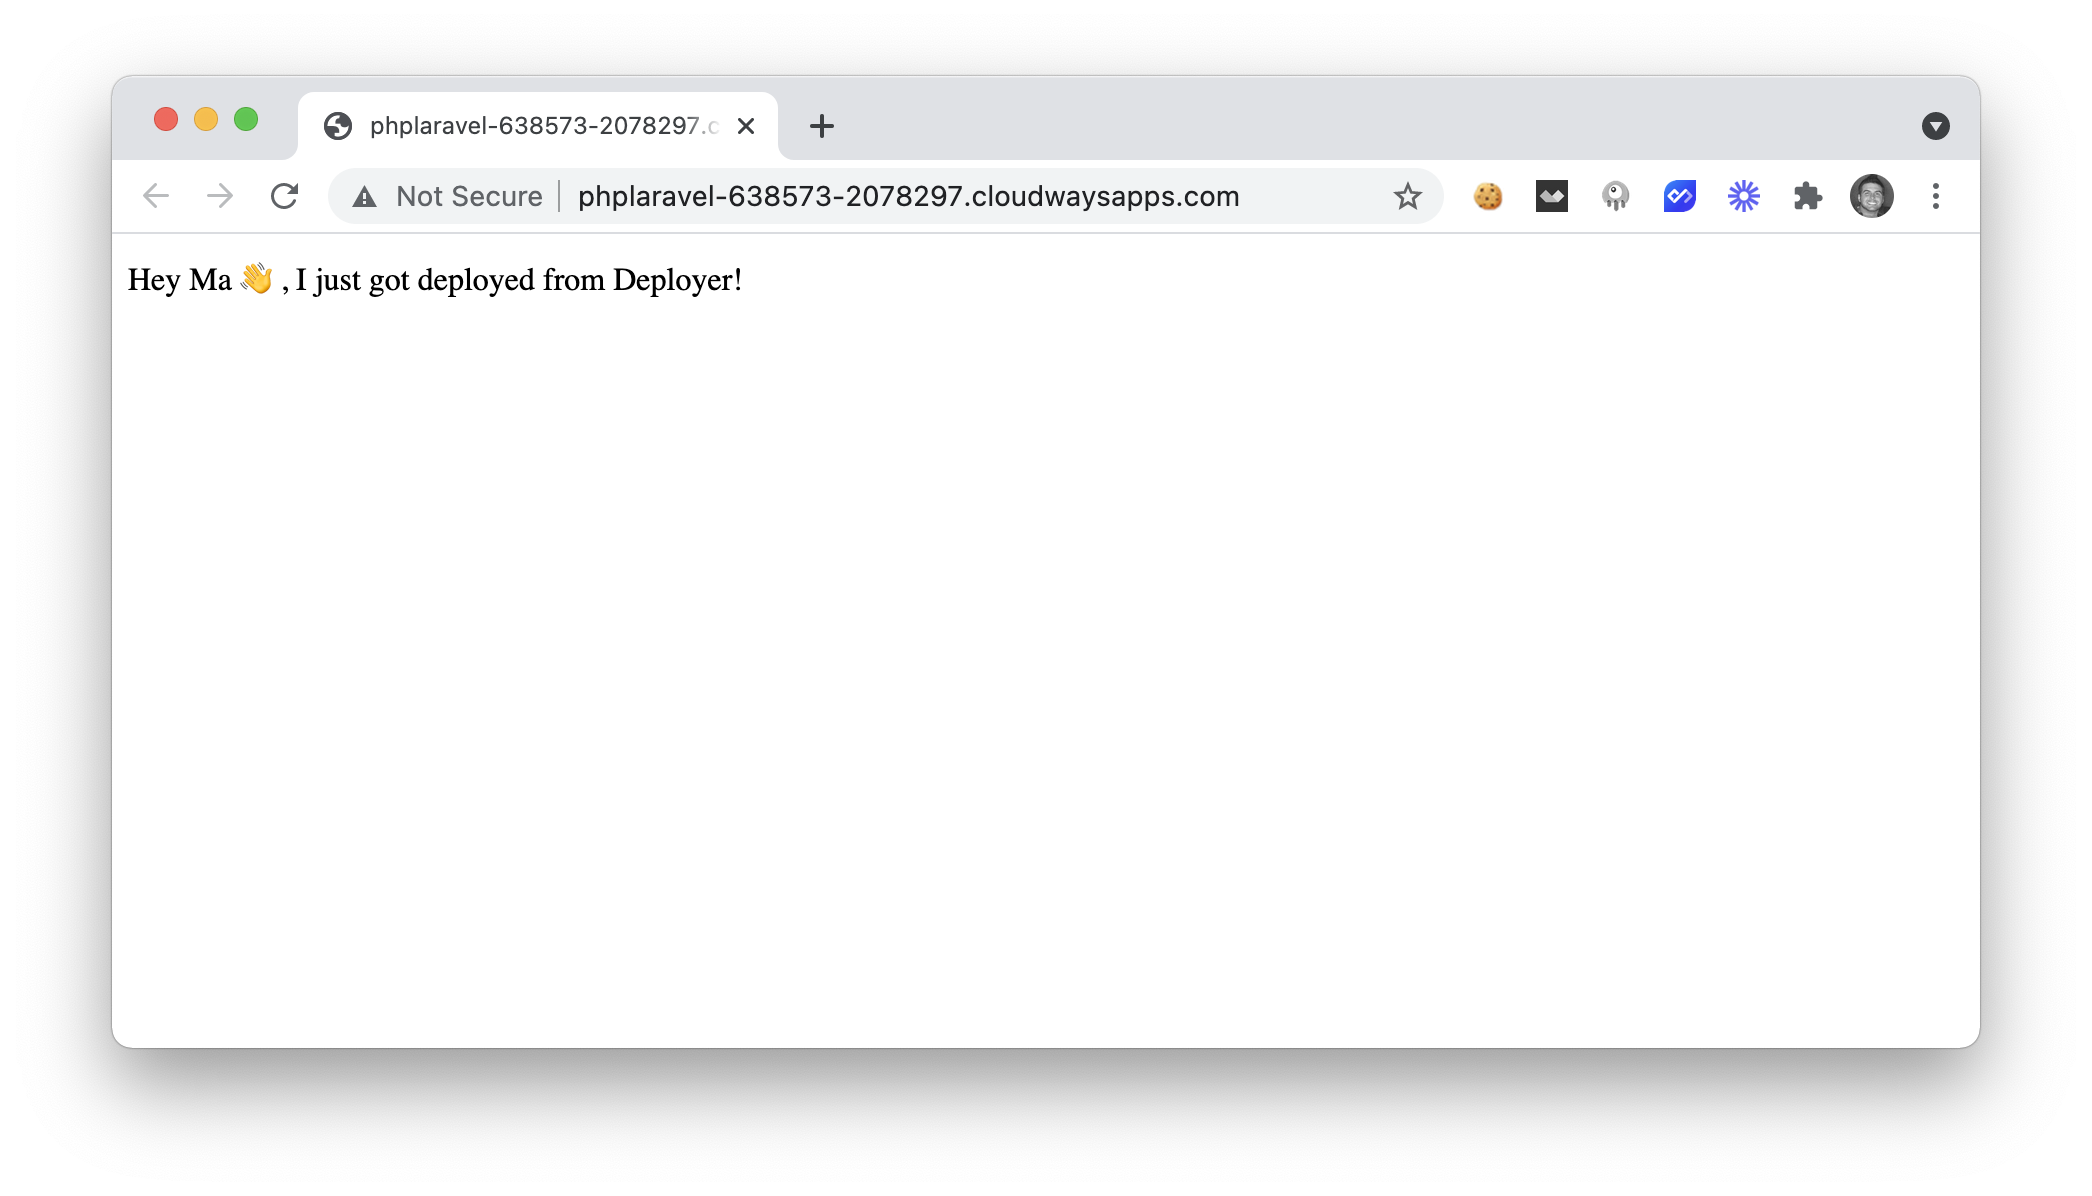
If we want to test it out, we can modify the home route inside of our routes/web.php file:
Route::get('/', function () {
    echo 'Hey Ma 👋, I just got deployed from Deployer!';
});
Now, we can push those changes to our main branch and then run the following command: dep deploy.
If we were to visit our application from the live URL, we would see the following screen.
🔐 Working with a Private Repo
In the previous example, we had set up a deployment process from a Public repo, so there was no need to use the SSH git URL. The odds are that you will want to deploy a private repo as opposed to a public repo.
We can fix this by switching our Repo URL from this:
// Project repository
set('repository', 'https://github.com/thedevdojo/laravel-cloudways-deployer.git');
To this:
// Project repository
set('repository', '[email protected]:thedevdojo/laravel-cloudways-deployer.git');
If you try and do a deployment with this URL, you will probably get a permission issue because we need to add our Server SSH key to our Github settings. We can easily create this by SSH'ing into our server and then running the following command:
ssh-keygen
Go ahead and just press Enter for each of the prompts, leaving them empty.

After that, we can print out the contents of our newly created SSH key.
cat /home/master/.ssh/id_rsa.pub
The contents of that file will look similar to the following:
ssh-rsa AAAAB3NzaC1yc2EAAAADAQABAAABAQDC+CGt1vWFqbBVLeAyFhZkiP6WtBwtk7//EzmkJ2UCQnSVfcJW52h2HxH5KEnO6/PAAY6nYorT0iCUiCk1v9Td0GPQH9lmZi/wmqo68K6PftSvYY09k6W7A3lOcoHIhtx6eJNaM7ZtC82T2DiEclkFIt6LZRhH9aAMJ13IIwQ9ThwnkUVKkxWjuVqHPthjiWpTBGFQAg5xoM8gFLs/LvWUhLZ7I61Nfpuj+Ztgr/P83PF6ED0FaJY7SM54pl8Awp7p0Q3SrheafctGJbH7+niVr9......
We can navigate to our Github Settings->SSH and GPG Keys->New SSH Key and enter in our SSH key along with a label (this label is just for you to remember where this SSH key belongs)
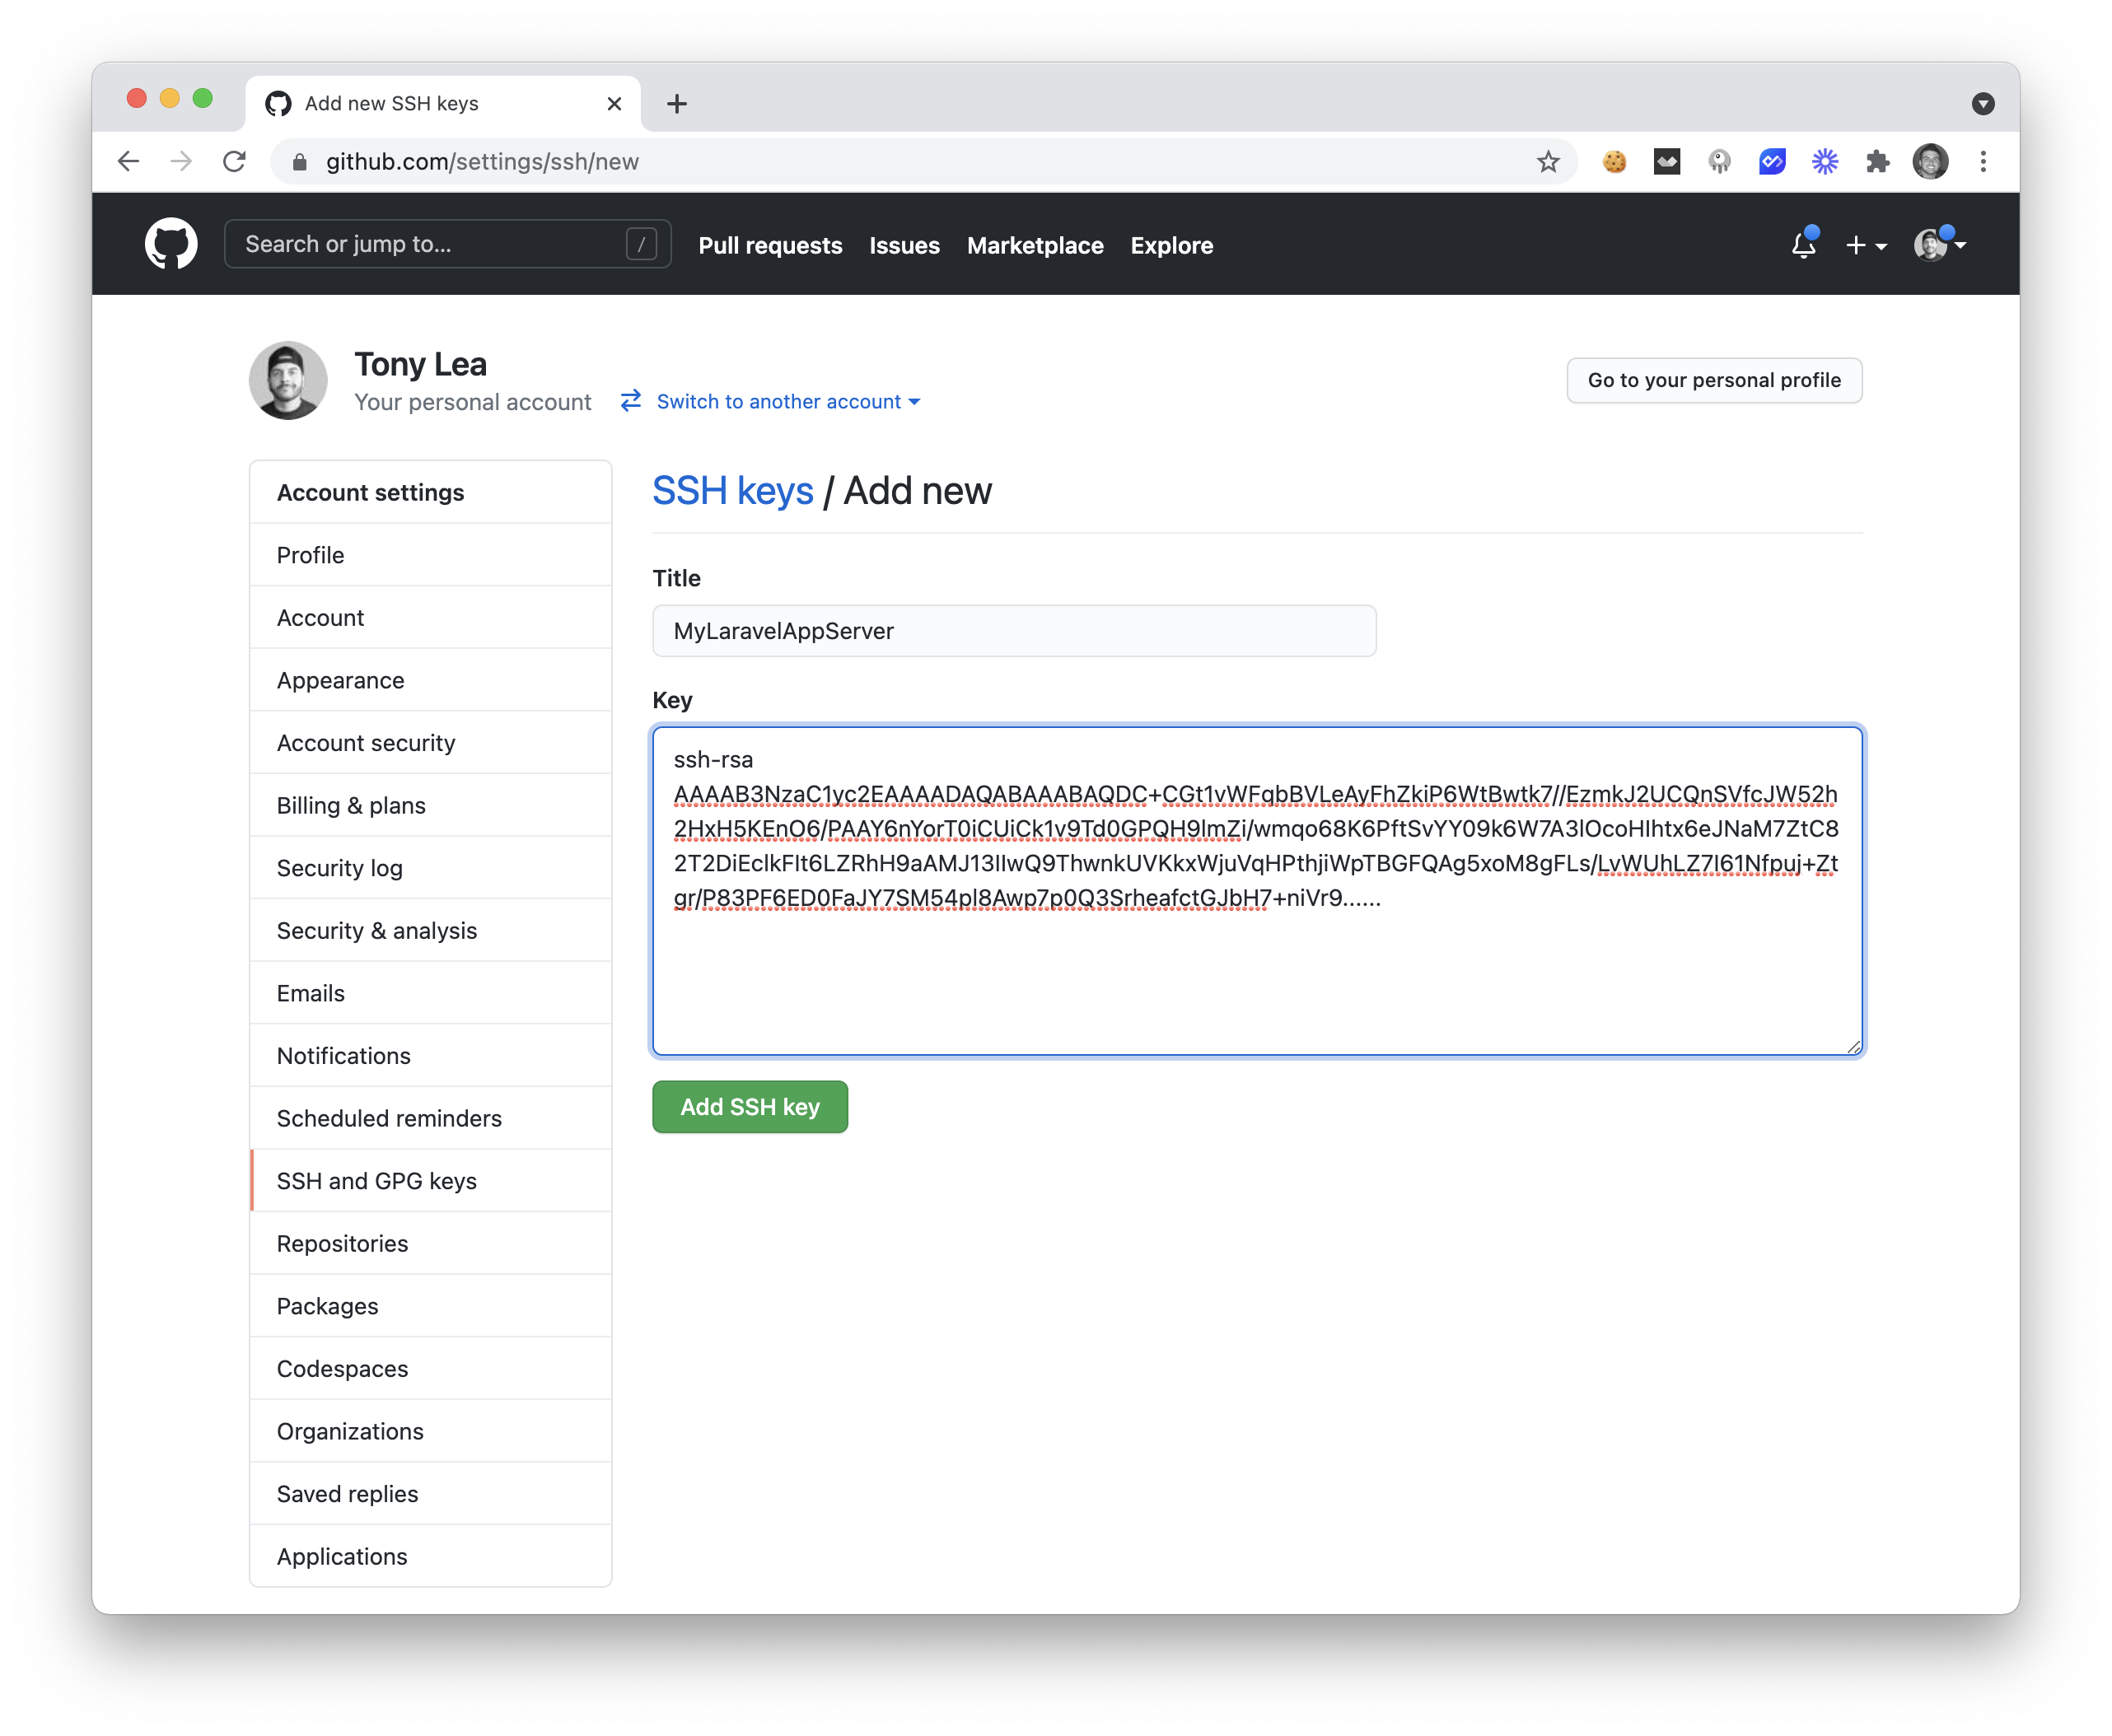
Go ahead and click save, and you are good to roll 🎲. Now, you can do another dep deploy from your project root, and you'll now be able to deploy your private project to your new Cloudways server.
🪛 Troubleshooting
While setting up your deployment process using Deployer and Cloudways, you may run into some common issues. Here is a quick list of quick solutions.
-
If you get a message that the
currentfolder already exists, you can ssh into your server and remove it. The symlink will be re-created on the first deployment. -
If you get a database error, make sure that the correct database credentials are stored inside of your
shared/.envfile. -
If you do not see your updates change immediately after a new deployment, make sure to Restart PHP-FPM in your Server->Manage Services section.
🍿 Watch the Video Tutorial
If you'd rather watch a video tutorial on this process. I've got you covered 😉. Below is a 15 minute video tutorial showing you how to deploy your Laravel app on Cloudways 👍.
🏁 Conclusion
The deployment process of your application is important for getting out fixes and new features quickly. Using Deployer along with Cloudways allows us to accomplish this easily.
Want to earn a $50 hosting credit with Cloudways? Click here to learn more.
I hope this article helps you learn more about Deployer and Cloudways. Happy coding and happy deploying 🚀.