Most tutorials for installing PHP on Windows involves installing MAMP or XAMP, which are great solutions; however, sometimes you may want a solution to install PHP by itself. If so, this tutorial is for you. In this tutorial I'll show you how easy it is to install PHP on Windows in 3 steps.
1. Download and Install PHP
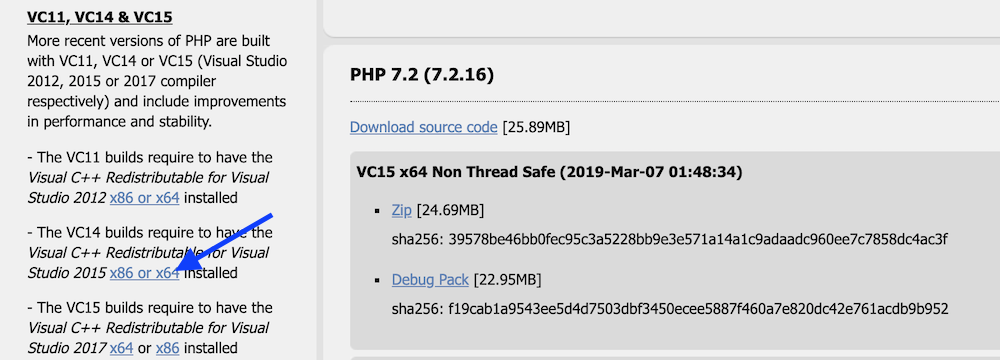
First you will need to download any desired version of PHP at https://windows.php.net/download, in my case I will download the zip file for 7.2

After downloading, unzip the file and store the contents in a new folder located at C:\PHP7
Before moving on to the next step, you will need to install one more dependency, which is Visual C++ Redistributable. This download link is on the same page, but it's located on the left sidebar, see screenshot below.

In most cases the Visual C++ Redistributable 2015 version will do just fine. It's a pretty small file, so downloading and installing is really quick.
2. Rename the PHP.ini file
Next, we need to open up the PHP folder located at c:\PHP7 and find the file named php.ini-development and rename it to php.ini. Ok, on to the final step.
3. Add PHP Environment Variable
Finally, we need to let Windows know where to find our PHP installation. We can do this with the following steps:
- Open the Control Panel -> System and Security Settings -> System
- Click on Advanced system settings
- Click on the Environment Variables button
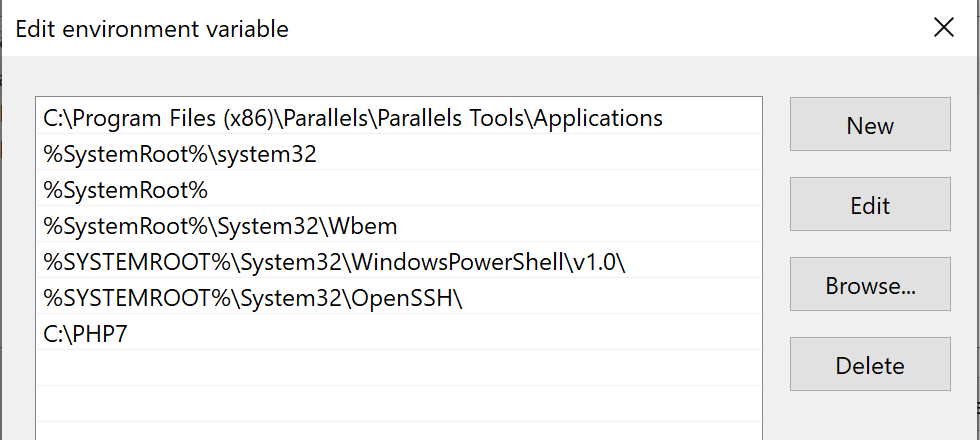
- Under System Variables select the Path variable and click the `Edit` button
- In the new Popup click the `New` button and add a new row with C:\PHP7
- Click Ok, Ok, and Ok. You've now added the PHP Environment variable

Now PHP has been installed. Read on to learn how you can confirm if it's installed.
To confirm PHP is installed on your machine open up Command Prompt and enter Powershell by typing:
> powershellNow that we are in Powershell, we can check if PHP is installed by running:
> php -vand you should see an output like the following:

It's as easy as that :) Now you can enjoy writing some PHP code.
Bonus: to start a PHP server in any current directory you can run the following command:
> php -S localhost:8000Now, you can visit localhost:8000 in your browser to serve up any .php files from that directory.
