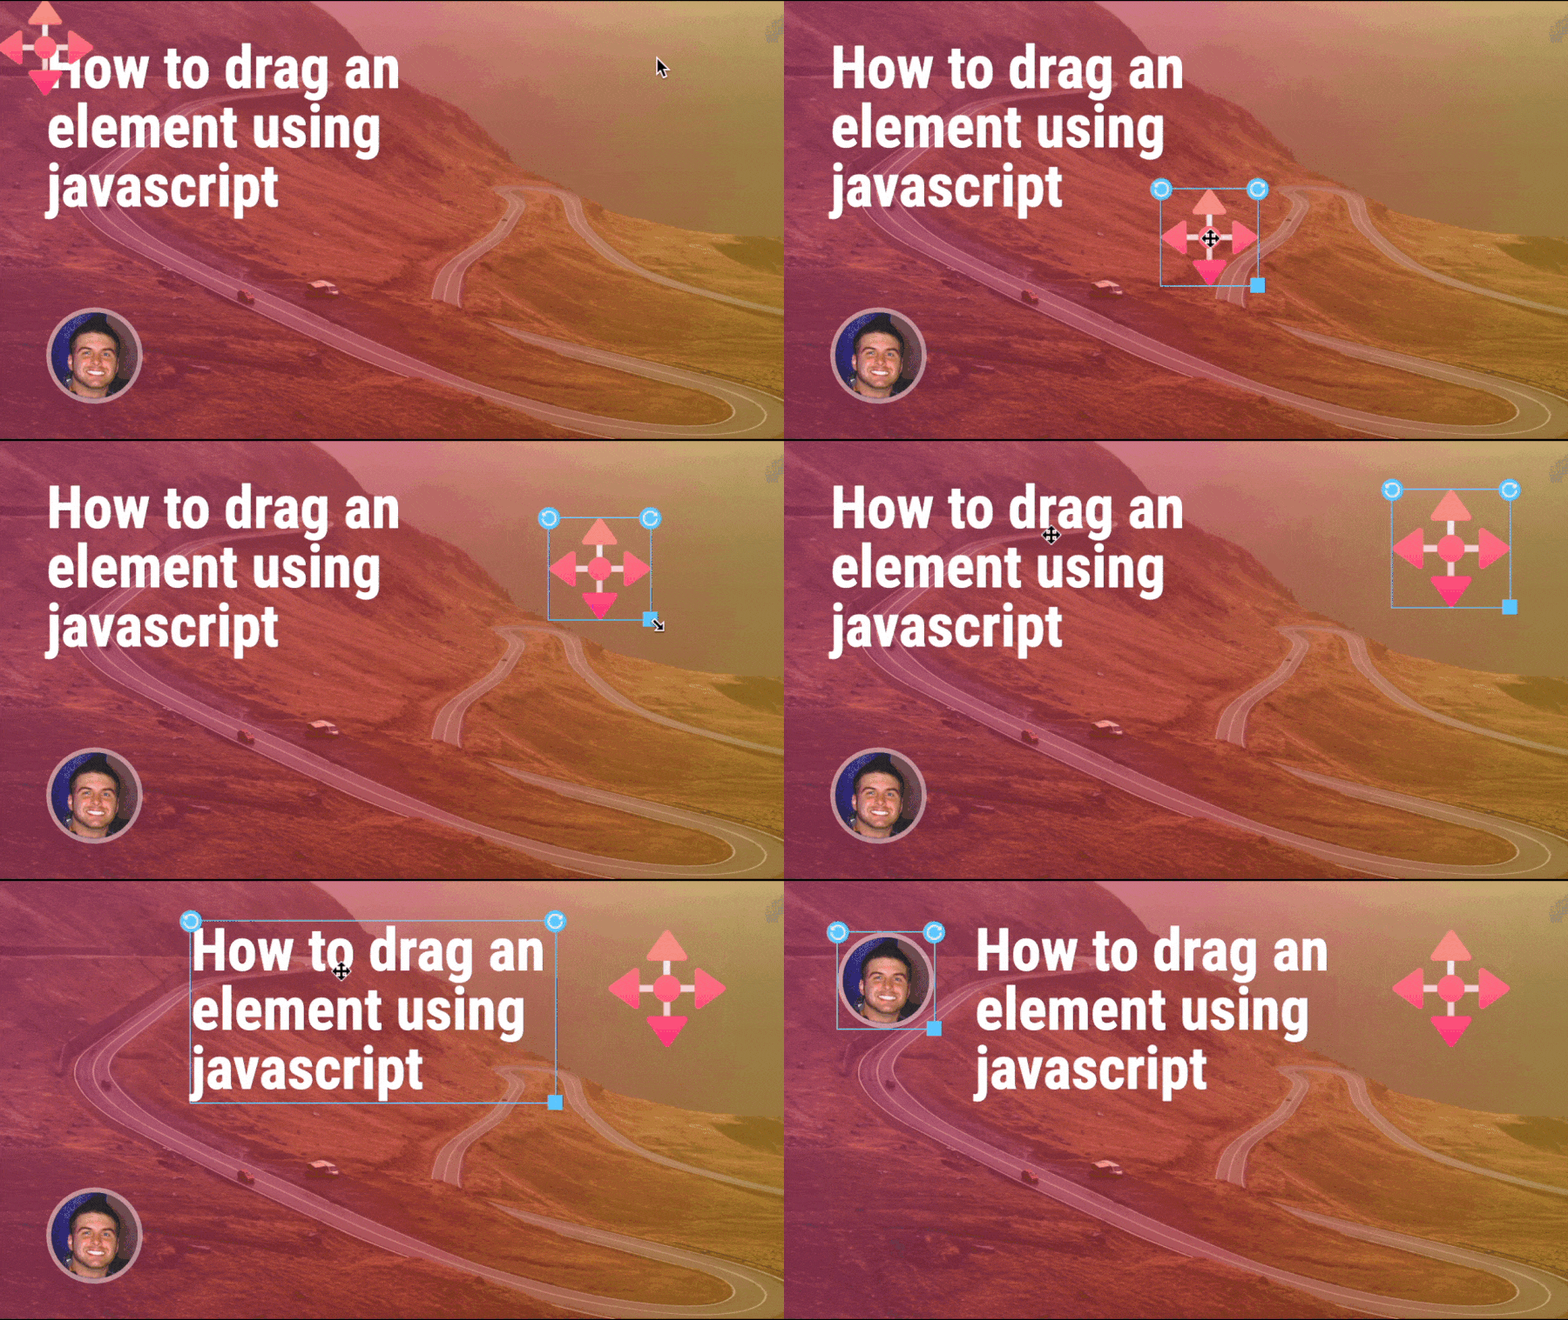
While building out a new image generator, I needed a way to drag and move HTML elements inside of another element. Take a look at what I was building below:

This is actually the new Post Image Generator that you can use here on the DevDojo to generate some nice looking cover images 😉.
Let's cover how we can easily add this functionality to any HTML element on our page.
The container and box
In order to demonstrate how this works, we will first need to add a container with a relative position, and an absolute positioned box that we want to move inside the container.
Here is the HTML for our example:
<div class="container">
    <div class="box"></div>
</div>
And here is the simple CSS for our example:
.container{
    width:640px;
    height:360px;
    background:#ff0000;
    position:relative;
    overflow:hidden;
}

.container .box{
    width:50px;
    height:50px;
    left:50px;
    top:50px;
    position:absolute;
    background:#0000ff;
    cursor:move;
}
Take a look at the codepen example below:
Of course this doesn't do much right now because we need to add the functionality to move the box inside our container. Let's do that next.
Adding the drag functionality
I think it would be helpful if I show you the full javascript code to apply this functionality, and then we will break it apart in the next section.
Here is the javascript code you can use to move the .box element around inside of the .container element:
el = document.querySelector('.box');
let newPosX = 0, newPosY = 0, startPosX = 0, startPosY = 0;

// when the user clicks down on the element
el.addEventListener('mousedown', function(e){
    e.preventDefault();

    // get the starting position of the cursor
    startPosX = e.clientX;
    startPosY = e.clientY;

    document.addEventListener('mousemove', mouseMove);

    document.addEventListener('mouseup', function(){
        document.removeEventListener('mousemove', mouseMove);
    });

});


function mouseMove(e) {
    // calculate the new position
    newPosX = startPosX - e.clientX;
    newPosY = startPosY - e.clientY;

    // with each move we also want to update the start X and Y
    startPosX = e.clientX;
    startPosY = e.clientY;

    // set the element's new position:
    el.style.top = (el.offsetTop - newPosY) + "px";
    el.style.left = (el.offsetLeft - newPosX) + "px";
}
Take a look at the functionality of this code from the example codepen below:
Breaking it down
Let's break this code down a little bit more so that way you can understand it. By understanding this code you will be able to modify it easier to fit your needs.
First, we need to get our .box element and then we are creating four new variables for newPosX, newPosY, startPosX, and startPosY. We need variables to store our new x/y position as the cursor moves and we also need the starting x/y position of the cursor before it moves.
el = document.querySelector('.box');
let newPosX = 0, newPosY = 0, startPosX = 0, startPosY = 0;
Second, we are creating an event listener when the user clicks and holds the mouse down on the .box element.
// when the user clicks down on the element
el.addEventListener('mousedown', function(e){
    e.preventDefault();

    // get the starting position of the cursor
    startPosX = e.clientX;
    startPosY = e.clientY;

    document.addEventListener('mousemove', mouseMove);

    document.addEventListener('mouseup', function(){
        document.removeEventListener('mousemove', mouseMove);
    });

});
Inside this function we are preventing any default functionality (if this were a link or a submit button). Next we store our starting position and add an event listener to trigger when the mouse is moved. We also remove the mousemove event if the user stops holding down the mouse, triggering the mouseup event.
Finally, inside of our mouseMove function we calculate our new position by subtracting the current mouse position from the starting position. After doing that we need to store the new starting position for our cursor for the next loop cycle. Then, we set the CSS top and left position based off of the offset and the new X and Y position.
function mouseMove(e) {
    // calculate the new position
    newPosX = startPosX - e.clientX;
    newPosY = startPosY - e.clientY;

    // with each move we also want to update the start X and Y
    startPosX = e.clientX;
    startPosY = e.clientY;

    // set the element's new position:
    el.style.top = (el.offsetTop - newPosY) + "px";
    el.style.left = (el.offsetLeft - newPosX) + "px";
}
This will result in our final output, allowing us to drag and move the .box element anywhere on the page. After we mouseup from the element, the new position will remain in tact 🙌
Here is that final codepen example again:
Conclusion
Adding simple javascript interaction to your elements is easier than you might think. So, instead of reaching for a library or a package you might want to see how you can implement the functionality yourself.
If you want to see what I've built using this functionality, be sure to write a post on the DevDojo and check out our new post image generator ✨.
