Tailwind has been gaining popularity and it's getting picked up by a lot of developers and designers. My hope is that everyone will soon know the awesomeness of this amazing library. So, in this tutorial, I want to show you the simplest way to get a quick taste of the deliciousness of TailwindCSS.
But, first, it might help to understand why you may want to use Tailwind over other CSS frameworks.
Why Tailwind
Tailwind gives you so much flexibility when designing your sites. The advantages of using Tailwind over other CSS libraries are utility classes, consistency, filesize, and so many others.
Utility Classes - With Tailwind, we have a catalog of utility classes that can help us build any type of user interface without writing a single line of CSS! As an example, we can give an element a small amount of padding by adding a class of p-1. Or, to give an element a tiny margin-right, we could use the class mr-1. These utility classes are customizable and very easy to use.
Consistency - If you've ever worked with a team on any project, you will notice that developers and designers will add custom CSS all over the place resulting in a larger file and a disorganized mess. Using Tailwind will make sure all developers are using the same classes/components to stay consistent.
Filesize - Tailwind utilizes PurgeCSS out of the box, which means the minified CSS file will only include classes you've added to your elements. Purging your CSS will result in smaller files, faster load times, better SEO, and better user experience.
Those are just among the few advantages of using Tailwind. Next, I want to show you just how easy it is to get started playing with Tailwind.
Use the CDN
The simplest way to get started using Tailwind is to include the CDN link inside your page:
<!DOCTYPE html>
<html lang="en">
<head>
    <meta charset="UTF-8">
    <meta name="viewport" content="width=device-width, initial-scale=1.0">
    <title>TailwindCSS</title>
    <link rel="stylesheet" href="https://cdnjs.cloudflare.com/ajax/libs/tailwindcss/1.5.1/tailwind.min.css">
</head>
<body>

</body>
</html>
You can find the latest CDN link at https://cdnjs.com/libraries/tailwindcss. After including the CDN link to your page, you can then start using some of the Tailwind utility classes in your elements. Here is a centered rectangle using only the utility classes.
Stylizing your elements with Tailwind is super fun!
If you want to take full advantage of more features provided by Tailwind, you will want to include Tailwind using a bundler like Webpack. Let's cover that next.
Use the Starter Kit
If you are unfamiliar with Webpack, you can check out Webpack for Newbs to learn more about it. By using Webpack, we will get a bunch of cool new features provided by Tailwind, including purging unused CSS, customizations, and plugins.
The simplest way to get started with a Webpack version of Tailwind is to use the official Tailwind Webpack Starter.
To get started, you will first clone the repo into a new folder:
git clone https://github.com/tailwindcss/playground.git tailwind
cd tailwind
Next, you'll install the npm dependencies:
npm install
And, finally boot up a local server, by running:
npm run serve
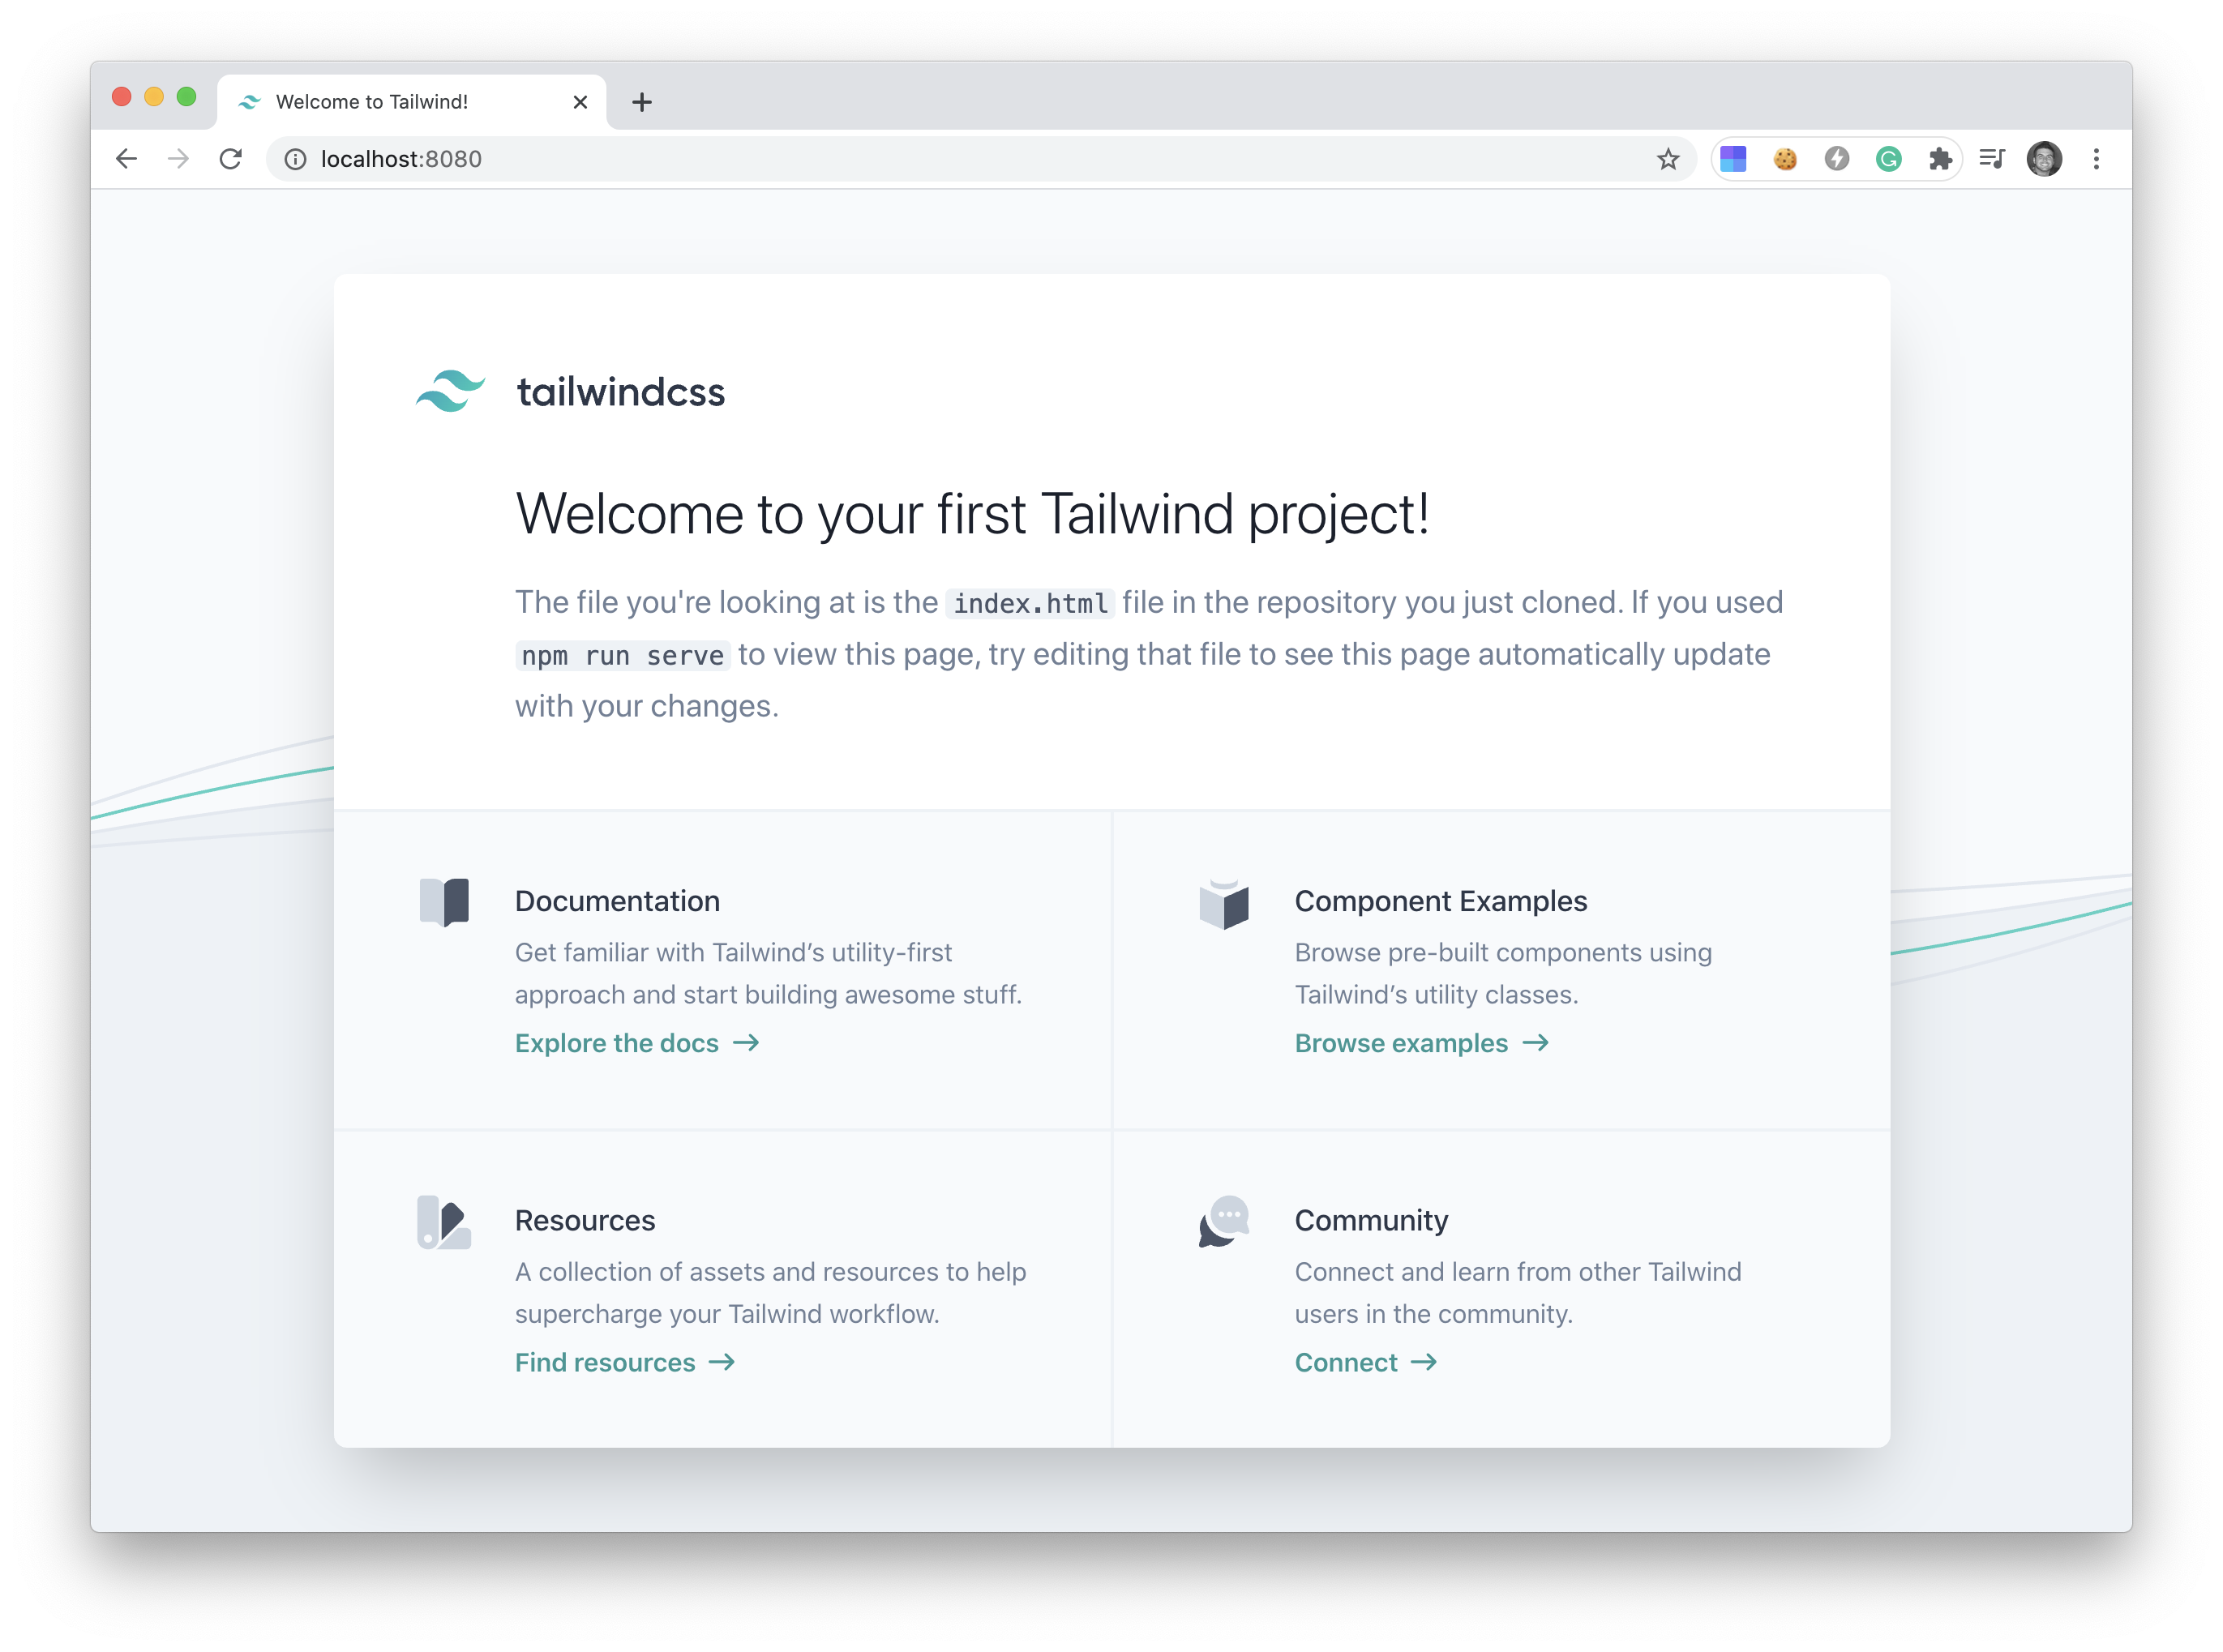
Now you will have a local version of the Tailwind Playground Starter Kit running at localhost:8080:
Inside of the Playground folder, you will find the index folder located at public/index.html. Here you will be able to start playing around with Tailwind and adding the utility classes to your HTML elements.
Also, notice the tailwind.config.js in the root of the folder. This file is where you will add or update configuration options for your Tailwind build.
Finally, take a look at the contents inside of your public/tailwind.css, this is the CSS that will get compiled:
@tailwind base;
@tailwind components;
@tailwind utilities;
Three parts of TailwindCSS get pulled in, the base, components, and the utilities. The base class normalizes base elements in our page, the components allow us to create custom components, and of course, the utilities is where all our utility class magic lives.
Learning More
The Tailwind Documentation is easy to read and written very well. It seems like that for most Open Source projects to succeed, the documentation must be top-notch. And top-notch documentation is what you can expect with Tailwind.
In addition to the documentation, you can also watch some very engaging screencasts crafted by the creator of Tailwind.
After learning more about Tailwind, I'm sure that you'll quickly fall in love with this amazing CSS library.